In this tutorial, we are going to learn about Rank Math General Settings. The General Settings contain the settings that affect the overall SEO efforts of your website, and your links, images, and many other things are affected by the Rank Math General Settings.
That is why it is important to understand what the General Settings are, what they do, and how to configure them for the best results.
Let us begin.
Rank Math General Settings
You can reach Rank Math’s General settings through the WordPress menu. Hover over the Rank Math’s menu entry, and from the options that appear, select the General Settings.
Once you’re there, you’ll notice that the General Settings are divided into many other settings or sections. This is to help find the exact setting you’re looking for, faster.
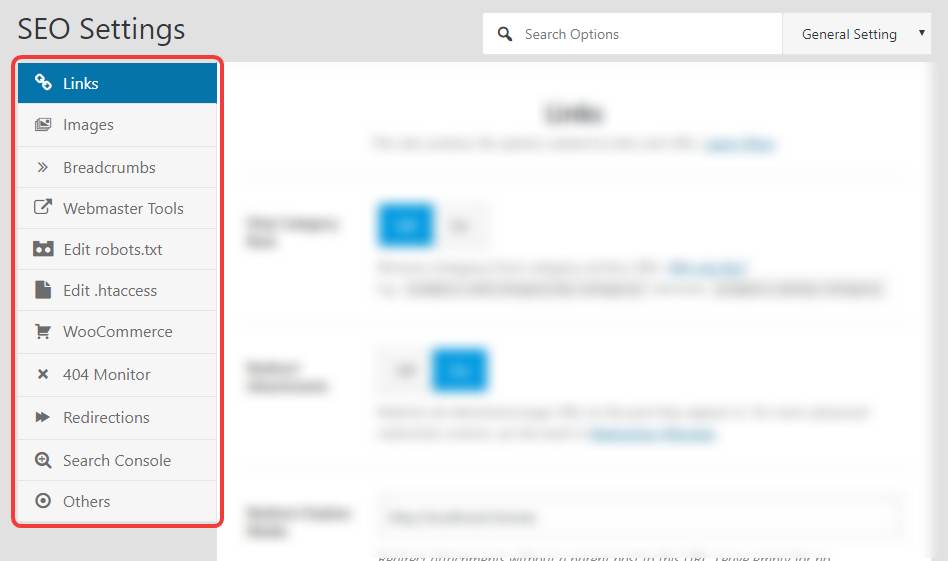
To find settings, you can use the sections on the left, and we’ve also included a handy search bar, which is even faster if you know what you’re looking for. Here is how it works.
Anyways, you should use the method you prefer. Here are all the settings in the General Settings of Rank Math.
You can click any of the links to be taken to that section of the settings easily.
Let us get started with the Links Section.
Links
As you probably have guessed by now, the links section has all the settings that modify the behaviour of links on your website. Here are all the settings you’d find in the Links Tab.

Let us understand each of the settings.
Strip Category Base
By default, the URLs of your post can contain the post name (if you configure it so), and the post category as well. For example, a post called best SEO plugin in the SEO category could be named as:
https://yourwebsite.com/SEO/best-seo-pluginIf you enable this option, Rank Math will strip the “category” part of the URL and make the URL shorter. So, the URL will become:
https://yourwebsite.com/best-seo-pluginThis option only affects aesthetics, and there is no research or evidence to show that removing the category from the URL helps your SEO in any way. However, it does make the URL shorter and more appealing. The choice is yours, if you like shorter URLs, then enable this option.

Redirect Attachments
Enabling this setting redirects URLs of your attachments to the post that are used in. For example, let us take a post with the URL yourwebsite.com/post-with-image. Let us assume that the post has an image with the name image-in-post.jpg.
Now, the direct URL of the image would be similar to yourwebsite.com/uploads/image-in-post.jpg.
If you enable this option, then if anyone (even search engines) try to access the image with the URL.
yourwebsite.com/uploads/image-in-post.jpg,
they will be redirected to the post with the URL yourwebsite.com/post-with-image.
Doing this might seem insignificant, but it has plenty of SEO benefits, including distributing the SEO value of the links that your images and other attachments build over time. For those reasons, we recommend that you enable this setting.

Redirect Orphan Media
Images and attachments that are not associated with any post on your website are called orphan media. In the section above, you chose whether you want to redirect attachment URLs to the post that contained them, but what about the attachments that do not have any posts attached to them?
That is where this setting comes in. Here you can enter the URL where you’d like the URLs of Orphan Media to be redirected to. The preferred setting is your homepage URL.

Remove Stopwords from Permalinks (deprecated)
This option removes stop words (a, and, the, or, he, him, etc.) from your WordPress URLs resulting in a cleaner, keyword rich URLs which are better looking and perform better too. We highly recommend that you enable this setting.
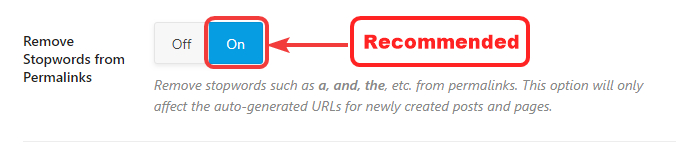
An important thing to note about this feature is that it only affects URLs auto-generated by WordPress. If you over-ride the WordPress URL and create one of your own, then stop words from those URLs will not be affected.
Also, this option will only affect URLs for new posts, and posts with existing URLs will also not be affected by this.
When you enable this option, a new setting should pop up below it like this.
Stopwords List (deprecated)
To offer you the most control over stop words, Rank Math lets you configure which stop words it should remove from the URLs. To configure this, simply paste the list of stop words that you’d like removed inside the text area, similar to what we’ve shown below. Here is a link to a comprehensive list of stop words in the English language for reference.

NoFollow External Links
This option automatically no-follows external URLs on all your posts, preserving the SEO of your website. We recommend that you enable this setting only if all external links on your website are affiliate links or sponsored links. You can also take advantage of the exclusion and inclusion lists to selective nofollow of follow certain domains.

NoFollow Image File Links
This option works similar to the NoFollow External Links option above, but this option nofollows any external links to images. We recommend that you enable this setting.

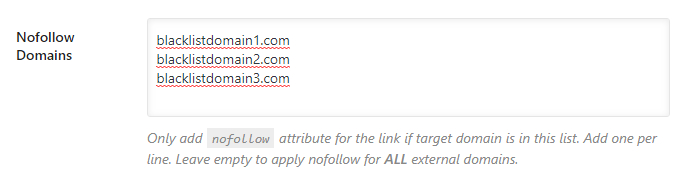
NoFollow Domains
This setting works in conjunction with the NoFollow External Links option listed above and acts like a blacklist for domains. Simply put, links from your website to any domains that you enter in this section will always be nofollowed.
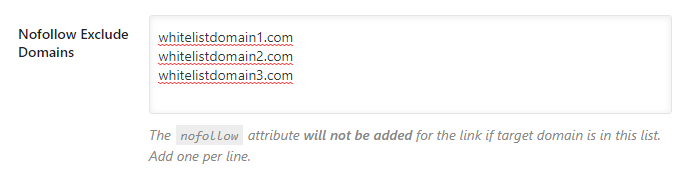
NoFollow Exclude Domains
This option also works in conjunction with the NoFollow External Links option, but it acts as a whitelist instead. What that means is that links from your website to any of the domains you enter in this section will be followed.
How NoFollow Whitelist and Black List Actually Work
Rank Math has 3 sections to manage the link properties of external links.
- NoFollow External Links
- NoFollow Domains
- NoFollow Exclude Domains
This has been done to give you the maximum amount of control over your links. However, it can be a little confusing to understand exactly how it works. Here is a breakdown of different scenarios which will help you understand how the 3 settings work together.
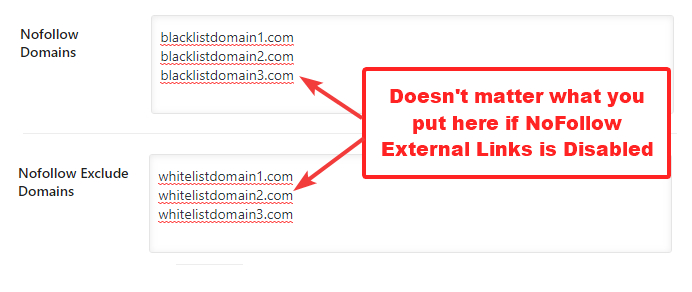
NoFollow External Links is Disabled
In this case, the NoFollow Domains and NoFollow Exclude Domains sections can be ignored, as they will have no effect, even if you add domains to either of the sections.
NoFollow External Links is Enabled
In this case, there are again 2 possibilities.
- NoFollow Domains is Blank: In this case, all external links will be no-followed, except for the domains that are included in the NoFollow Exclude Domains section.
- NoFollow Domains has domains listed: In this case, only the links to the domains listed in the NoFollow Domains will be no-followed, rest of the links will be followed. In this case, the NoFollow Exclude Domains holds no weight.
To explain simply, if you disable the NoFollow External Links setting, then links will keep working for you as normal. By default, all links would be created followed, and you would have to manually no-follow them.
However, if you enable the NoFollow External Links section, then all external links will be no-followed. You can then use the NoFollow Domains (Blacklist) or the NoFollow Exclude Domains (Whitelist) to narrow the domains you want to no-follow. Note that you can either use the blacklist or the whitelist to manage external links, but you cannot use them at the same time.
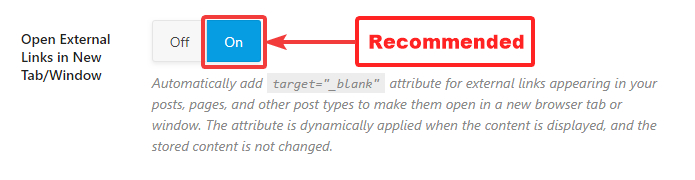
Open External Links in New Tab
This option applies the target = "_blank” attribute to external links which opens them in new tabs or windows. We recommend that you enable this setting.
This concludes the Links Section of the General Settings in Rank Math. Let us move on to the next section on the list, the Images section.
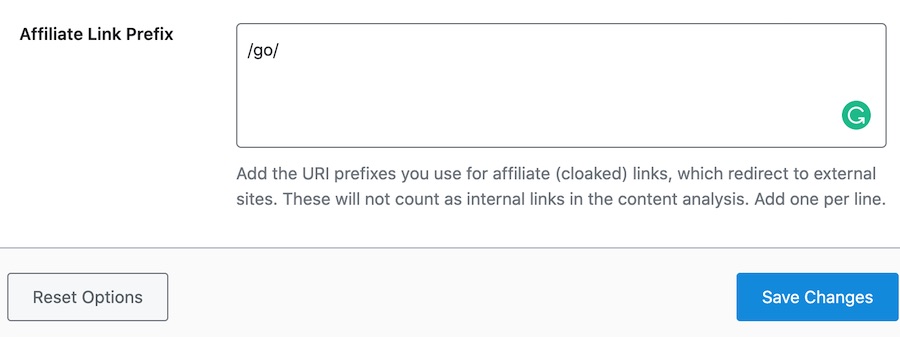
Affiliate Link Prefix (Pro)
Sometimes, affiliates need to differentiate cloaked links from regular internal links. Traditionally, all links with your domain as prefix are counted as internal links. This causes problems when you wish to nofollow all external links but automation tools skip cloaked links thinking they are internal links.
With this link prefix option, you can choose the URL base for your cloaked links so Rank Math can automatically count them as outgoing links and apply nofollow/open-in-new-tab to them if the option is enabled via Rank Math.
If you are using domain.com/go/ as the base for cloaked URLs, then enter /go/ like in this screenshot:
- How To Setup Rank Math Redirections In 4 Easy Steps
- How To Setup Rank Math SEO Plugin On Your Website [4 Easy Steps]
- Rank Math FAQ [21 Solid Frequently Asked Questions And Answers By Rank Math]
- Rank Math Import And Export Settings In 5 Easy Steps
Images
When you open the images section, you will notice that there are only 2 settings in it.
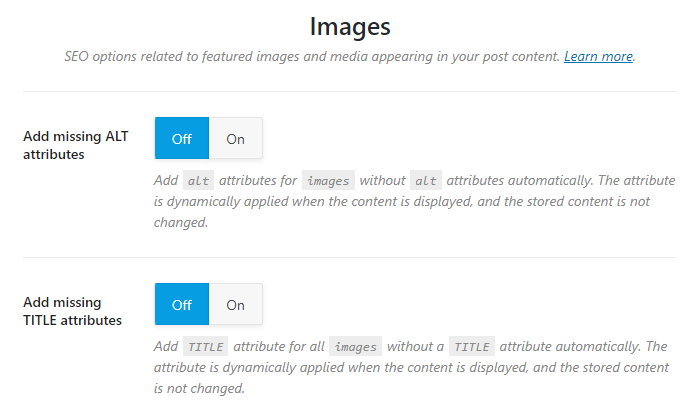
But, if you enable any of the options, another setting will open up below it.
Let us explore each of the settings.
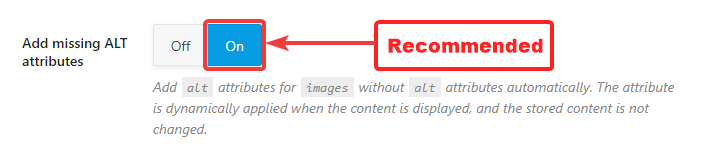
Add Missing Alt Attributes
Enabling this setting will add Alt Attributes to all the images that do not have their alt text set. Since the alt text is valuable to search engines in understanding your images, we recommend that you enable this setting.
Alt Attribute Format
If you’ve enabled the Add missing Alt Attribute option, the next question is, how does Rank Math know what an image is about? Actually, Rank Math does not know, and it relies on you to help answer the question with the Alt Attribute Format.
The Alt Attribute Format helps you create a pre-defined format which will be used to create alt text for images. Instead of relying on generic names, Rank Math lets you use from the many supported variables to create a useful format.
Selecting a variable will update the live preview below it, which will help you understand how the final alt text will be.
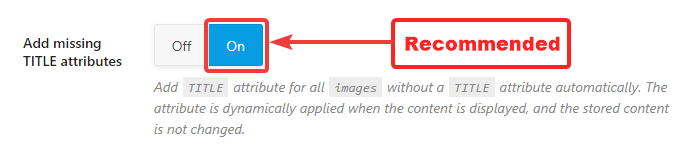
Add Missing Title Attributes
This option automatically adds the Title attributes to the images without a title. A title also helps search engines understand your images better, and we recommend that you enable this setting.
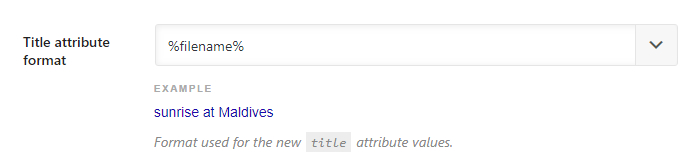
Title Attribute Format
The Title Attribute Format option works similar to the Alt Attribute format, the only difference being that it helps define a format to create the image’s title. Use the variables and live preview to create a format.
This covers all the settings in the Image tab, let’s move on to the Breadcrumbs Tab.
BreadCrumbs
Breadcrumbs are navigational elements which the user understand where they are on a certain website, and also help them navigate the website in an easy to understand manner.
In simple terms, they can be compared to “You’re here” signs in large parks, as they both achieve similar things.
Here is an example of how breadcrumbs appear on a website.

Yes, these are breadcrumbs from the article you’re reading right now.
The Breadcrumbs setting in Rank Math lets you configure Breadcrumbs. When you open the settings up, you only see one setting.
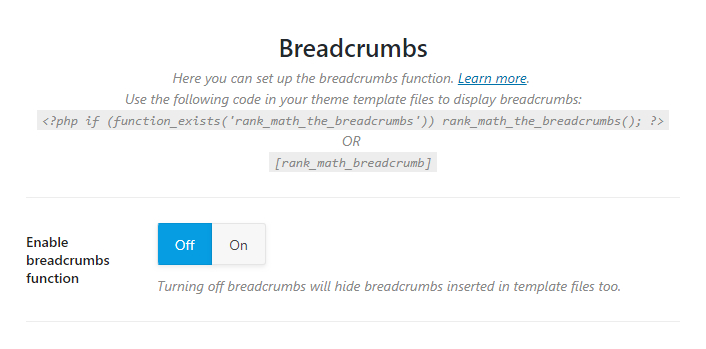
That’s because Breadcrumbs are turned off, and there is no need to show any of the other settings. Once you enabled breadcrumbs, all the other settings will appear on the screen.
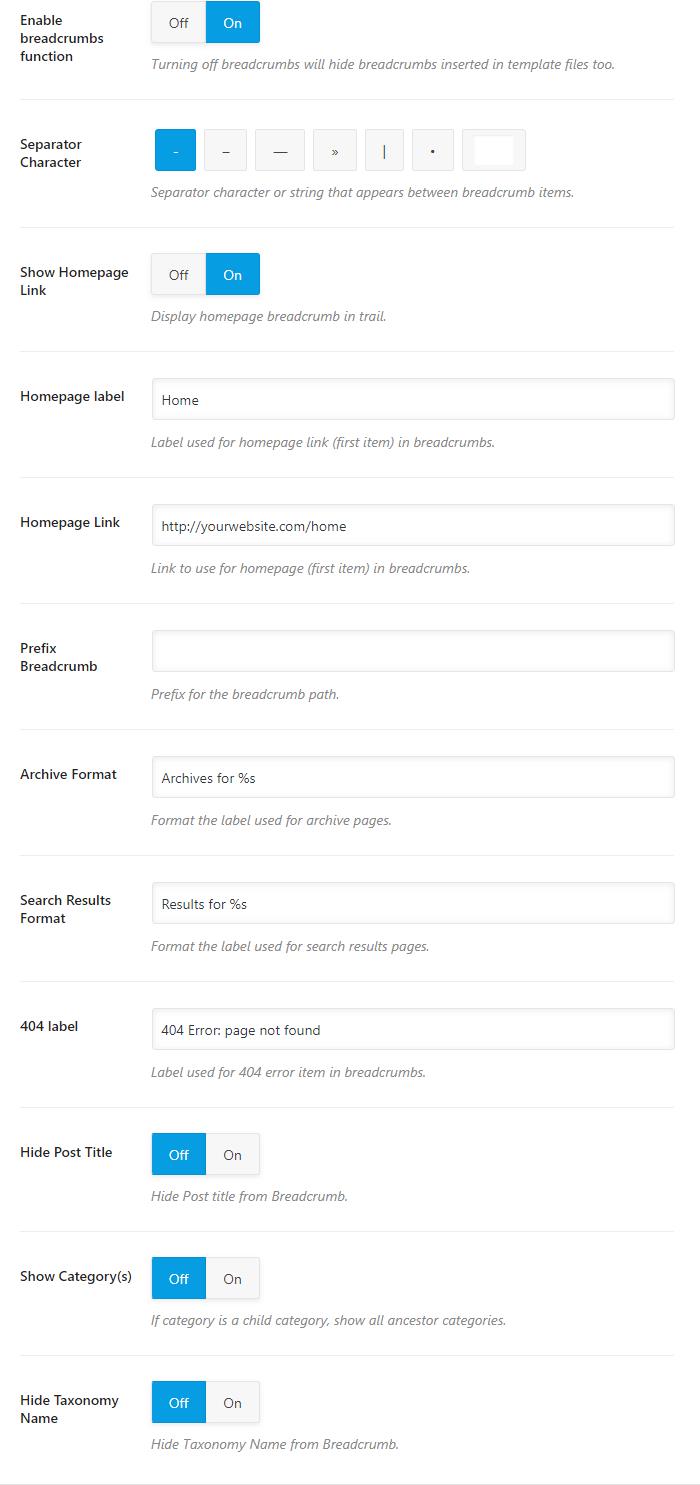
Let us understand each of the options one by one.
Enable Breadcrumbs Function
This setting enables breadcrumbs on your website. Breadcrumbs help users navigate your website and also helps search engines index your content efficiently. We recommend that you enable this setting.

Separator Character
This option helps you set a Separator Character for your breadcrumbs. There are many options available, so choose the one you prefer. You can also set a custom separator character by typing it in the last field.

You might have missed it, but guess which separator character are we using?

Show Homepage Link
If you want your homepage to be included in the breadcrumbs, enable this option. This is more of personal preference, but we’ve seen most websites do include the homepage in their breadcrumbs.

If you enable the Homepage Link, 2 new settings will pop up under it.
Homepage Label
Here you can configure what label to give the homepage of your website. All you have to do is type in the label that you want to assign your homepage.

For example, we have included the homepage link in our breadcrumbs, and the label we’ve assigned is home.

Homepage Link
This option lets you configure where will the homepage link take the visitor. This is particularly useful when you have many sections of your website like a blog, a store, or others. Using this option, you can configure the breadcrumb to take your visitor anywhere you prefer.

Prefix Breadcrumbs
If you’d like to add a prefix before your breadcrumbs, you can use this option to do so. Popular options would be to add “You are here”, “Navigation”, “Index”, etc.

Archive Format
This option lets you set a breadcrumb format for the archive pages. You can customize it completely, but we recommend that you don’t remove the “%s” from it, as it represents the taxonomy.

Search Result Format
This option lets you set a breadcrumb format for search result pages. Popular options are, “You searched for”, “Here is what I found for”, etc. We would recommend that you don’t remove the “%s” from the field.

404 Label
This option lets you set a breadcrumb format for your 404 pages.

Hide Post Title
Enabling this option lets you hide the title of the post from the breadcrumb.

For example, here is the breadcrumb of our post with the title.

If you enable this setting, the breadcrumb will change to:

Show Category
This option enables ancestor categories in the breadcrumbs. What that does is that if your current post is part of a child category, then the breadcrumb will include the parent categories as well. We recommend that you keep this disabled to keep your breadcrumbs small and precise.

Hide Taxonomy Name
If you use any other taxonomy other than categories, then you can use this option to enable or disable the inclusion of the taxonomy in the breadcrumb. Our recommended setting is “Off”.

This covers all the settings in the Breadcrumbs tab. Let us move on to the next tab, the Webmaster Tools.
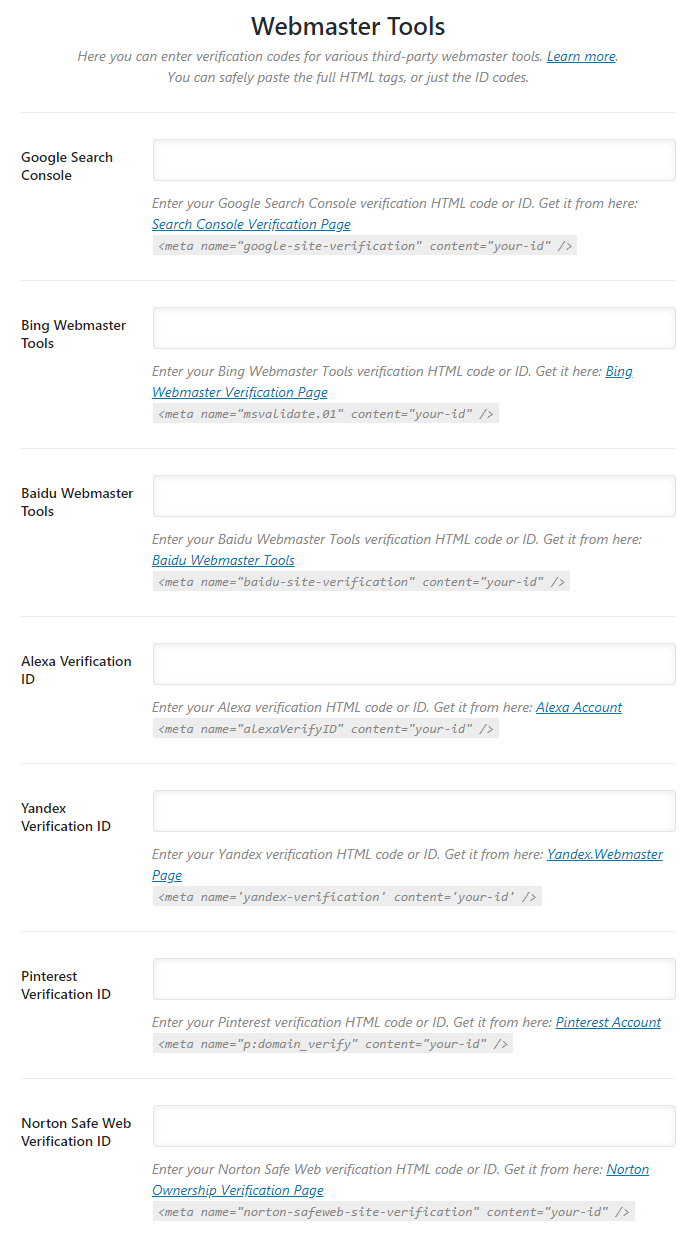
Webmaster Tools
The Webmaster tools is the section where you can take the necessary steps to verify your website with various webmaster tools. There are many tools supported, and here is an image that shows all the supported webmaster tools.
Before getting into the verification process, let us understand how the verification process works.
How Does Webmaster Verification Work
Almost all webmaster tools have similar verification processes. The specifics might be different, but the overall principle is the same. Here are the steps that usually take place.
- You tell a search engine (or another service) about a “property” and claim to own it
- The webmaster tools generate a piece of code that you need to place on your website
- You place the code on your website, proving that you have access to the site and your ownership
- Your property is verified and stays verified till the code is present
The reason why we specify the process is because we won’t be discussing the specifics of getting your website verified with all the webmaster tools. Rather, we will demonstrate the process on one of the webmaster tools, and you can learn the process there. Actually, you don’t even have to verify your website with all the webmaster tools, only for the ones that you want to.
Here are all the currently supported Webmaster Tools.
- Google Search Console
- Bing Webmaster Tools
- Baidu Webmaster Tools
- Alexa Verification ID
- Yandex Verification ID
- Pinterest Verification ID
- Norton Safe Web Verification ID
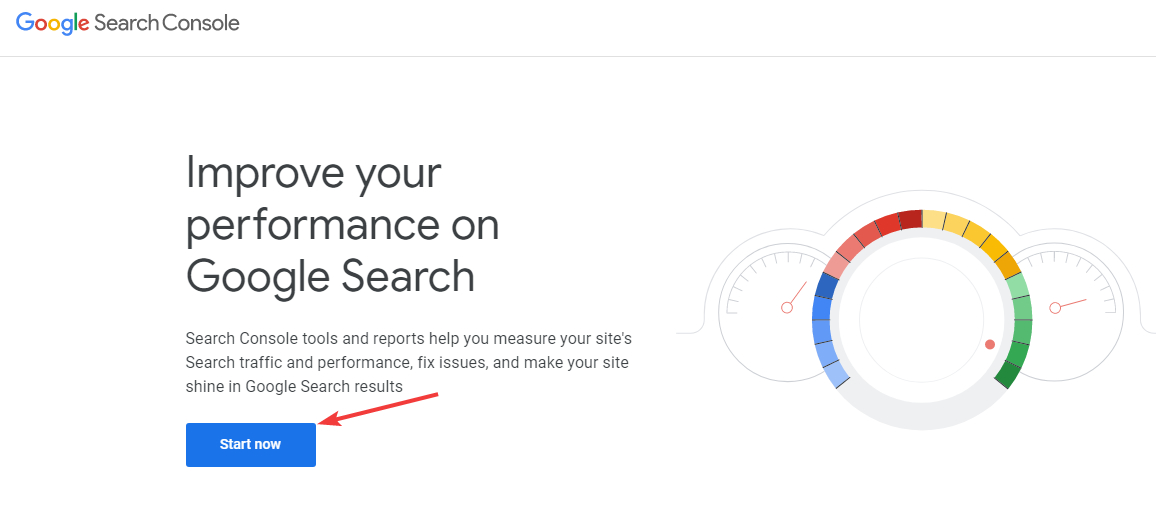
Let us demonstrate how to verify your website for Google Search Console (formerly known as Google Webmaster Tools).
Start by going to the Google Search Console Website, and click the “Start Now” button.
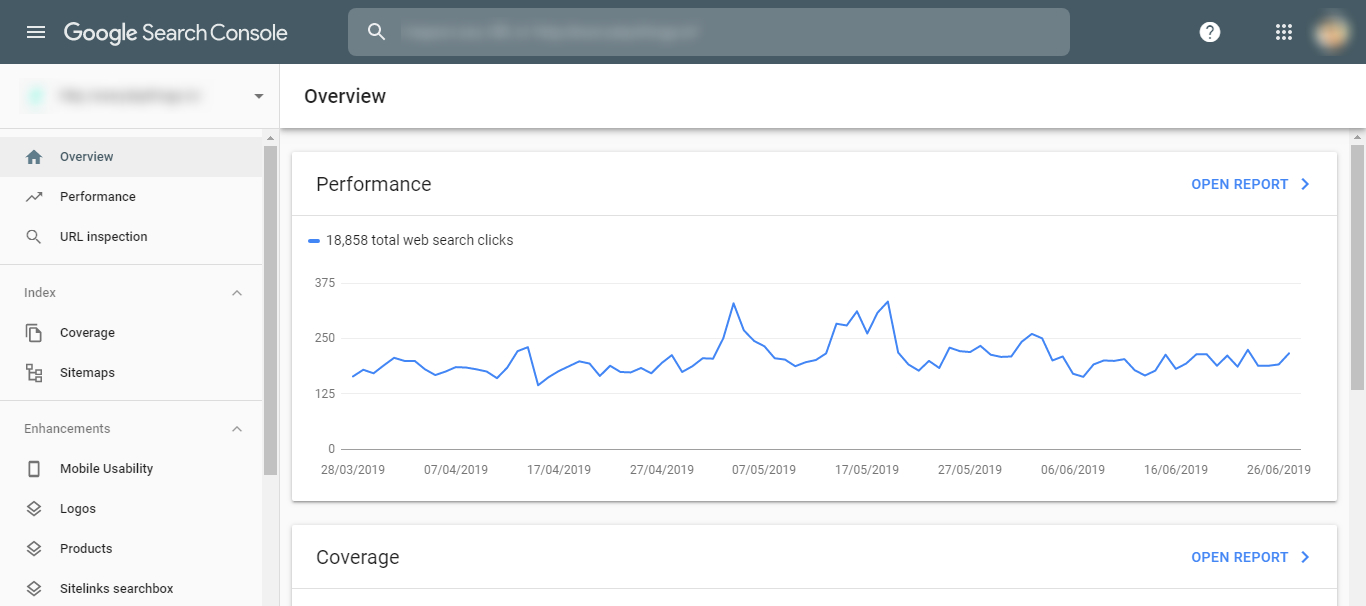
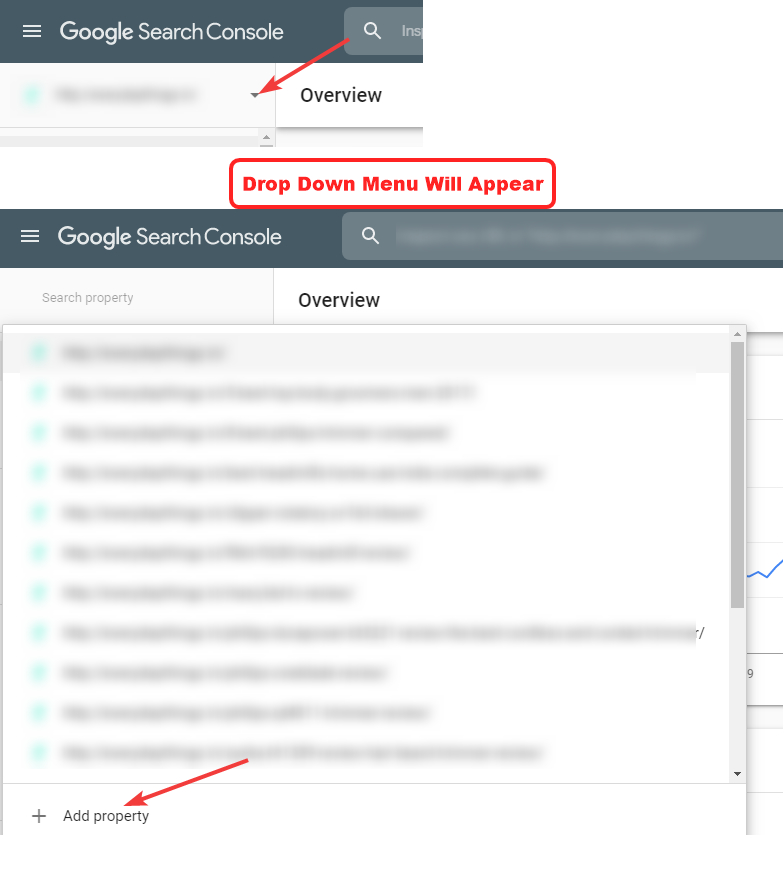
You’ll need to log in with a Google Account. Once you’re in, you should see a screen similar to this. Note that your Search Console will look different if you don’t have any websites connected.
To add a new property, click the Property Selection dropdown, and select the new property option. Again, if you don’t have any properties added, your view will be a little different.
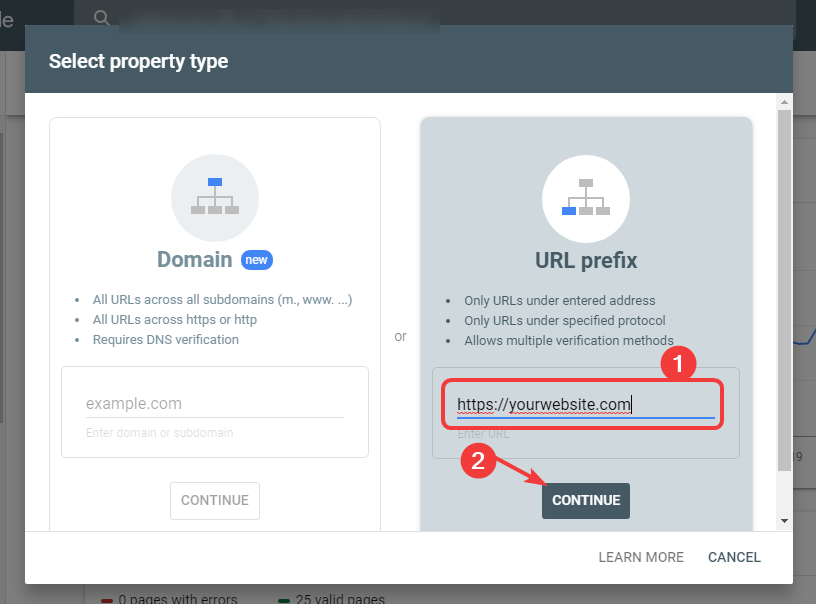
Google Search Console offers 2 types of properties. A domain property, and a URL property. For simplicity, we will demonstrate the process using the URL property. Enter your website’s URL in the URL prefix field, and click “Continue”.
You should see a screen similar to the below. Here Google is showing you all the ways you can verify your website ownership and also recommending their preferred method. Click the highlighted drop-down indicator to see all the available methods.
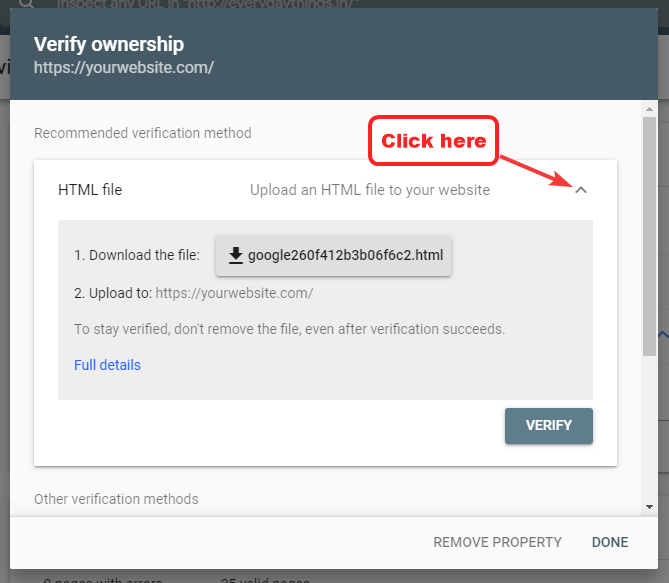
Here are all the methods that you should see. Since Rank Math already does the heavy lifting for you, you don’t have to choose a complicated verification method. Instead, we will use the HTML Tag method. Click the dropdown next to the HTML Tag option to see its details.

The settings will expand, and you will see the verification meta tag. Copy it, and click “done”.
In the Webmaster Tool settings, paste the Meta Code in the Google Search Console Field.
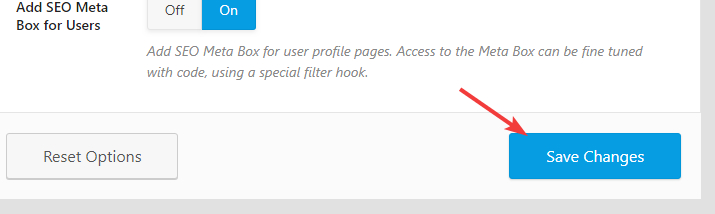
For the code to be applied, you’ll need to update your settings by saving your changes. Head over to the bottom of the page, and click “Save Changes”.
The page will refresh, and you should see a confirmation message on top. Your website will now be verified in Google Search Console.
As we mentioned, the process for verifying with other tools is quite similar, and here are some resources that should help you in verifying your website with other webmaster tools. Remember, you don’t have to follow all the steps from these resources. Once you’ve generated a meta-tag, all you have to do is paste it in the appropriate field.
Use these resources for reference.
- Verify Your Website With Bing Webmaster Tools
- Verify Your Website With Baidu Webmaster Tools
- Verify Your Website for Alexa
- Verify Website for Yandex Webmaster Tools
- Claim Your Website for Pinterest
- Submit a Website to Norton Safe Web
That covers the Webmaster Section Completely. Let us move onto the next section.
Edit Robots.txt
Once you open the Edit robots.txt tab, you’ll see that it has only one setting.
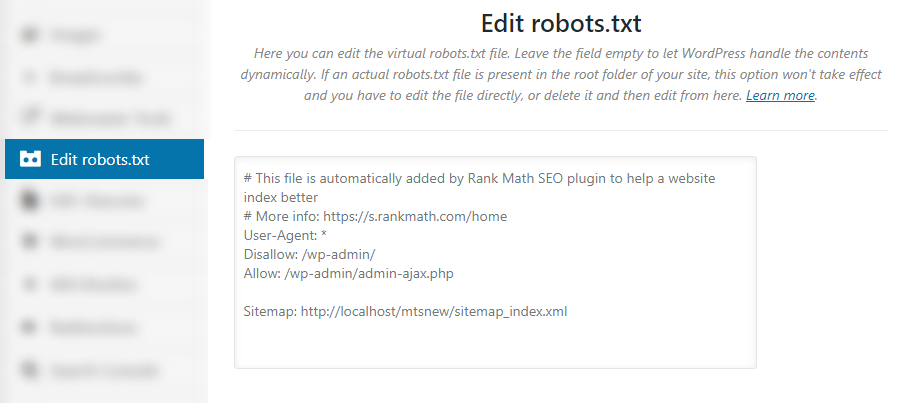
In the text area, you can configure your virtual robots.txt file.
If you don’t know, robots.txt is a text file present in the root of your website which helps search engines understand which parts of your website you want them to crawl and index. For example, you wouldn’t want Google to index your website’s admin area, right? You can set this up in the robots.txt file.
We mentioned that you could edit your virtual robots.txt file here. We say virtual because here you are not editing your actual robots.txt file, but a virtual one.
Rank Math already configures some default settings that should be useful. But, any changes you make here will not have an effect on your website if the actual robots.txt file already exists. If it does exist, you would have to edit the file using FTP or any other method, or delete the file completely, and make all the changes through Rank Math.
Edit .htaccess
The .htaccess file is a configuration file that helps in users and search engines navigate your website. Often, changes or updates are needed to be made to the .htaccess file, for which you can use this section.
Inside the section, you will see that there is a single text area which can be used to edit the .htaccess file. The important thing to note is the warning above the text area.
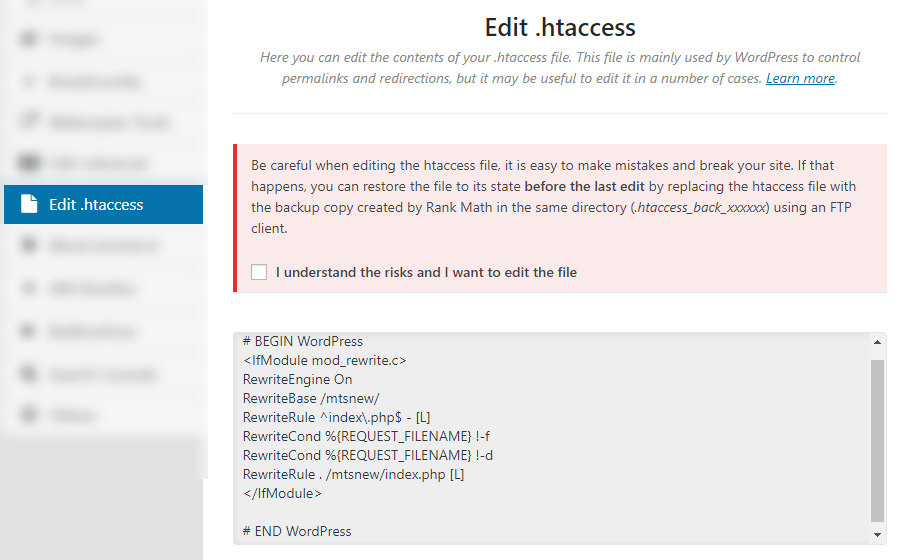
The notice warns you that changing the .htacess file can break your website. Even if you are technically capable, mistakes can happen. To prevent issues, Rank Math automatically backs up your .htacess before you modify it.
So, if you accidentally make any changes that mess up your site, you can roll the changes back using the backup. But remember, the backup will only contain the last save. That means if you make multiple changes that cause problems, then the backup will not help you. Proceed with caution.
If you understand the risks and want to edit the .htacess file, then click the checkbox below the text. The text area below will become active, and you can then change your .htacess file.
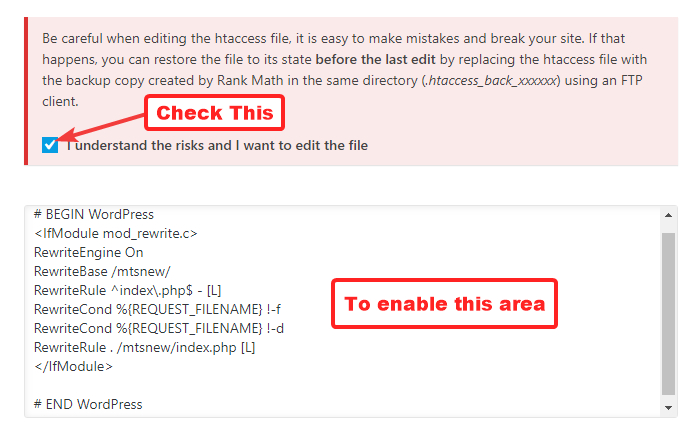
This concludes the .htaccess section. Let us move on to the next section.
WooCommerce
This section deals with all the options related to WooCommerce. Needless to say, this section will only be relevant to you if you actually use WooCommerce and sell products online. In fact, if you don’t have WooCommerce installed, then this section won’t even be visible to you in the settings.
With that out of the way, here are all the settings in the WooCommerce Section.
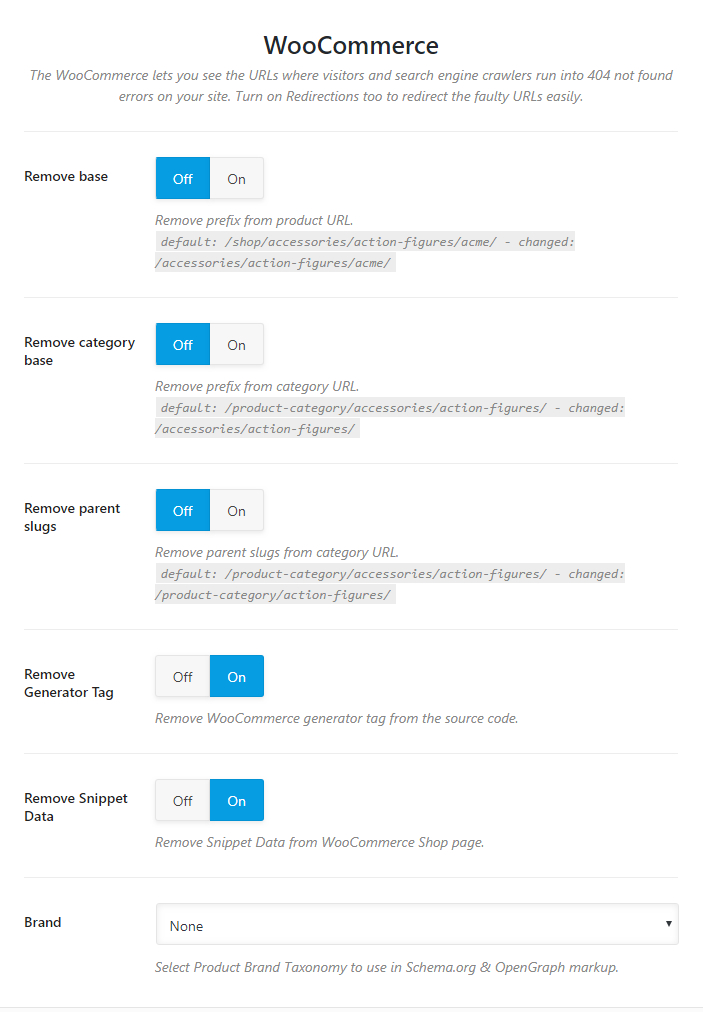
Let us discuss each of sections one by one.
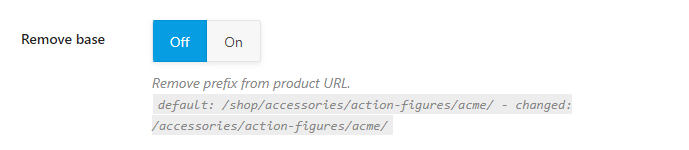
Remove Base
WordPress URLs have a “shop” base added to them when WooCommerce is enabled. So, every product URL follows this format.
https://yourwebsite.com/shop/product-1/
Notice the ‘/shop/’ part in the URL? That’s what we’re talking about.
Enabling the Remove Base option lets you remove the /shop/ from the URL, so the resulting URL can become.
https://yourwebsite.com/product-1/
This is personal preference, and you can enable or disable it.
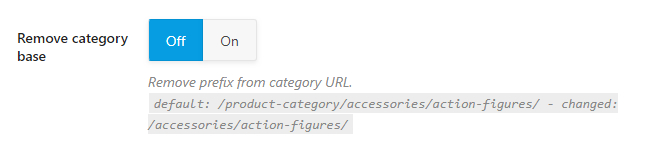
Remove Category Base
If you have a large base of products and use multiple categories to manage them, then your WooCommerce URLs will also contain the product category. An example URL would be:
https://yourwebsite.com/shop/product-category/product-1/
This option lets you remove the “product-category” section from the URL, so the resulting URL becomes.
https://yourwebsite.com/shop/product-1/
This option is also a preference thing, and you should make a decision to enable it or disable it accordingly.
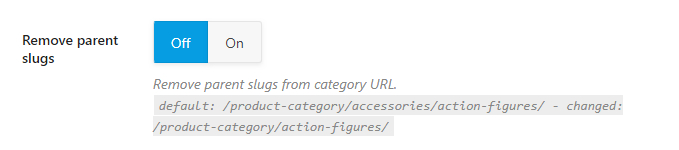
Remove Parent Slugs
Categories in WordPress are hierarchical, that means a category can have a parent category. If you have products that have a parent category, then WooCommerce’s default behavior is to list the product with the parent category in the URL. An example URL would be:
https://yourwebsite.com/parent-category/sub-category/product/
Using this option, you can remove the parent category slug from the URL, resulting in a cleaner and shorter URL. Like the other settings, how you set it up is a personal preference.
Remove Generator Tag
When you’re using WooCommerce, it includes plenty of meta information in the source code. While it can be useful for diagnostic purposes, it also presents a security risk. Here is how the Meta Generator tag appears in the source code.
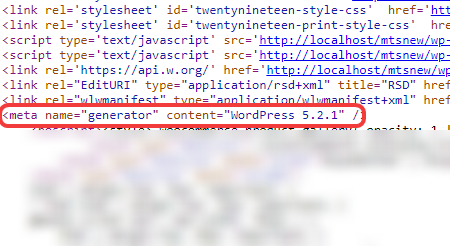
When you enable this option, Rank Math disables the output of this meta information in your website’s source. Since this essentially is a security feature, we recommend that you enable this option.

Remove Snippet Data
This option works similar to the option discussed above, and it removes the Snippet data from the WooCommerce data as a security measure. We recommend that you enable this feature as well.

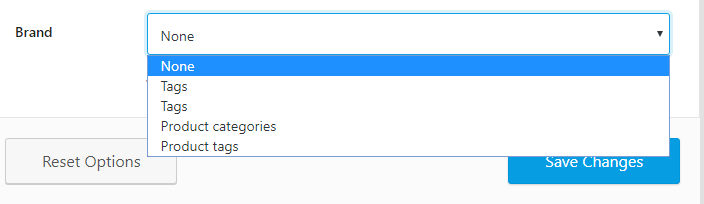
Brand
Rank Math adds a lot of rich snippet data to your website and your product pages. One of the key components of that rich data is the Brand of products you’re selling. In this setting, you select the taxonomy that you’ve used to configure brand listings on your website so that Rank Math can set it up accordingly. Use the drop-down menu and choose the appropriate taxonomy from the available options.
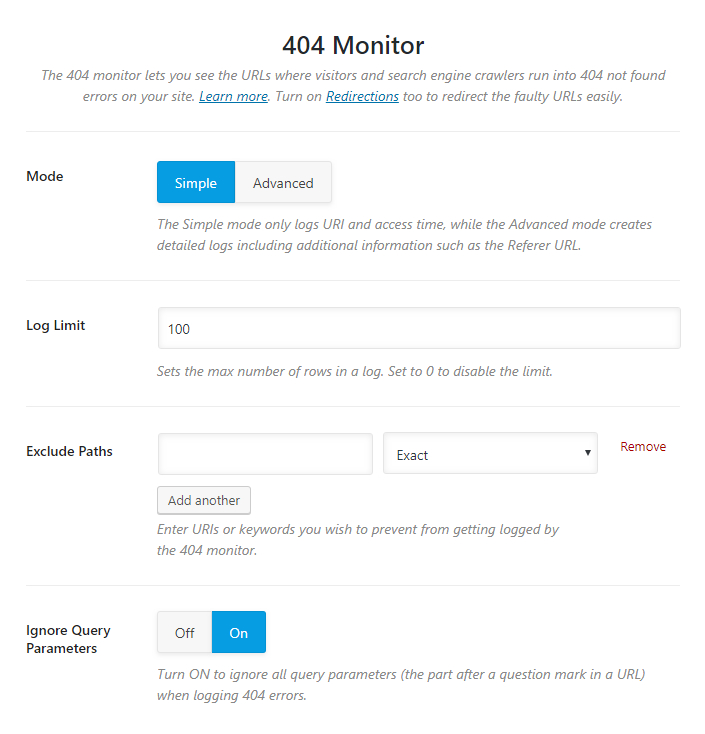
404 Monitor
A 404 error occurs when the user tries to access a URL that does not exist. During the regular working of a website, it is normal to update and remove content, and as a result, every website will have a few 404 errors. Having 404 errors is not necessarily bad, but the important thing is to find them and resolve them actively. Rank Math’s 404 monitor helps with exactly that. Here are all the options available in the 404 Monitor.
Let’s look at all the options one by one.
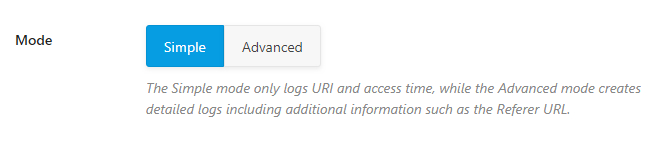
Mode
The 404 Monitor has 2 modes. Simple and Advanced. The Simple monitor records only the URL where the error occurred and the time of the error. The Advanced Monitor captures a lot of additional information such as the referring URL of the URL with the error.
The Advanced Mode is pretty powerful, but it does come at a cost. It does require additional resources to capture and store the detailed logs.
If you don’t have many 404 errors, then we would recommend that you use the Simple mode. However, if you’re constantly seeing 404 errors, then it might be useful to enable the Advanced Mode for some time to diagnose the source of the problem.
Log Limit
This setting controls the maximum number of rows that the monitor will generate. The default setting of 100 is good enough for most sites, and you can increase or decrease the number depending on your website. For example, for a large ecommerce website with thousands of products may have thousands of broken links at any time (due to new products being introduced and old ones being removed) and might need to remove the limit altogether. In another example, if you’ve just changed domains names, you might need to increase the log limit temporarily to make sure all your links perform as intended.

Exclude Paths
If you’re making some changes to your website, then the 404 monitor can fill the up the log with unimportant URLs while the real errors get buried. To avoid this from happening, you can set exclusions where the 404 monitor will not check for errors.
The exclusion tool is versatile and offers plenty of options to set up an exclusion path. You can enter exact URLs, categories, keywords, or even use RegEx to define an exclusion path. The image below shares all the options that are available to you. You can also stack multiple exceptions by creating more exclusion rules.

Ignore Query Parameters
This option controls whether the 404 monitor ignores the query parameters when logging the 404 errors. Whether you should enable or disable this setting will depend on your website. We recommend that you keep this disabled at first, then enable it if you see a lot of errors in the log file that have the same URL but different query parameters.

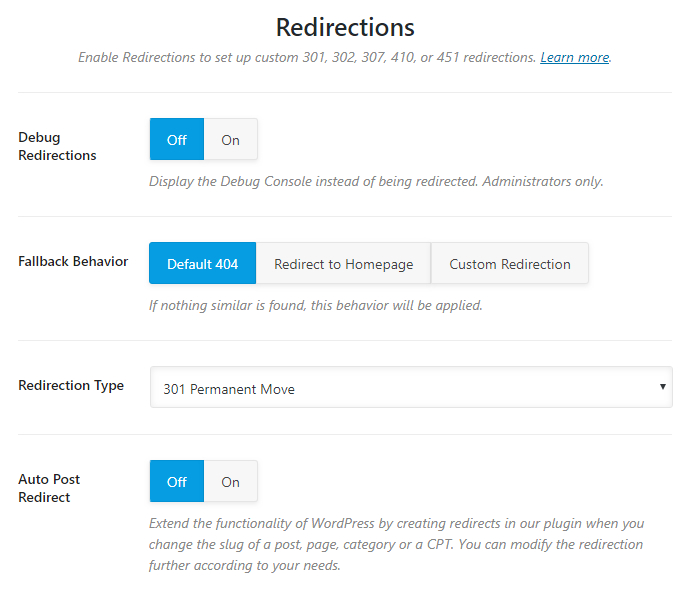
Redirections
Rank Math has a built-in redirection manager that helps you get rid of 404 and other errors. The redirection tab has a few settings that control how the redirections take place. Here is a preview of all the settings in this tab.
Let us understand what each of the settings does.
Debug Redirections
Redirects can be tricky business, especially when you’re Regex and other complex techniques to create redirects. The more complex the method, the more chances that something might go wrong. If you see redirects on your website that can’t place, then Debug Redirections is here to help.
The Debug Redirection feature places an interstitial window between the source URL and the destination URL. The window contains basic diagnostic information along with the rule that caused the redirection. This helps in finding out the rules that are triggering certain redirects.
And, the interstitial window is visible only to administrators, and your website visitors won’t know a thing about it.
We would recommend that you keep this feature disabled, and only enable it when you have to perform some diagnostics on redirects.

Fallback Behaviour
What happens when the destination URL in a redirect isn’t found? With the Fallback Behaviour setting, you can define it just the way you like. You can set it to a 404, redirect to the homepage, or redirect to a custom URL.
If you select the custom URL option, then another field opens up where you can enter the fallback URL.
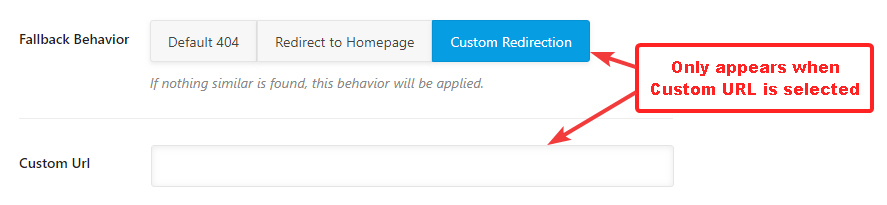
You can set this up any way you like; there is no single recommendation.
Custom URL
This field only appears when the Custom URL option is selected. Here you enter the custom fallback URL that your visitors will be taken to if the actual redirect URL is not found.
Redirection Type
Redirections can be of many types, and each type serves a specific purpose. The Redirection Type setting helps configure the default redirection type that Rank Math will use when creating a new redirection. You can also over-ride the redirection type when you’re actually creating a redirect. Here is a detailed article that explains the different redirect types and their uses.

Auto Post Redirect
If you change the URL of a post in WordPress, nothing happens—no redirects are created. As you can probably understand, that is not ideal. The Auto Post Redirect feature fixes that behavior by automatically creating a redirect from the old URL to the new URL whenever you change the URL (slug) of a post. We recommend that you enable this feature.

That covers all the sections in the Redirections Tab. Let us move on to the next tab, the Search Console Tab.
Search Console
The Search Console option is different from the Webmaster Tools that we’ve discussed above. The Webmaster options helped you verify the ownership of your website with different search engines, and the Search Console option connects with Google Search Console to fetch and display information inside your WordPress setup. Here are all the options in it.
Let us start discussing the various options.
Search Console
In the Search Console option, we will authorize Rank Math to fetch data from Google Search Console. A pre-requisite to this is that your website should already be verified in Search Console.
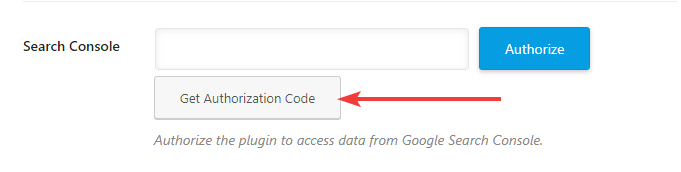
We already how to do that in the Webmaster Tools section. If your website isn’t verified, we recommend that you follow our instructions there before attempting to configure Search Console options. Once your website is verified, follow these steps.
Click the “Get Authorization Code” button.
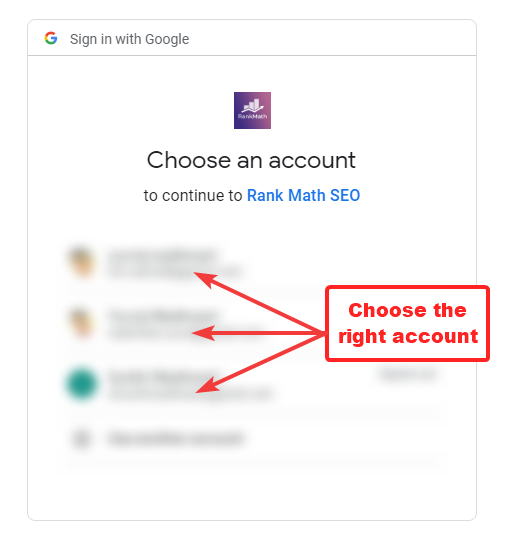
Google’s OAuth window will open. Click on the account you used to log into Search Console and verify your website.
You will see a confirmation screen. Click “Allow” to connect Rank Math with Google Search Console.
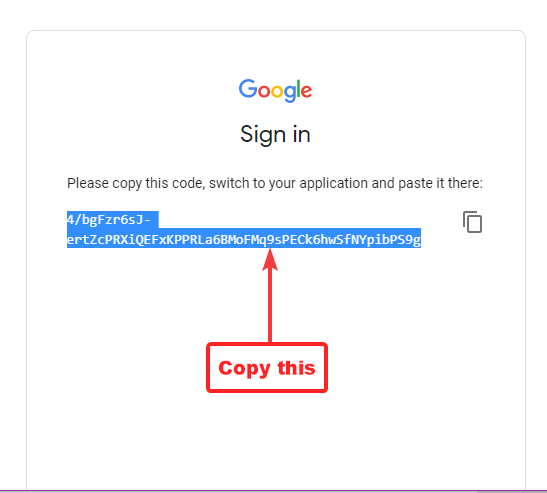
An authorization code will be generated. Copy the code to your clipboard and close the window.
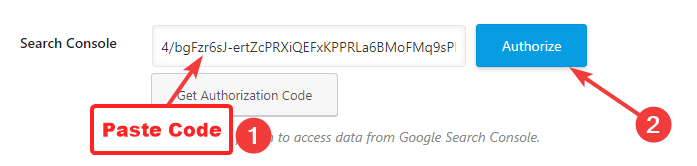
Paste the code in the Search Console setting and click “Authorize”.
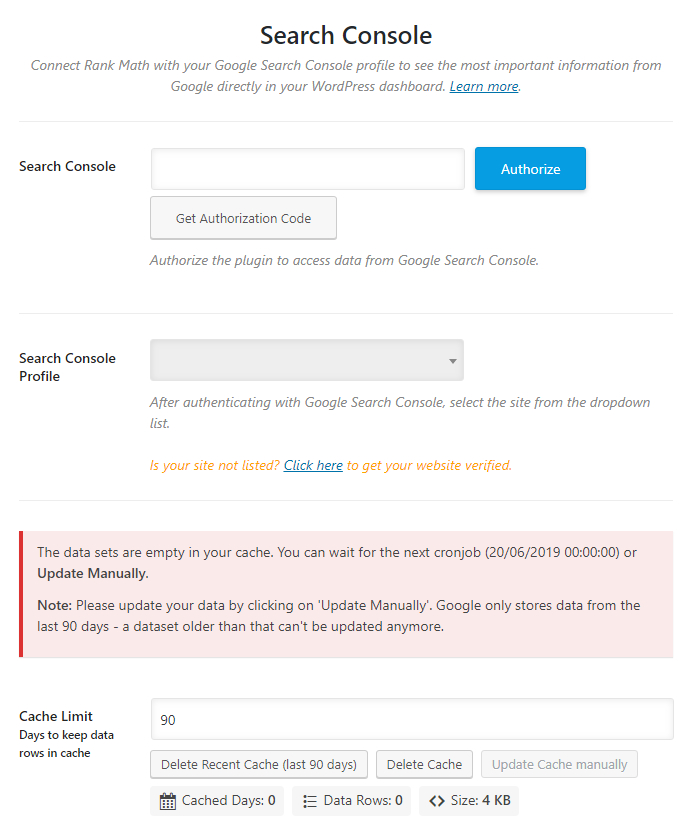
Rank Math will take a few seconds to verify the code, after which your screen should look like this.
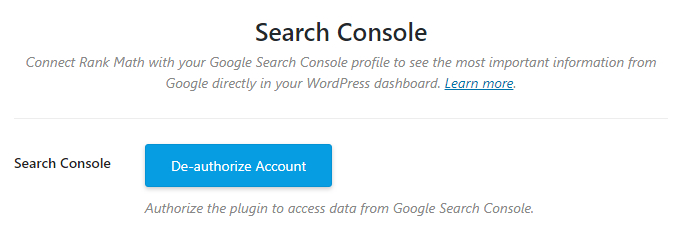
When you see this screen, that means Rank Math is now authorized to fetch information from your Search Console account. The next step is to select your property.
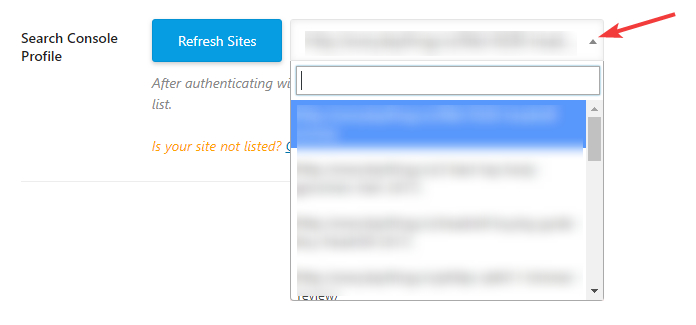
Search Console Profile
Search Console fetches data on “properties”. A property can be a complete domain, a website, and even a single URL. Here you will select the appropriate property that you want Rank Math to fetch information for. Click the drop-down button to see a list of all the properties.
If this is your first website, then you won’t see multiple entries, just the one. On the contrary, if you don’t see any websites or properties here, you might have missed the part where you need to verify your website with Google Search Console. Head over to the Webmaster Tools Section section and follow the instructions there to verify your website.
Once you select the right property, move to the next setting.
Cache Limit
The cache limit is where you set the number of days that the Search Console data will be stored for. Rank Math will automatically fetch data from Search Console at a defined interval, but you can also fetch the data manually.
When you connect your website, Rank Math has obviously fetched no data from the Search Console, hence it shows this warning message, which you can safely ignore.
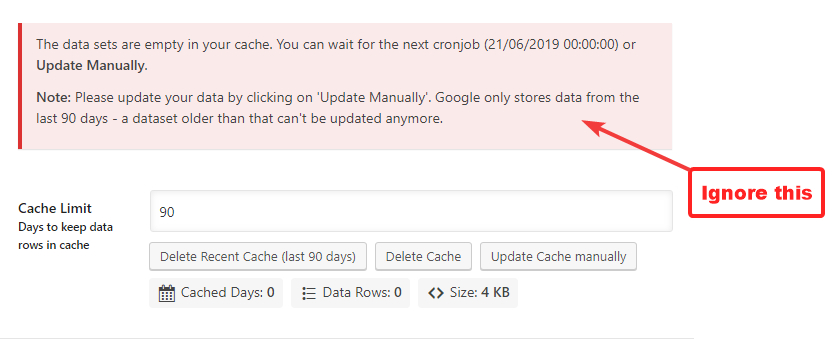
In the Cache Limit settings, you can configure the number of days for which you want the data to be visible inside WordPress. The default of 90 days is sufficient in most cases, but you can also change it.
After setting the cache limit, we would recommend that you manually fetch the data for the first time.
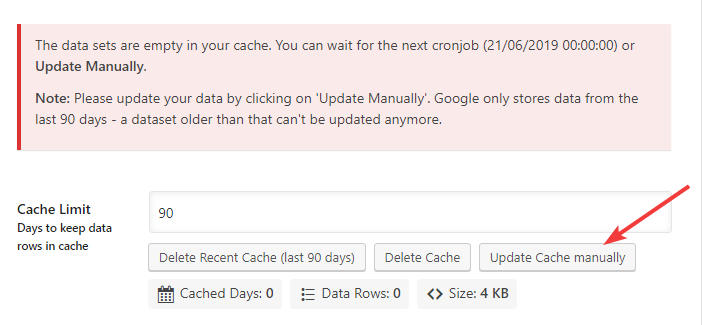
Rank Math will fetch the data, and you should see a progress bar at the bottom.
Once the fetch is complete, the meta-data should appear updated.
Others
The Others section is home for miscellaneous settings that could not be placed in any of the categories. Here are all the settings in the Other section.
Let us talk about each of the settings.
Usage Tracking
If you’d like to help us improve Rank Math, you can enable the Usage Tracking option. All the data we collect is completely anonymous, is never used for marketing purposes, or even shared with 3rd parties. You can read more about Privacy Policy here.
Enabling this is completely upto you, but we encourage you to do so.o
Show SEO Score
If you have a ton of posts on your website and you just started using Rank Math, then it can be difficult to open each post to check how well they are optimized. This option can come in handy in those situations. When you enable this setting, Rank Math will start displaying the SEO Score of each of the posts on the frontend, which will make it easy for you to identify the posts that need the most work.
This option is useful, but it isn’t mandatory for everyone. Only enable this if you have the need.

If you enable this setting, a bunch of new settings opens up below it.
SEO Score Post Types
This setting lets you select the types of posts that the SEO score will be displayed. Rank Math will detect and display all types of posts available on your website, including custom post types, and you can select one or more of them.

SEO Score Template
The SEO score can be displayed in 2 visual formats—Circular, or Square—and this setting lets you select your preferred method.

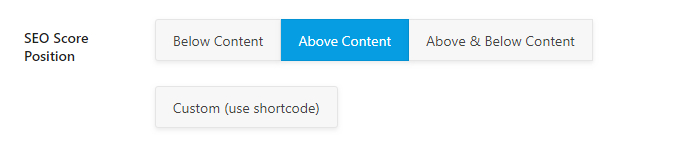
SEO Score Position
This option lets you pick the position of the SEO score. You can place it above the content, below the content, or both. You can also choose a custom location by using a shortcode.
The shortcode you need to use is . If you’re editing your template and making the changes there, you’ll need to use this code chunk.
Support Us with A Link
We’ve put in years of hard to bring Rank Math to you, and if you want to help us spread the word, we’ll be delighted. When you enable this option, Rank Math will include a hyperlink to the Rank Math from your website to your website. The link will be no-followed, and no SEO value will be passed from your website to Rank Math’s.
RSS Before Content
This option lets you add additional content at the beginning of your RSS feed. You can enter any content in the text field, and also use the variable listed below to customize the text here.

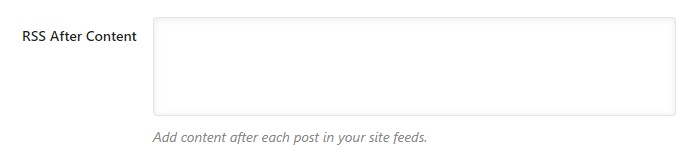
RSS After Content
This option lets you add content after your RSS feed. You can use the same variables as in the before content option.
Available Variables
This section isn’t configurable, and it just lists all the variables that you can use in the RSS Before and RSS After content options.
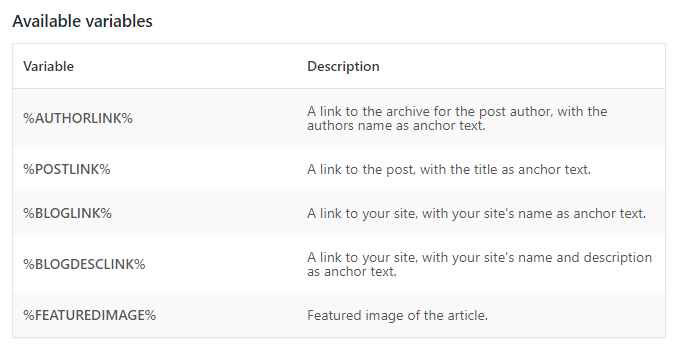
Here is a sample text you can create with variables and use with your RSS settings.
The post %POSTLINK% first appeared on %BLOGLINK% and is written by %AUTHORLINK%.
Saving Your Settings
Once you’ve made all the changes to the General Settings, it’s important that you save your settings. Rank Math does not save your settings automatically to avoid accidental changes, but the downside is that you have to save your settings manually.
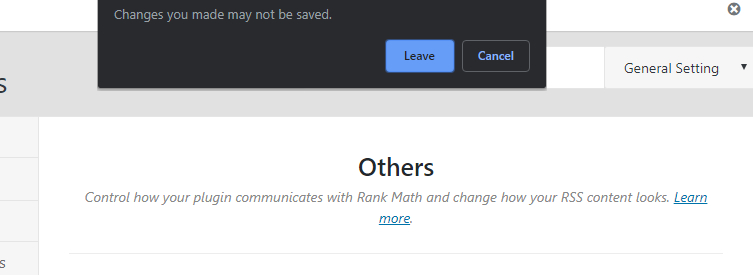
If you haven’t saved your changes and you accidentally navigate away from the General Settings, Rank Math will attempt to notify you of your unsaved changes.
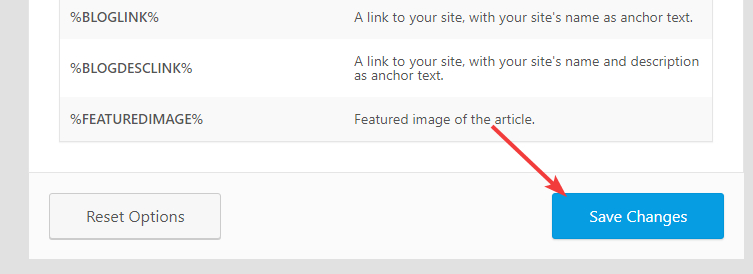
To save your settings, click the “Save Changes” button that is present in the bottom right of the screen.
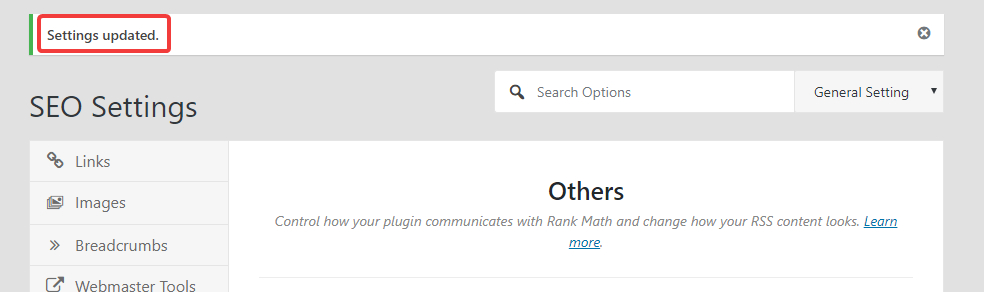
It might take a couple of seconds, but the page will refresh, and your settings will be saved. You will also see a confirmation message on the screen.
Resetting Your Settings
If there arises a need that you need to go back to the default settings, then you don’t need to remember the default settings—Rank Math has the capability built-in.
To “Reset” or go back to your default settings, just click the “Reset” button that is present at the bottom of any page.

Since this is a big step, Rank Math will ask for a confirmation before it resets your setting. Click “Ok” on the confirmation dialogue box that appears on the screen.
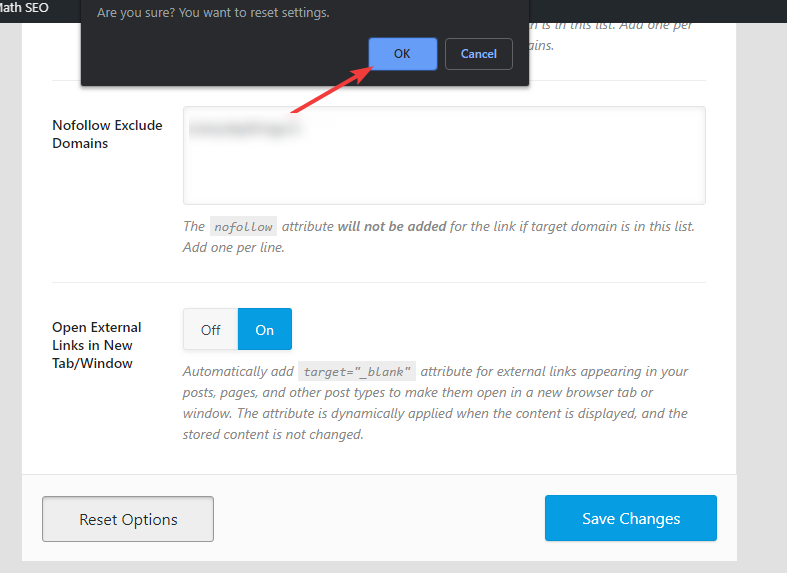
The page will refresh, and in a few seconds, your settings will be reset. There is no confirmation message on the screen, so take the page refresh as your cue.
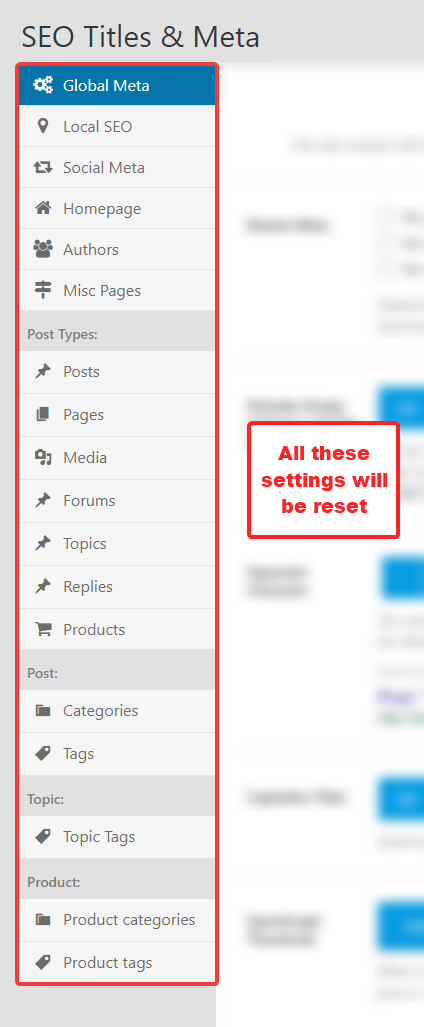
Important Thing To Understand About the Reset Process
When you reset your settings, it affects the entire section. To put that into context, if you reset your settings while you were navigating the General Settings, then all your general settings will be reset. Without a backup, all your custom settings will be lost. If you have the slightest of the doubts, make sure to take a backup by following the instructions in this article. You’ve been warned.
Conclusion
Finally, we’ve covered all the sections in the General Settings in Rank Math. There were a lot of settings, so we hope that you’ve understood them all. If you haven’t, go back to that section again. If you still have doubts or have issues while using Rank Math, feel free to open a support ticket and the support team will help you out in the best way they can.


![Blogger Gadgets: Add, Configure, Remove And Rearrange [3 Easy Steps]](https://lh3.googleusercontent.com/blogger_img_proxy/AEn0k_v9fGYnaPDylhNb-jAMwj4Ag7gN5I9-hwitIJV7deHhBnZPfzunl9seciAU8zgL7Y2AzgmCtUP1EjmS9XCdSgLv4Iq4tHg52_vLJzlf9x_0gDgfAjnTOUFkkmLoVDheXSIHi-pU4CAnJloUKEoJ2SI=w680)


22 Comments
Muchas gracias. ?Como puedo iniciar sesion?
ReplyDeleteHeya i'm for the first time here. I found this board and I find It really
ReplyDeleteuseful & it helped me out a lot. I hope to give something back and help others like you helped me.
asmr 0mniartist
Unquestionably believe that which you stated.
ReplyDeleteYour favorite justification appeared to be on the web the simplest thing to be aware of.
I say to you, I certainly get annoyed while people think about
worries that they just don't know about.
You managed to hit the nail upon the top and defined out the whole thing without having side-effects ,
people could take a signal. Will probably be back to get more.
Thanks 0mniartist asmr
When some one searches for his necessary thing, therefore he/she wants to be available that in detail, so that thing is maintained over here.
ReplyDelete0mniartist asmr
You ought to be a part of a contest for one of the best
ReplyDeletewebsites on the web. I'm going to highly recommend this site!
asmr 0mniartist
Hey! This post could not be written any better!
ReplyDeleteReading through this post reminds me of my previous room mate!
He always kept talking about this. I will forward this write-up to him.
Fairly certain he will have a good read.
Thank you for sharing! 0mniartist asmr
Wow, marvelous blog layout! How long have you been blogging for?
ReplyDeleteyou made blogging look easy. The overall look of
your site is fantastic, as well as the content! asmr 0mniartist
I'm impressed, I must say. Seldom do I come across a blog that's
ReplyDeleteboth equally educative and entertaining, and let me tell you, you have hit
the nail on the head. The issue is an issue that not enough people are speaking
intelligently about. I am very happy I found this during my search for something concerning this.
Thanks to my father who informed me about this weblog, this website is actually awesome.
ReplyDeleteLink exchange is nothing else however it is only placing the other person's
ReplyDeleteblog link on your page at suitable place and other person will also do same in favor
of you.
My family every time say that I am wasting my time here at web, except I
ReplyDeleteknow I am getting knowledge all the time by reading such fastidious articles.
This paragraph is in fact a nice one it helps new internet viewers, who are wishing
ReplyDeletefor blogging.
This web site certainly has all the info I needed about this
ReplyDeletesubject and didn't know who to ask.
Hello I am so delighted I found your webpage, I really found you by accident, while I was researching on Bing for something else,
ReplyDeleteAnyhow I am here now and would just like to say cheers for a fantastic post and a all round thrilling blog (I also
love the theme/design), I don’t have time to go through it
all at the minute but I have bookmarked it and also included your RSS feeds, so when I have time I will be back to read a
lot more, Please do keep up the great jo.
Hi my loved one! I want to say that this post is amazing,
ReplyDeletegreat written and include approximately all important infos.
I would like to look more posts like this .
Spot on with this write-up, I really believe this website needs a
ReplyDeletelot more attention. I'll probably be returning to read through more,
thanks for the advice!
I go to see each day some web pages and blogs
ReplyDeleteto read articles, except this webpage presents feature based content.
In fact when someone doesn't be aware of afterward its up to other users that they will help, so
ReplyDeletehere it occurs.
I think this is among the most vital information for me.
ReplyDeleteAnd i am glad reading your article. But should remark on few general things, The website style is
great, the articles is really excellent : D. Good job, cheers
Really informative blog article.Really thank you! Awesome.
ReplyDeleteFantastic post.Really looking forward to read more. Want more.
ReplyDeleteI used to be able to find good info from your blog articles.
ReplyDelete