In this knowledge base tutorial, we are going to cover the Rank Math Titles and Meta Settings. As you probably know, the titles and meta play an important role in how search engines perceive your content. Therefore, it is important that they are optimized. Rank Math’s Title and Meta features will help you optimize the titles of all your posts, no matter how big your website is.
Let’s get started.
Rank Math Titles and Meta Settings
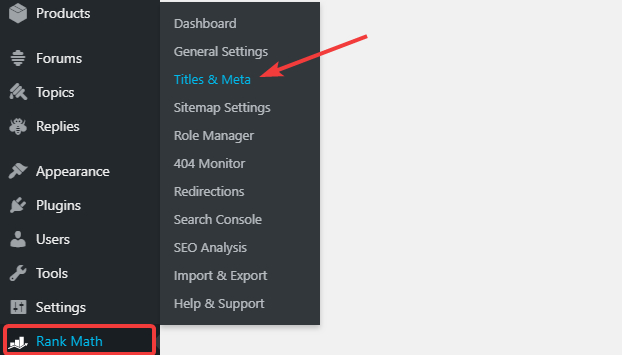
Start by going to the Titles and Meta options by hovering over Rank Math’s settings in the WordPress menu and clicking “Titles and Meta”.
The Titles and Meta options will appear. All the various settings have been organized in tabs to make it easy to navigate. Here is a list of all the tabs in the Title and Meta Settings.
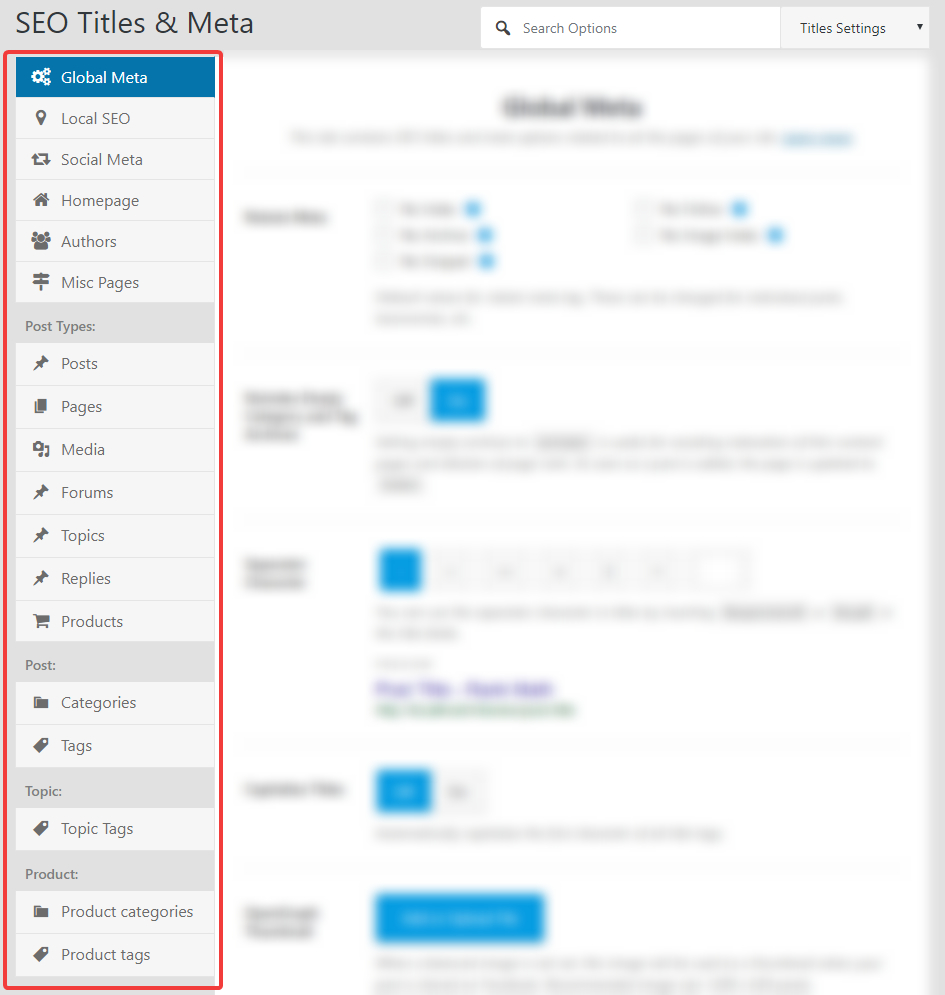
As you can see, there are tons of options in there to understand and optimize. Also, you might not see all the options that you see here. That is because some of the options are made visible only if the corresponding plugin is installed. For example, you wouldn’t see the Product Categories and the Product Tags page options if you don’t have WooCommerce Installed.
Accessing Rank Math Titles and Meta Settings
You might not have noticed it, but there are 2 ways to access the settings. The obvious way is to go to the appropriate section and then access the setting you want.
The other method is by using the search box, which is located at the top of the page.
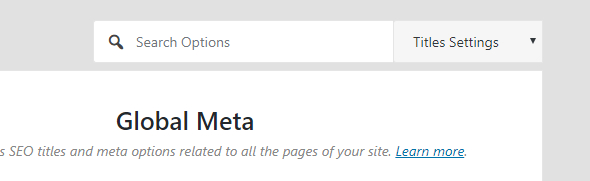
The Search Box is AJAX based. That means that as soon as you start typing the setting name, it will be searched and displayed almost instantaneously. Here is an example.
The search option is pretty convenient, and once you learn about the various settings, you might find it more comfortable to use to find your settings.
Understanding The Impact of These Settings
It is important to understand how these settings affect your website. When you set up your Titles and Meta from settings, it creates a default set of settings that will be used for posts, pages, and other post types that you might have. This ensures that each post on your website has some optimization done for them. When you create new posts or pages, you can then override each of the settings per-post.
Now that you understand that let us start by discussing the first section, the Global Meta Section.
Global Meta
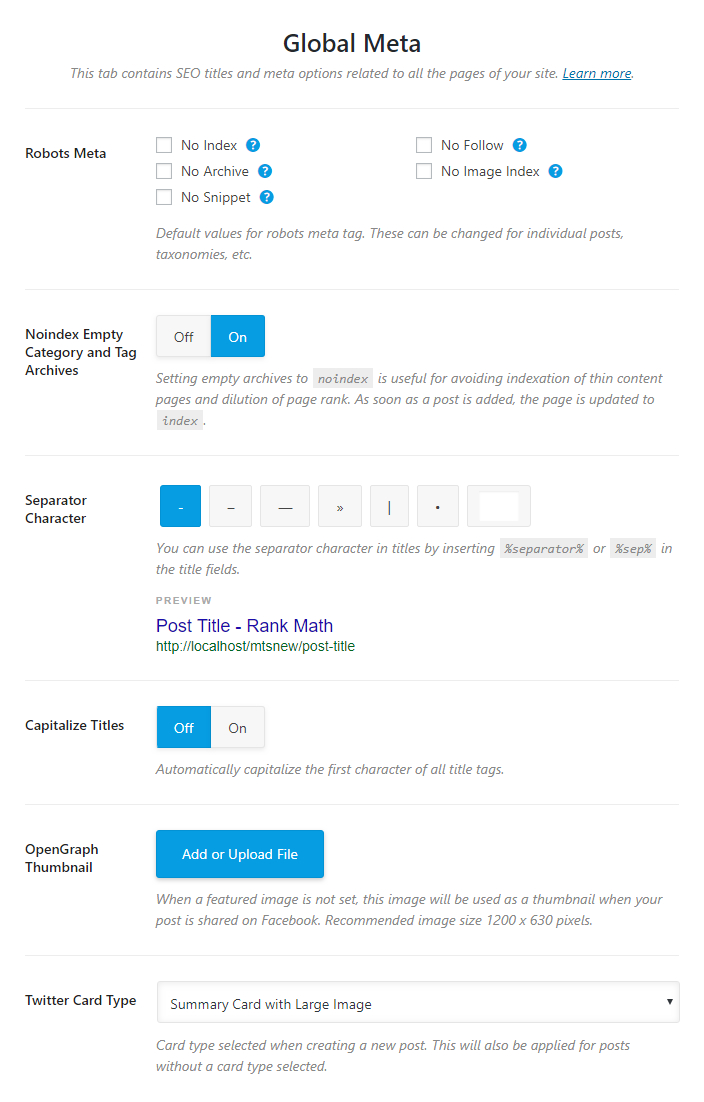
The Global Meta settings help set the default Title and Meta settings for all pages on your website. Here are the options available in the Global Meta Tab.
Let us discuss each of the options.
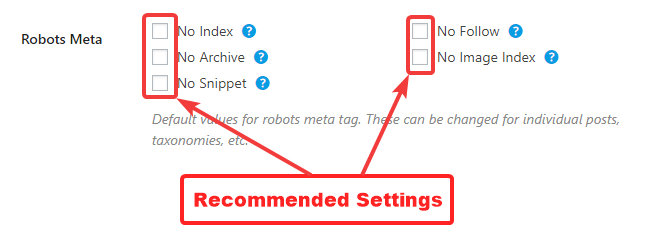
Robots Meta
The Robots Meta tags help you communicate your indexing preferences to search engines. These tags can be set on a per-post basis, but here you set up the default values for these tags.
If you’re not too sure what these tags mean, here is a small explanation.
- No Index: Enabling this communicates to search engines that you do not want this post to be indexed.
- No Archive: Enabling this communicates to search engines that you do not want cached versions of this page appearing in the search results
- No Snippet: Enabling this communicates to search engines that they should not include a snippet below the search result of this page
- No Follow: Enabling this communicates to search engines that you do not want any of the links on this page to be followed
- No Image Index: Enabling this communicates to search engines that you do not want any images on the page to be indexed
You can also see a brief description of the tags by hovering over the “?” next to them.
As for recommended settings, we recommend that you keep all the settings disabled. Most of your posts will benefit from indexing, and the ones that you want to de-index can be done so manually in the post settings.
Here is the tooltip text if you’re interested in reading what it says.
- No Index: Prevents this page from being indexed by search engines
- No Follow: Page gets indexed, but the links on the page are not followed
- No Archive: Search engines do not display a cached version of the page
- No Image Index: The page is indexed, but the images on the page are not indexed
- No Snippet: Search engines do not display a snippet below the search result for this page
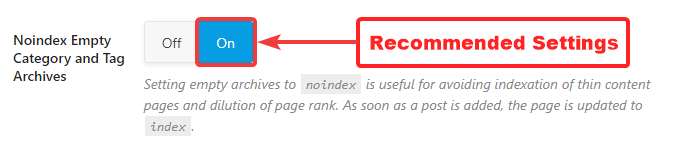
Noindex Empty Category and Tag Archives
WordPress automatically creates “archive” pages for each category, tag, and other taxonomies that you use on your website. An archive page is simply a collection of all the posts (or custom) post in that taxonomy, organized in pages.
If you’ve created a bunch of categories and tags, but there are no posts associated with them, then not only archive pages for those pages be created, they will also be indexed.
Enabling this option counters this problem as all the archive pages of empty category and tag pages will be no-indexed. We recommend that you enable this option.
Separator Character
This option lets you decide the separator character that will be used in the Title of your posts. There are several options available, and you can choose anyone based on your preference.
When deciding which separator character to use, you can take the help of the demo title below. The title will update based on the separator character you choose and will help you in selecting the one that looks best.
Ideally, you should test the impact of the separator character on your website. If you want to do so, then set any character as the separator character and then observe your CTR (click through rate). After a few weeks, change the separator character and observe if the rate improves.
You can also set a custom separator character by entering it in the last field.
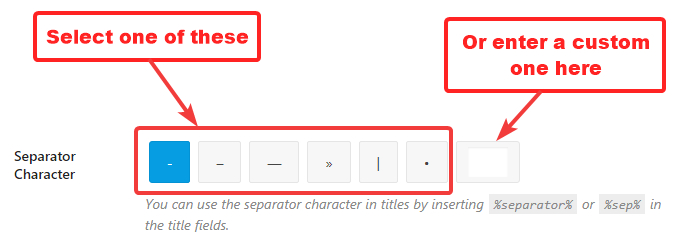
After you’ve selected your separator character, you can use it in your titles by inserting %separator% or %sep in your titles.
Capitalize Titles
Enabling this setting capitalizes the first character of your post’s title. For example, a title like this is a post will become This Is A Post. We recommend that you enable this setting.

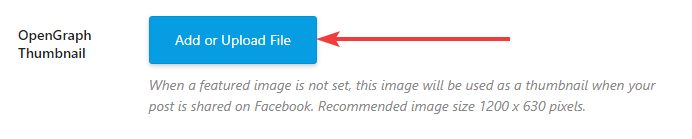
OpenGraph Thumbnail
This option lets you set a default OpenGraph thumbnail. OpenGraph tags are used by Facebook whenever a post is shared on Facebook. When you set up a default OpenGraph Thumbnail, all your posts without featured images will use this image when the post is shared on Facebook.
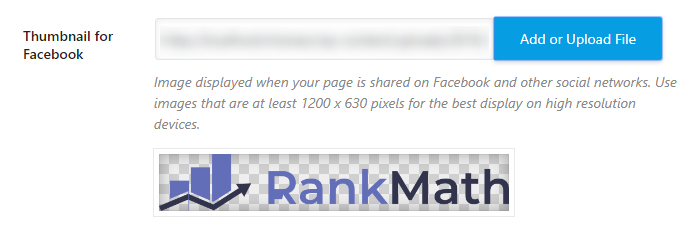
To set an OpenGraph Thumbnail, click the “Add or Upload File” button.
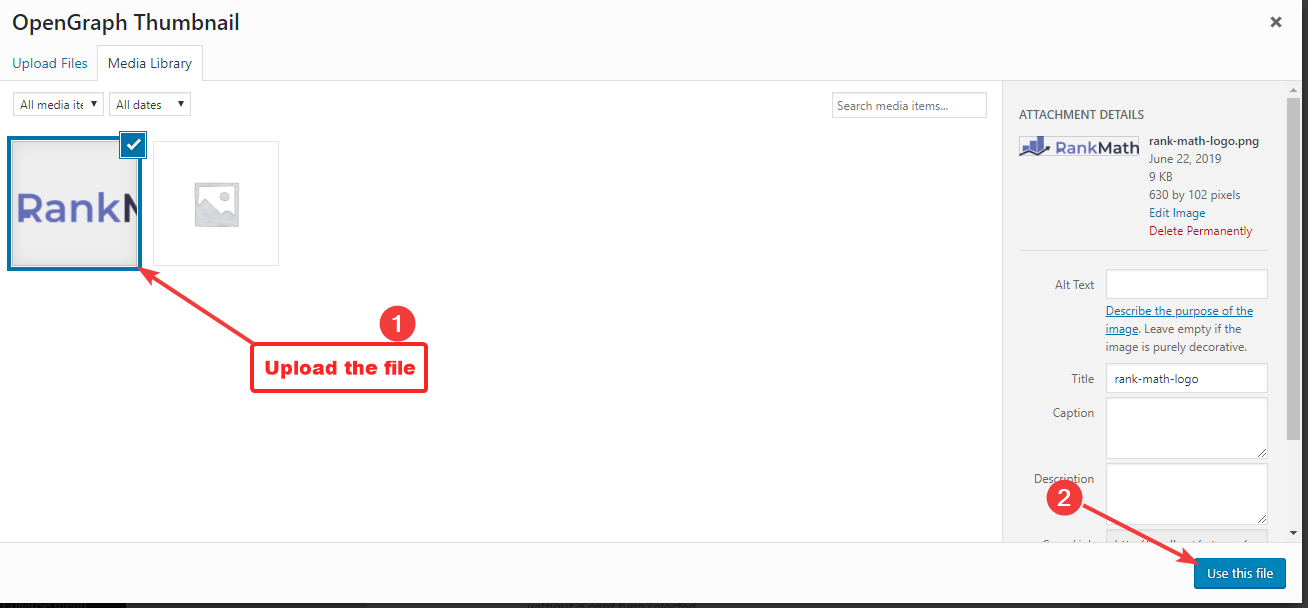
WordPress’s media manager will open. Upload a file by dragging and dropping it on the manager or select an already uploaded image. Then click the “Use this file” button.
The image will now be shown alongside the setting.
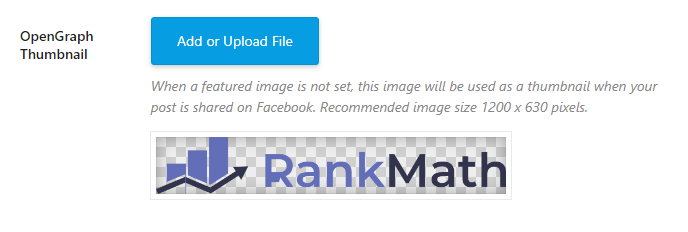
Here we have uploaded Rank Math’s logo as for demonstration, but you should upload an engaging banner. The recommended dimensions for the OpenGraph Thumbnails is 1200 x 630 pixels.
If you want to change the OpenGraph Thumbnail in the future, then hover over the uploaded thumbnail with your mouse. You will notice an overlay on the image with an “X” in the corner. Click the X to remove the image, and then select a new one.
- Rank Math Import And Export Settings In 5 Easy Steps
- Rank Math Sitemap Issues and Their Fixes
- Sitemaps Settings In Rank Math [5 Easy Steps]
Twitter Card Type
This option lets you set a default Twitter Card for your posts. This card will be used when your posts are shared on Twitter.

This covers all the settings in the Global Meta section. Let us move onto the Local SEO Section.
Local SEO
The Local SEO section contains all the settings related to Local Businesses.
When you configure the Local Settings section Rank Math will add the necessary metadata to your website for Google to recognize your website as a local business website, and Google will start showing your website in the SERPs for related business queries.
Local SEO is vast and needs a guide of its own. You can learn how to do Local SEO with Rank Math.
Social Meta
The Social Meta Section harbours all the settings related to the metadata for social media. Here is a glimpse of all the settings present in the Social Meta section.
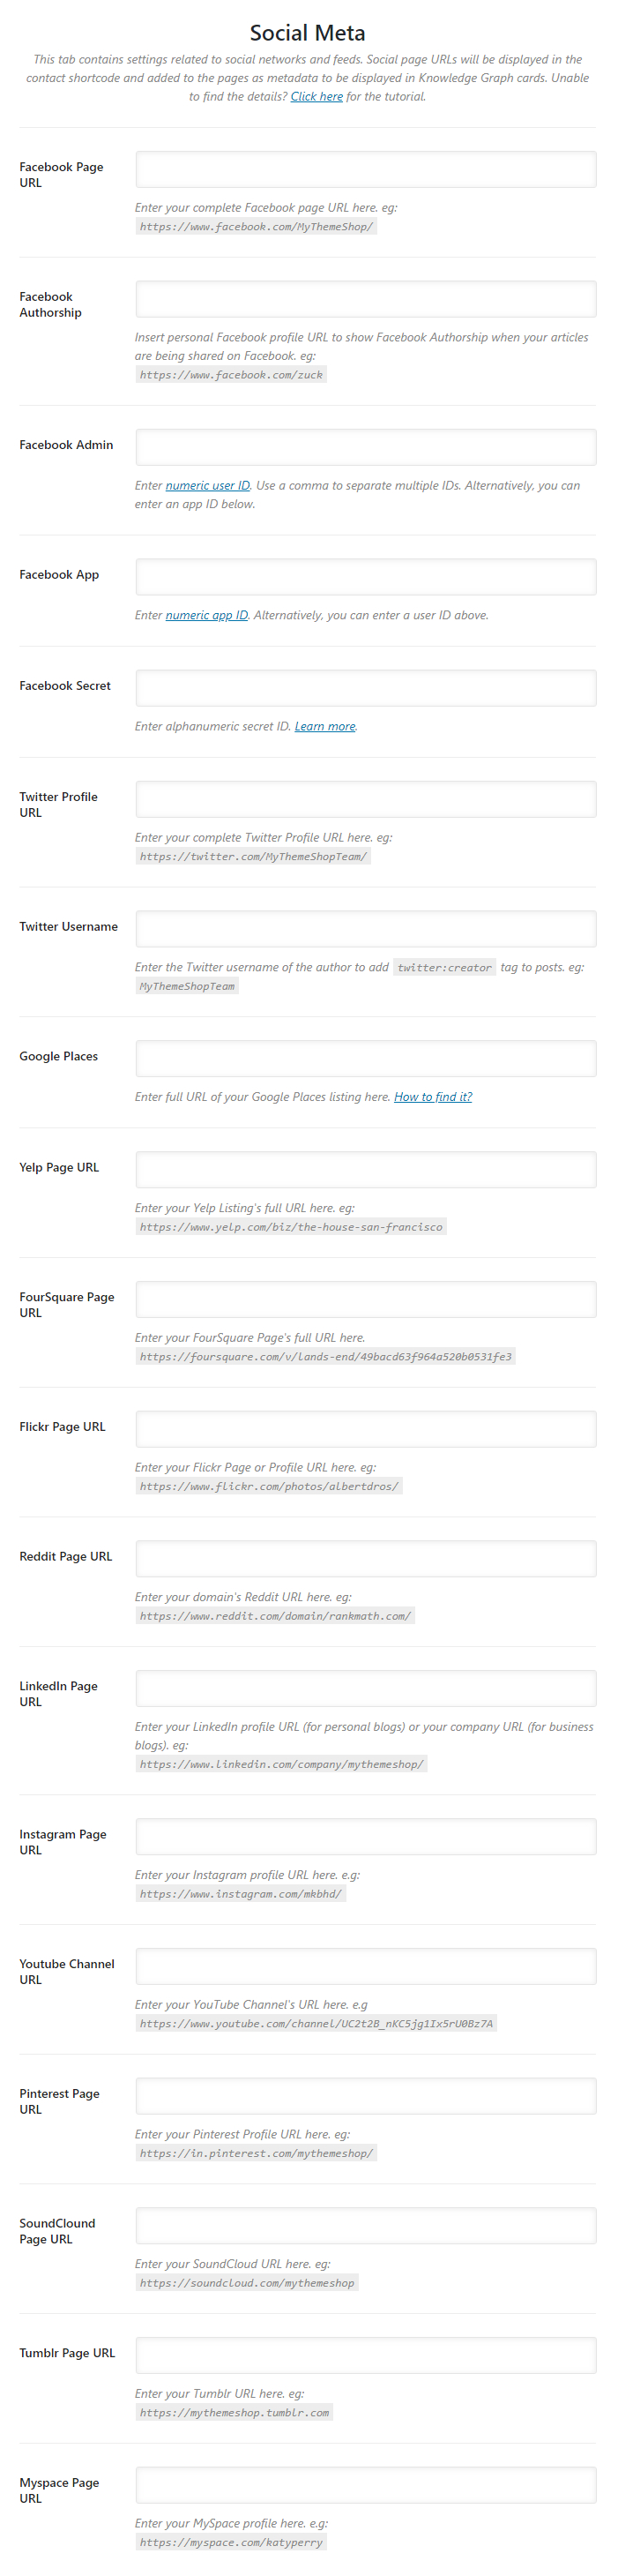
Let us explain each of the settings quickly.
Facebook Page URL
Enter the URL of your Facebook Page here. This URL will be displayed with contact shortcode and also added as metadata to your pages for OpenGraph and Knowledge Graph.

Facebook Authorship
Facebook supports a Facebook authorship tag, which is used to credit authors when a post is shared on Facebook.
If you would like to enable Facebook Authorship for your website, enter the URL of your personal Facebook page here.
Facebook Admin
Enter the numeric user ID here. You can find your User ID using this tool. You can also enter multiple IDs by separating them with commas. You can skip this and use the Facebook App settings, which is discussed below.

Facebook App
Enter the App ID of your Facebook App in this field. If you do not have an app, you can use the Facebook Admin setting, which is discussed above. Follow this tutorial to create your own App.

Facebook Secret
If you’re using a Facebook App, the enter the App’s secret key in this field.

Twitter Profile URL
Enter the URL of your Twitter profile here. Make sure to enter the full URL, not just your Twitter handle.

Twitter Username
Enter your personal Twitter username in this field. This is used by Twitter for twitter:creator tags.

Google Places
Here you’ll need to enter the URL of your Google Places listing. If you don’t know how to find the link, here is a link that will answer your question.

Yelp Page URL
Enter the URL of your Yelp Listing here.

FourSquare Page URL
Enter the URL of your FourSquare Page here.

Flickr Page URL
Enter the URL to your Flickr Page, or your Flickr profile here.

Reddit Page URL
Enter your domain’s Reddit URL here. This will be different from a subreddit URL. Here is an example:

LinkedIn Page URL
Enter the URL of your LinkedIn page here.
Instagram Page URL
Enter your Instagram Page URL here.

YouTube Channel URL
Enter your YouTube Page URL here.

Pinterest Page URL
Enter your Pinterest Page URL here.

SoundCloud Page URL
Enter your SoundCloud Page URL here.

Tumblr Page URL
Enter your Tumblr Page URL here.

MySpace Page URL
Enter your MySpace Page URL here.

Do You Need To Configure All These Settings
As you just saw, there are many options in the Social Meta section—more social networks than a business would reasonably be present on. It poses the question, do you need to configure all these social media options?
The answer is no. You do not need to configure all these options, especially if you’re not on a particular social media platform.
Different business types work with different social media. A business that does well on Instagram might not do well on LinkedIn and vice versa.
To be inclusive of all kinds of business, and to offer the maximum control over your website’s optimization, we have included all the popular social media channels. You can (and should) configure only the ones that you’re interested in, and intend to use in your business, leave the rest of them blank.
That covers all the settings in the Social Meta Section. Let us move to the next section, the HomePage Section.
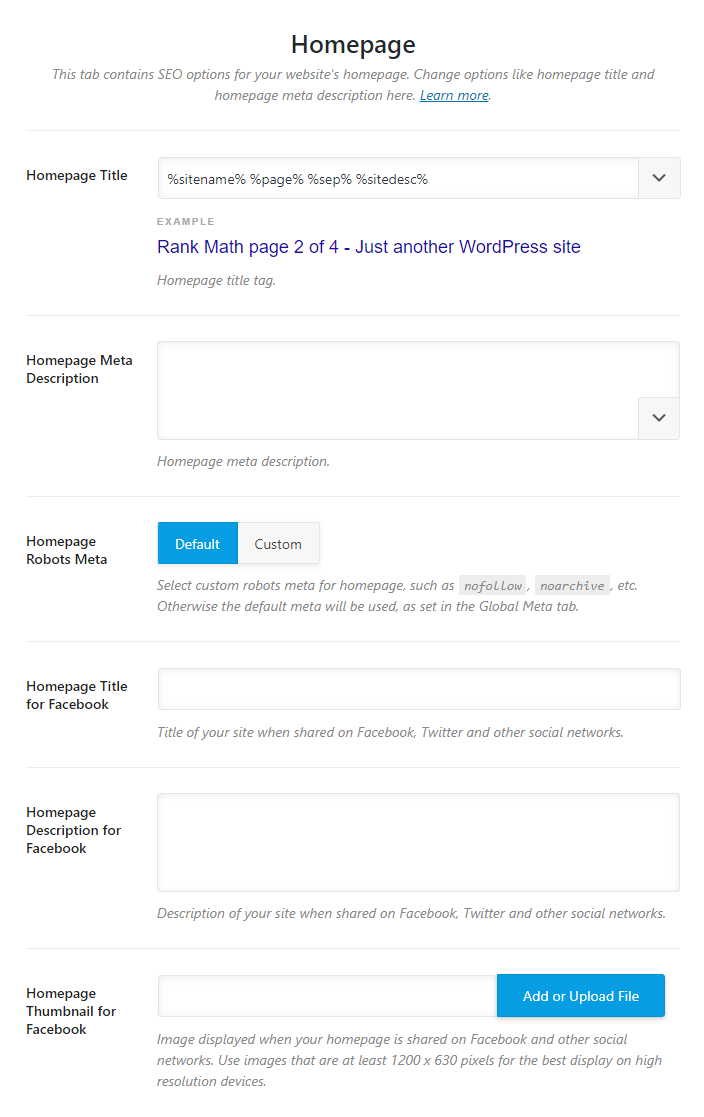
HomePage
As you probably guessed, the HomePage section contains all the Title and Meta settings related to the homepage. Here are all the options that you will see in this section.
Let us cover each of the section and understand what it does.
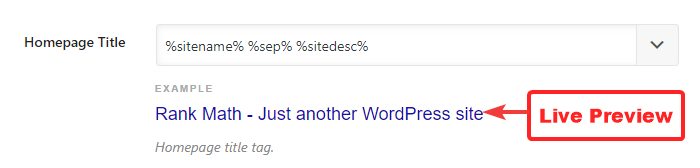
HomePage Title
Here you set the title of the homepage of your website. As you can probably understand, the title of your homepage is very important from an SEO perspective and thus needs to be set accordingly.
You can either set a static title, which won’t change unless you change it yourself, or create the ones with variables. The benefit of using variables is that your title will automatically be updated if you change any of the things that affect the variables.
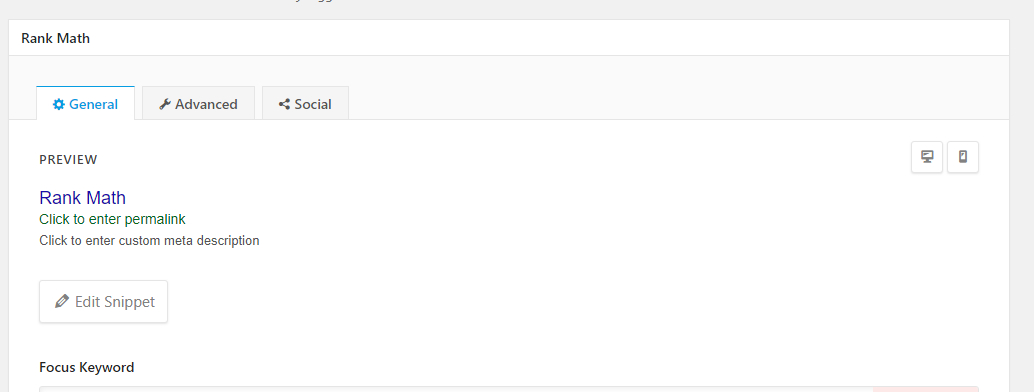
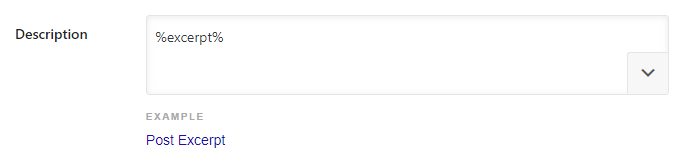
A sample homepage title will be set by Rank Math using variables for demonstration. We recommend that you change. To see the list of all the variables you can use, click the drop-down icon at the end of the text area.
The example shared below the text area also acts as a real-time preview. When you update the title format, you will instantly see the change below.
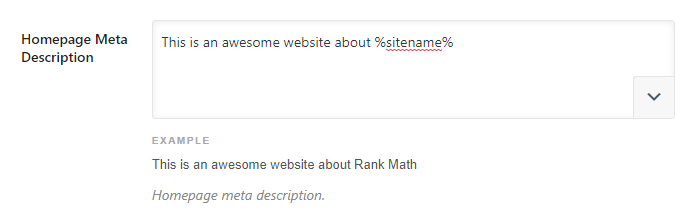
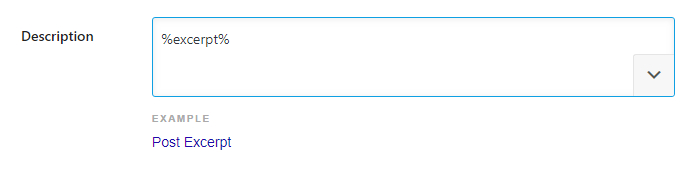
HomePage Meta Description
Here you can enter a meta description for your homepage. Similar to the Homepage Title, you can enter a static description or create a dynamic one using the supported variables.
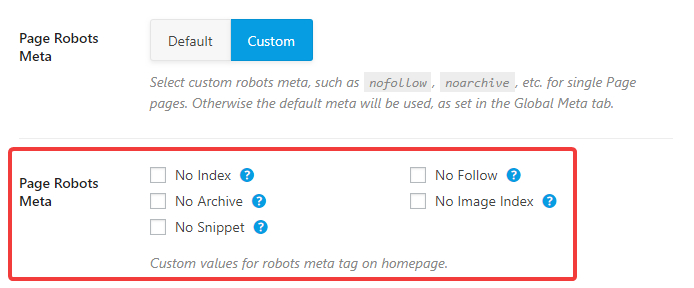
Homepage Robots Meta
This option lets you set the Robots Meta for your homepage. You can either choose the Default settings, that you’ve set in the Global Meta section, or choose custom settings for the homepage.

If you choose the Custom option, another set of setting will appear.
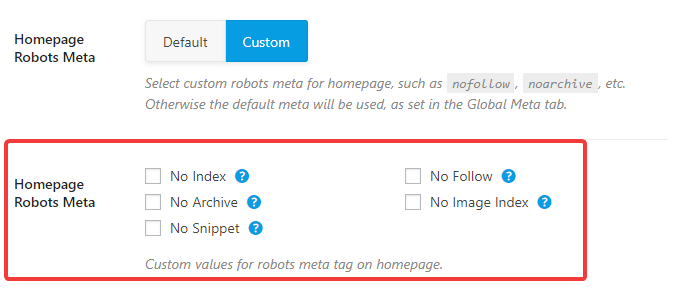
You can select any of the Robot Meta tags, and those will be used for your homepage only.
Homepage Title for Facebook
As the setting name mentions, it sets the Homepage title for Facebook. But, in reality, the title you set here will be used in the OpenGraph meta on your website. That means that any social networking website that uses the OpenGraph protocol will see this title when your homepage is shared there.

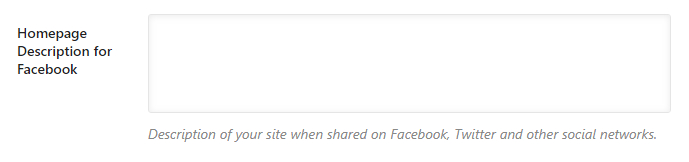
Homepage Description for Facebook
In the setting above, we set the title for your homepage. Here, you will set the description of the page. Just to remind you, this description will only be used when your page is being shared on social media.
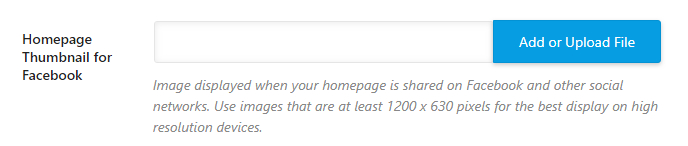
Homepage Thumbnail for Facebook
Here you can choose the default thumbnail image that will be used when your homepage is shared on Facebook, Twitter, or other social networks.
This setting shouldn’t be confused with a similar setting that you set in the Global Meta section. There, you set a default thumbnail for the pages of your website, while here you are setting one for your homepage. The recommended resolution is 1200 by 630 pixels or above.
This covers all the settings in the HomePage section, let us move on to the next section, Authors.
Authors
Just as WordPress creates category and date archives, WordPress also creates Author Archives.The author tab contains all the settings that relate to the author archives. Here are all the available options.
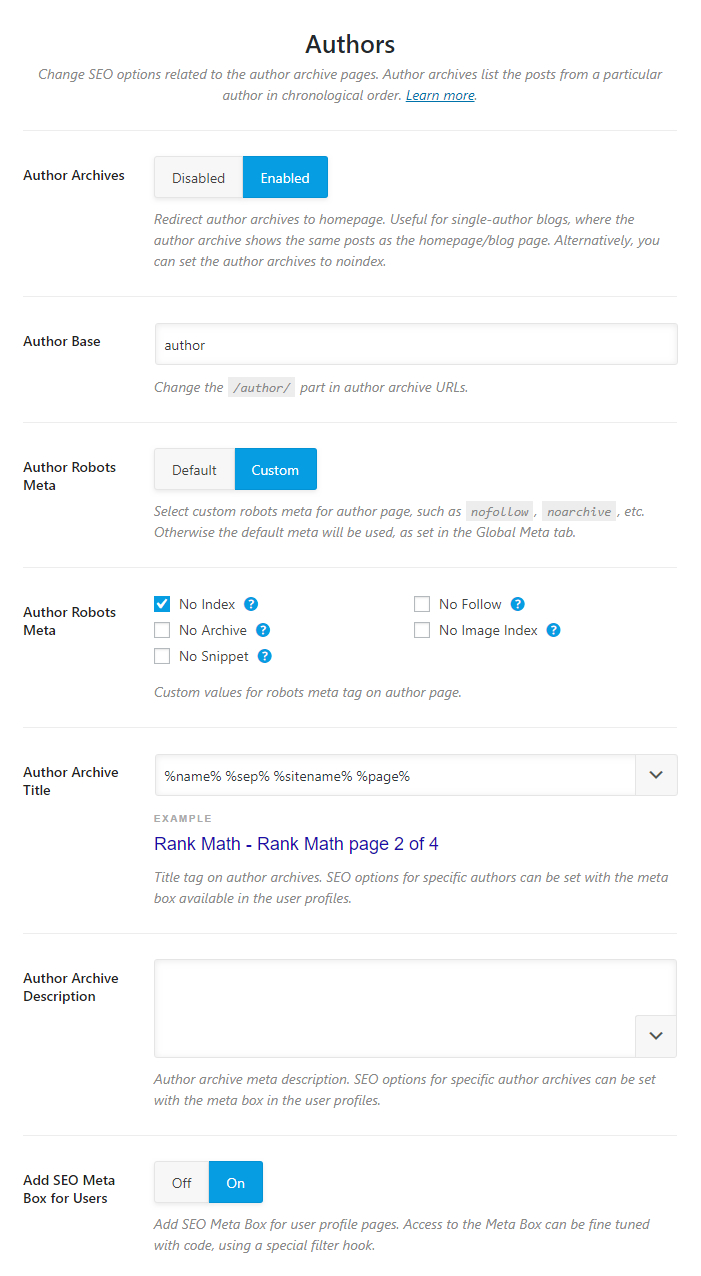
Let us understand the impact of each of the settings in detail.
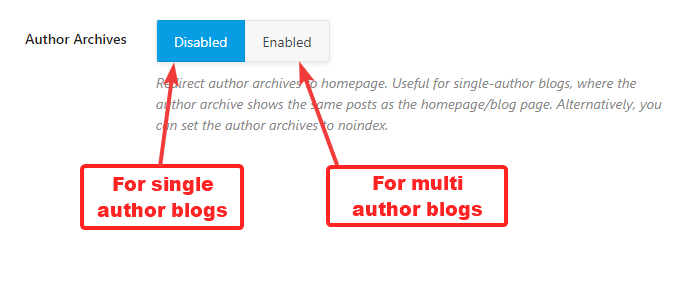
Author Archives
This option enables or disables the author archives entirely. Depending on how you set up your website and Rank Math, this option might be disabled for you. If that is the case, you will not see the rest of the settings, and you’ll need to enable Author Archives to see the rest of the settings.
For single author blogs, there is no need to keep author archives enabled as it just leads to duplicate content. If you’re planning to add new authors later, you can keep Author Archives enabled but no-index them to avoid the same content being indexed more than once. We’ll show you how to do a little later. Note that if you disable the Author Archives, then they will not magically disappear from your website, rather, they will be redirected to the homepage of your website.
Author Base
By default, the author archive pages have the term “/author/” in them. For example, an author archive for a user might be www.mysite.com/author/author1.
This option lets you rename the “author” part to the text of your choice.

Author Robots Meta
This option lets you configure robots meta for author archives. You can either choose the default meta that you’ve set for your website for your Author Archives too or choose Custom Meta.
If you choose the Custom option, new settings will appear below it.

You can then choose all the meta robot tags that you want to apply to your author archives. We would recommend that you at-least No Index your author archives to avoid indexing duplicated content. You won’t get penalized for duplicate content, but it will waste your crawl budget.
Author Archives Title
This option lets you create a template for Author Archive pages. You can enter static text, or create a template based on variables. A sample template is already created for you to see.
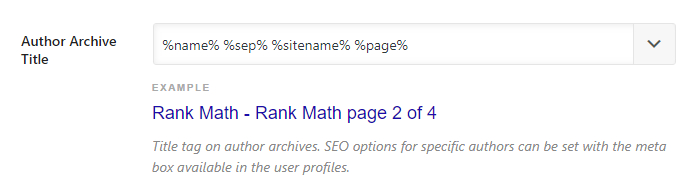
To see all the available variables, click the drop-down button present on the top right of the text field. Here is an image showcasing all the variables. As you’ll see in the image, you can also type in some words to search through the variables.
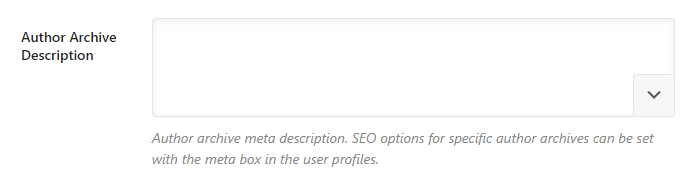
Author Archive Description
This option lets you create a description for the Author Archive pages. Similar to the Author Archive Title, you can enter static text or create a dynamic text using variables.
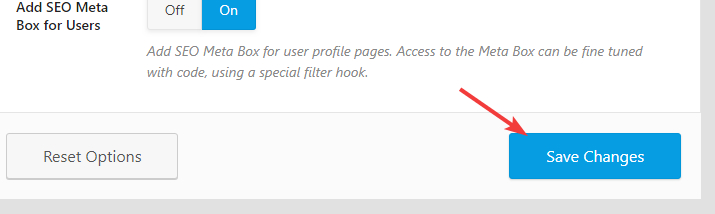
Add SEO Meta Box for Users
This option adds an SEO meta box for user profiles pages. What that does is give you an option to optimize your Author’s Page’s Title, meta description, and social sharing meta on an individual level instead of using default settings for each of them. If you’re running an authority website with multiple authors, then you might find this useful.

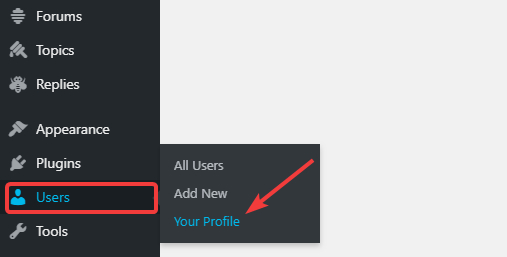
To see the Meta Box in action, head over to your user profile in WordPress by heading over to Users > Your Profile.
Once you’re on your profile page, you’ll have to scroll down until you see the familiar Rank Math meta box.
You might see a warning on the meta box similar to the one in the image below—which will also disable the meta box effectively.

In that’s the case, go back to the Author Robots Meta and see if you’ve set it up in a way that search engines won’t see or index Author Archives.

If your Author Robots Meta is set to default, then you might have no-indexed archives or all the pages on your website. Check the other settings to disable those settings first.
After making those changes, don’t forget to save your settings.
Then, when you come back to the Snippet, you will see that all the options are enabled.
The optimization process that you would follow here would be the same as the one you follow while optimizing your posts. Rank Math’s meta box guides will help you in that process.
This covers all the section in the Authors tab. Let us discuss the next section.
Misc Pages
We’ve already covered Global Pages, Local Pages, Homepages, Social Pages, and even author pages. The Misc Pages section contains all the settings for all the other pages in WordPress like the search page, 404 page, and more. Here are all the settings in the Misc Pages section.

Let us discuss each of the settings one be one.
Date Archives
Date Archives are pages that WordPress creates, organizing your content by the dates they were published on. For example, website.com/2019/03/ would be a date archive page.
This option lets you enable or disable Date Archives completely from your website. Date Archives are useful only in certain situations, and most websites, they should be disabled.
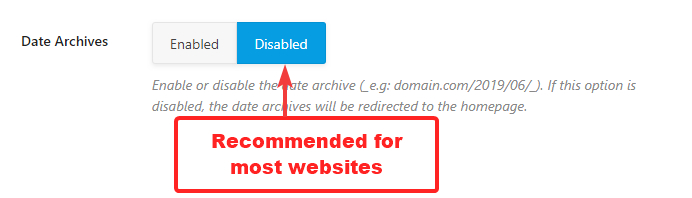
When you disable Date Archives, they don’t disappear from your website. They are redirected to your homepage instead.
Enabling the Date Archives opens up 2 additional settings below it, which help configure the date archives.
Date Archive Title
This option lets you create a title template for the Date Archive pages. You can either enter static text or create a dynamic template using variables. A sample template has been created for a demonstration.
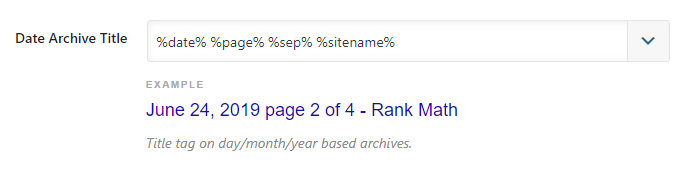
To see the list of all available template variables, click the drop-down arrow on the top right of the field. You can either scroll to see a list of all variables or type in a few characters to filter the list to your desired variables.
Date Archive Description
This option lets you set a template for the description of Date Archive Pages. You can either enter static text or create a dynamic template using variables.
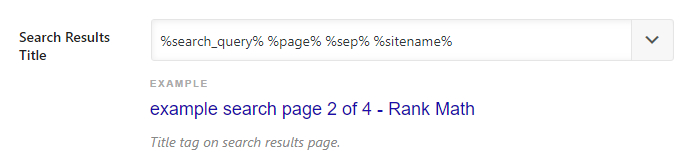
Search Results Title
This option lets you create a title template for the search results page. The same set of variables are available to you, and you can create a static template or a dynamic one. There are also some variables that are only accessible on search pages, like %search_query%—use them if you like.
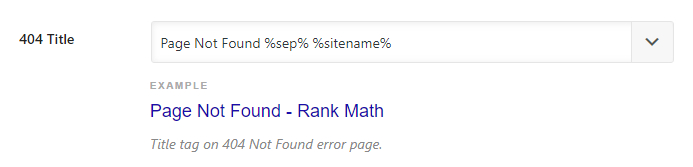
404 Title
This option lets you create a template for the title of the 404 pages. A sample template is created, and the same variables that we’ve demonstrated above are accessible here as well.
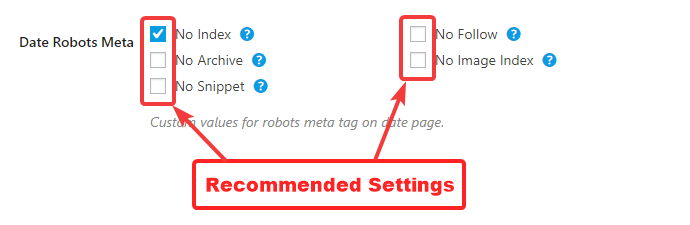
Date Robots Meta
As we mentioned, Date Archives are useful only in certain specific scenarios. Even if you decide to use them, you will face a duplicate content problem. To avoid that problem, and to keep your crawl budget efficient, we would recommend that you No index your Date Archives.
Noindex Search Results
This option lets you enable or disable the indexing of the Search Result Pages. Search result pages are usually not heavy on content, and there is no content on them that will not be indexed anyway. So, we recommend that you turn this setting on and No index your search results pages.

Noindex Paginated Pages
WordPress gives you the ability to split large posts and pages into multiple pages. For example, a post with URL yourwebsite.com/special-post can be split into multiple pages with URLs yourwebsite.com/special-post/2 and yourwebsite.com/special-post/3 and so forth.
Enabling this option will No index all the subpages and they will thus no show up in the search results.

Quick Note: The reason why post splitting became popular was that webmasters thought it provided a better user experience. But, users’ expectations have changed, and more users now expect all the content on the same page. As a result, Google has stopped supporting rel=next/prev for quite some time now. Here is a reference article stating that.
Bottom line, if you’re splitting content into multiple pages, then you should stop, and if there exists content on your website that is split to multiple pages, then it the right time to merge them into a single page.
Noindex Archive Subpages
We discussed paginated posts and pages above. But, archive pages can be paginated too. This option lets you enable or disable the no-indexing of Archive Subpages. We recommend that you enable this setting.

Noindex Password Protected Pages
WordPress supports password protected pages that you can use for a variety of purposes. This option lets you control whether you want password protected pages to be indexed or not. We recommend that you enable this setting.

This concludes all the options in the Misc Pages tab. Let’s move on to the next tab, the Posts Tab.
Posts
The Posts tab deals with all the Title and Meta settings that affect your single posts. Again, all the settings inside the Posts tab will help you create a default template that all your new posts will use, and you will be able to override each of these settings on a per-post level. Here are all the settings that you would see in the Posts section.
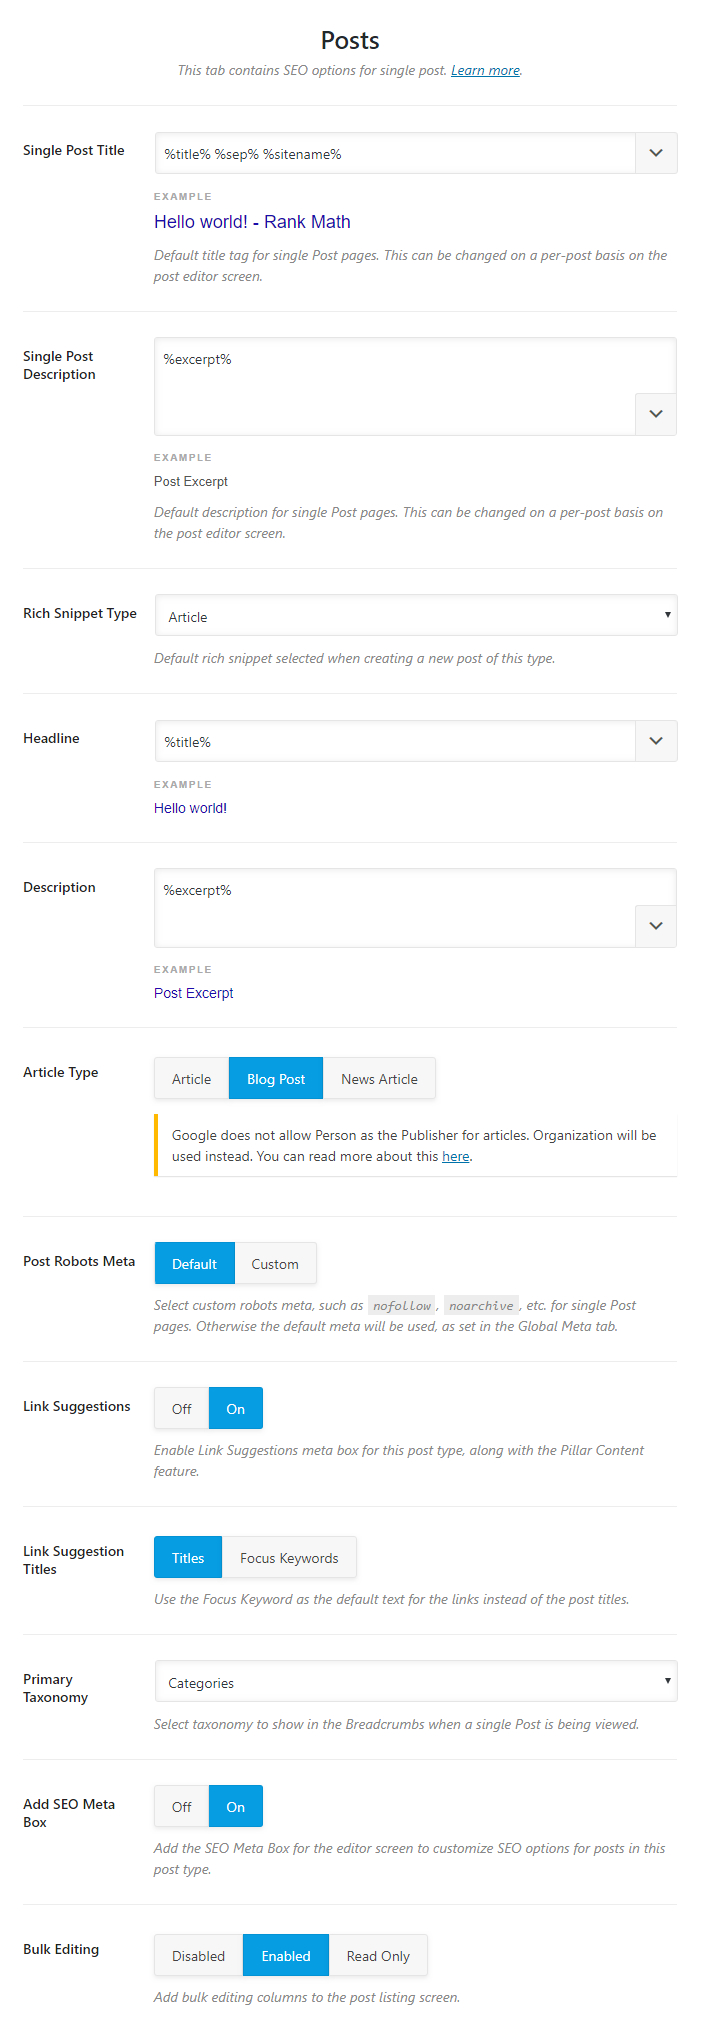
Let’s look at all the settings one by one.
Single Posts Title
This option lets you create a template for your single post titles. There are many variables that you can use to create a template, and a sample template has been created for you to check out.
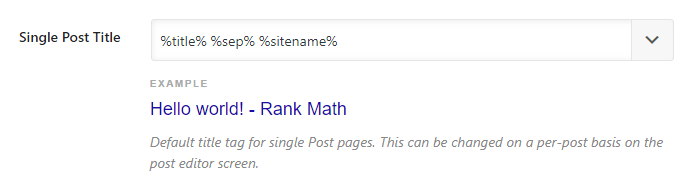
To check out all the available variables you can use, click the dropdown button at the end of the text area. You’ll see that there are plenty of variables available to use. You can also quickly locate any variable by typing out some keywords in the search bar. As you make any changes to the template, you’ll notice that the preview at the bottom of the field changes in real time.
Single Post Description
This option lets you create a template for the description of your single posts. Similar to the Single Post Titles, you have access to variables a bunch of variables which you can use in the text field.

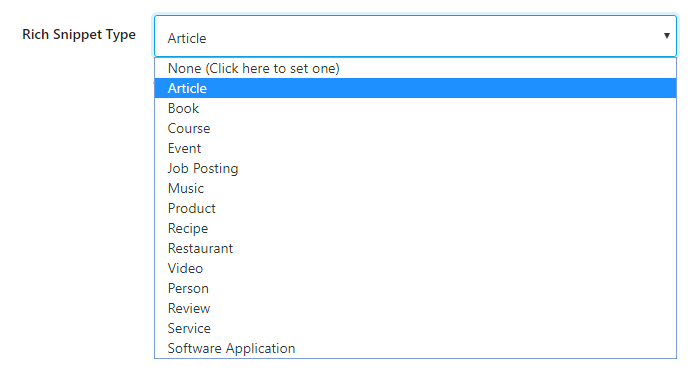
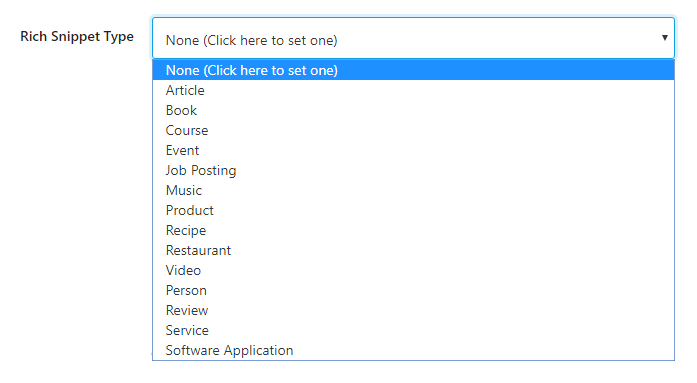
Rich Snippet Type
This option lets you set a default rich snippet for all your posts. If most of your new posts are about a similar topic, this saves you the hassle of setting a rich snippet again.
Click the drop-down menu to see the list of available rich snippets. You can choose any one of the options, or leave it at none to leave the rich snippet empty for new posts and set them manually.
Headline
This option lets you set up a headline template for all your posts. You can use all the variables that we showed you in the settings above and create a new template, or use the default one we’ve set up.

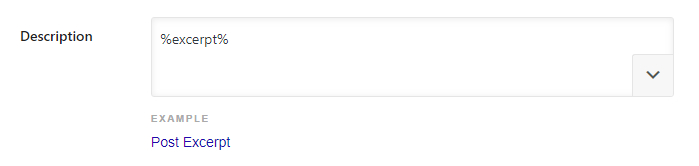
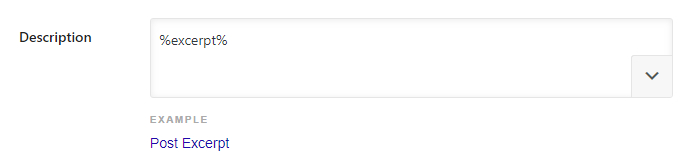
Description
Here you can set a default description for all your posts. Similar to other settings, you can use variables to create a dynamic template. However, the default description that we’ve created should also work. Please note that most Rich Snippet types support the description field, except the Books Rich Snippet Type.
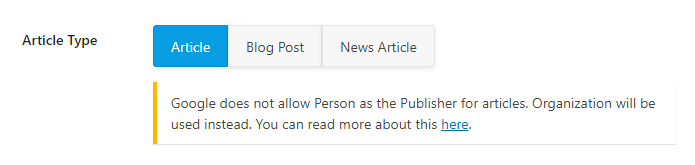
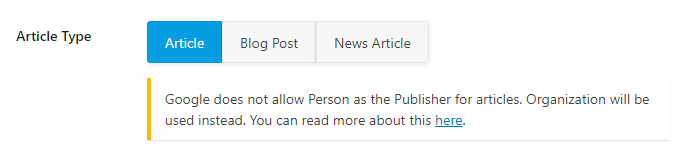
Article Type
This setting will only be visible if you select the Article Type Rich Snippet from the Rich Snippet Type setting mentioned above. Here, you will have 3 options to choose from.
- Article
- Blog Post
- News Article
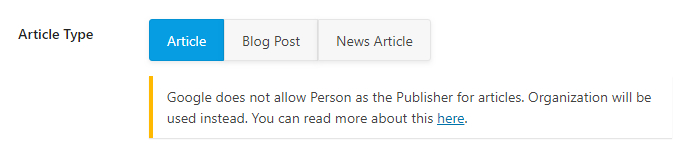
Generally, opinion pieces can be set up as Articles or Blog Posts with the assumption that articles are generally longer and more extensive pieces on a topic. A News Article has to report factual information and not mix opinion with facts. Choose the Article Type that suits your website the best.
Regarding the warning notice; the error is pretty self-, and you will only see it if you’ve set up your blog as a personal website. The reason behind it is that Google does not recommend that you use the Article Type Rich Snippet with the markup of an individual, rather an organization. Even if you’ve set up your blog as an individual, Rank Math will insert the markup of an organization to circumvent the error.
Post Robots Meta
This option lets you set a default Meta Robots Tag for your posts. You can either set it to use the default settings you configured in previous settings or set it up as a custom setting.

If you select the custom option, the entire list of Meta Robots options appears just below the setting. You can then choose any number of tags, which will be applied by default to all your new posts.
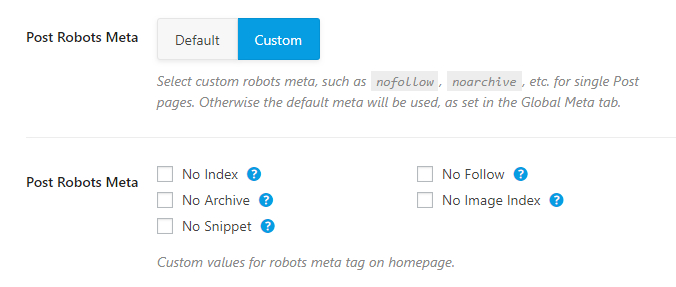
For Posts, we would recommend that you keep all the options unchecked.
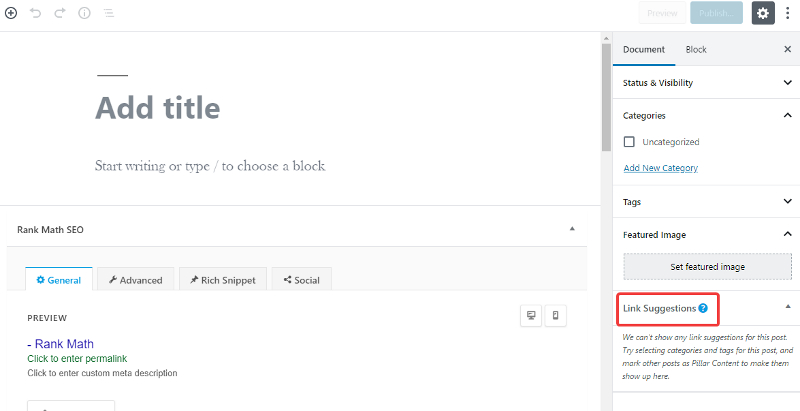
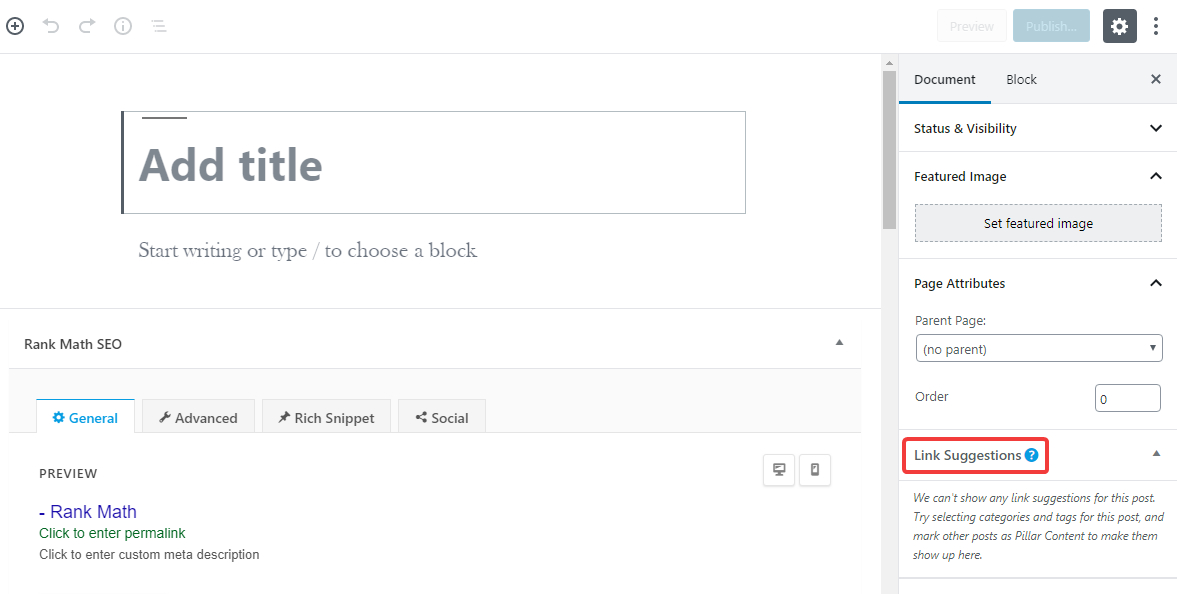
Link Suggestions
This option will let you enable the Link Suggestion feature. The Link Suggestion feature is a pretty unique feature, and if you enable it, then Rank Math will provide you link suggestions when you are writing your posts.

Here is how the Link Suggestions feature appears in the Post Creation screen.
Link Suggestion Titles
The Link Suggestion Titles field will only be visible if you enable Link Suggestions. This option lets you configure how the link suggestions are fetched by Rank Math. You have 2 options to choose from.
- Titles: Selecting this option will configure Rank Math to look for link suggestions based on the title of the current post
- Focus Keywords: Selecting this option will configure Rank Math to look for link suggestions based on the focus keyword of the particular post
Both options work great, and it is more about your writing style that will help you decide how to configure this option. We recommend that you try each of the options out for some time, and then decide which one works for you.

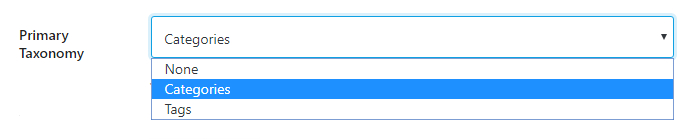
Primary Taxonomy
This option lets you select the taxonomy that will be displayed in the breadcrumbs in your posts. Click on the setting to see all the available options and select the one that you prefer.
Add SEO Meta Box
This option adds an SEO Meta box to your posts. Using the SEO Meta box, you can customize which of Rank Math’s diverse SEO features are enabled for the post, which in turn gives you total control over your SEO efforts. We recommend that you turn ON this setting.

You can learn more about the Rank Math’s Meta Box from its dedicated article.
Bulk Editing
If you already have a bunch of posts on your website when you first installed Rank Math, then this option will help you optimize them easily.
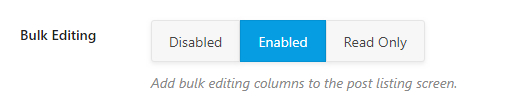
Enabling this feature introduces a bulk editing feature in your post listing screen, using which you can edit multiple posts in one go. There are 3 options to choose from
- Disable: Disables the Bulk Editing Feature
- Enabled: Enables the Bulk Editing feature with read and write options
- Read Only: Enables the Bulk Editing feature with only read options.
We recommend that you enable this setting with both read and write options if you already have a lot of posts to optimize. Otherwise, you can keep it at Read-only mode.

This covers all the options in the Posts Tab. Let us cover the next tab, which is the Pages tab.
Pages
As the name suggests, the Pages section holds all the Title and Meta settings related to Pages. Here is an image showing all the settings available in this section.
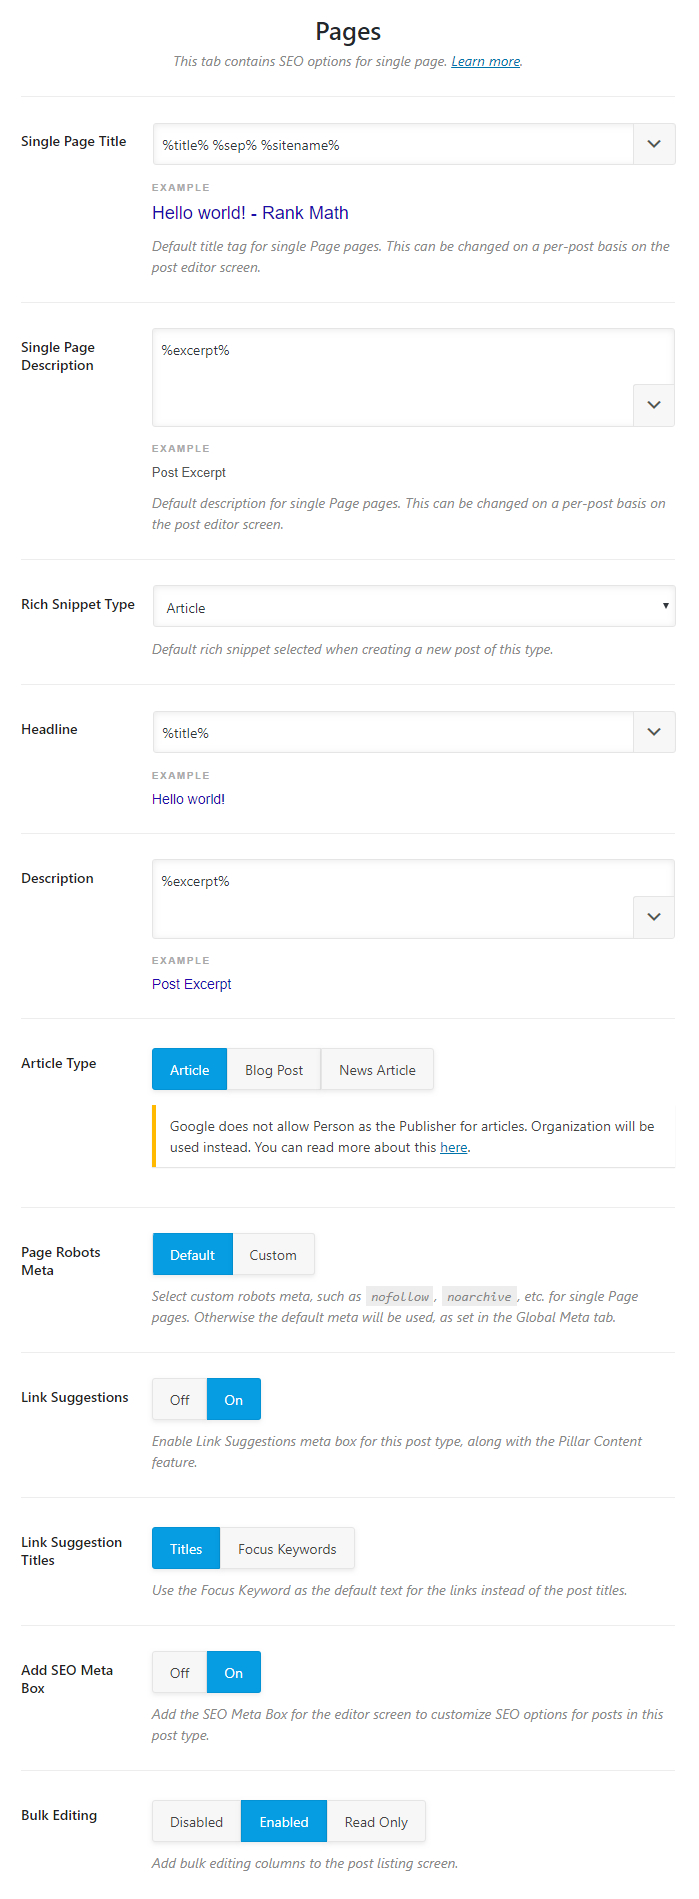
Let us discuss each of the settings now.
Single Page Title
This option lets you create a template for your single page titles. There are many variables that you can use to create a template, and a sample template has been created for you to check out.
To see the list of all the variables at your disposal, click the drop-down button on the top right of the text field. You can then scroll through the list of variables, or filter them by typing characters on your keyboard. The preview below the text field updates in real time as you make any changes to the template.

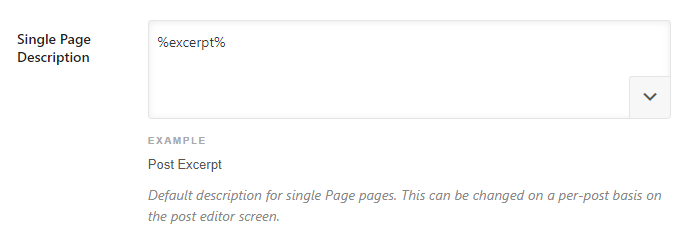
Single Page Description
This option lets you create a template for the description of your single pages. Similar to the Single Page Titles, you have access to variables a bunch of variables which you can use in the text field.
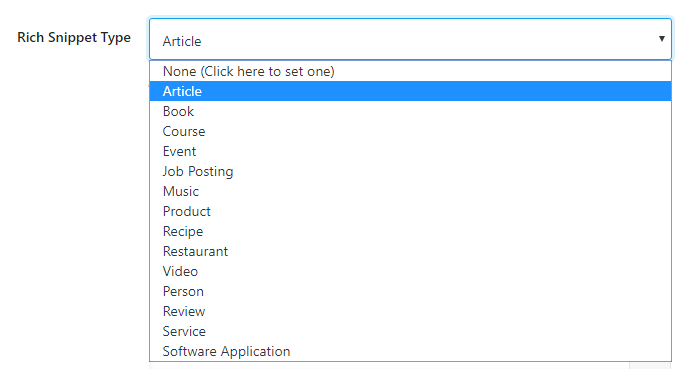
Rich Snippet Type
This option lets you set a default rich snippet for all your pages. If most of your new pages are about a similar topic, this saves you the hassle of setting a rich snippet again.
Click the drop-down menu to see the list of available rich snippets. You can choose any one of the options, or leave it at none to leave the rich snippet empty for new pages and set them manually.
Headline
Here you set a headline format for your Pages. As you saw with the other settings, you can use a bunch of variables to create a customized format or use a static one. A default one format has been set too, which can also work for most scenarios.

Description
In this setting, you will set up a format that will be used as the default description for pages. We’ve already created a sample description, and you can use variables to customize the format, or simply create a static description.
Please note that the description field is not supported for the Book Rich Snippet type. So, if you don’t see a description field, it is probably because you’ve selected the Book Rich Snippet as the default snippet type.
Article Type
As its name suggests, the Article Type setting lets you choose the type of articles you’ll publish on your website. As you might have guessed, this option will only be visible if you select the Article Type Rich Snippet.
You will have 3 options to choose from.

- Article
- Blog Post
- News Article
The differentiation between an article and a blog post is not very specific, but the general consensus is that shorter opinion pieces should be classified as blog posts, while longer pieces should be called articles. News articles, on the other hand, should only be reporting factual information. Choose the Article Type that fits well with the content you post.
Page Robots Meta
This option lets you set a default Meta Robots Tag for your pages. You can either set it to use the default settings you configured in previous settings or set it up as a custom setting.

If you select the custom option, the entire list of Meta Robots options appears just below the setting. You can then choose any number of tags, which will be applied by default to all your new pages.
Link Suggestions
Rank Math intelligently scans the content on your pages as you write them and suggests internal linking options. With this setting, you can turn that feature ON or OFF.
Since most bloggers should use internal links for better SEO performance, we recommend that you turn this option ON.

Here is how you would see the link suggestions on Pages. If your website is brand new, add some content and organize it inside categories for the Link Suggestion feature to have enough data to work.
Link Suggestion Titles
The Link Suggestion Titles field will only be visible if you enable Link Suggestions. This option lets you configure how the link suggestions are fetched by Rank Math. You have 2 options to choose from.
- Titles: Selecting this option will configure Rank Math to look for link suggestions based on the title of the current post
- Focus Keywords: Selecting this option will configure Rank Math to look for link suggestions based on the focus keyword of the particular post
Both options work great, and it is more about your writing style that will help you decide how to configure this option. We recommend that you try each of the options out for some time, and then decide which one works for you.

Add SEO Meta Box
This option adds an SEO Meta box to your pages. Using the SEO Meta box, you can customize which of Rank Math’s diverse SEO features are enabled for the page, which in turn gives you total control over your SEO efforts. We recommend that you turn ON this setting. You can learn more about Rank Math’s Meta Box here.

Bulk Editing
If you already have a bunch of pages on your website when you first installed Rank Math, then this option will help you optimize them easily.
Enabling this feature introduces a bulk editing feature in your page listing screen, using which you can edit multiple pages in one go. There are 3 options to choose from.
- Disable: Disables the Bulk Editing Feature
- Enabled: Enables the Bulk Editing feature with read and write options
- Read Only: Enables the Bulk Editing feature with only read options.
We recommend that you enable this setting with both read and write options if you already have a lot of pages to optimize. Otherwise, you can keep it at Read-only mode.

Let us now move on to the next tab, the Media tab.
Attachments
The Media tab contains all the settings that affect the Title and Meta settings of the media and attachments on your website. Here is a preview of all the settings available.
Let us understand each of the settings in detail.
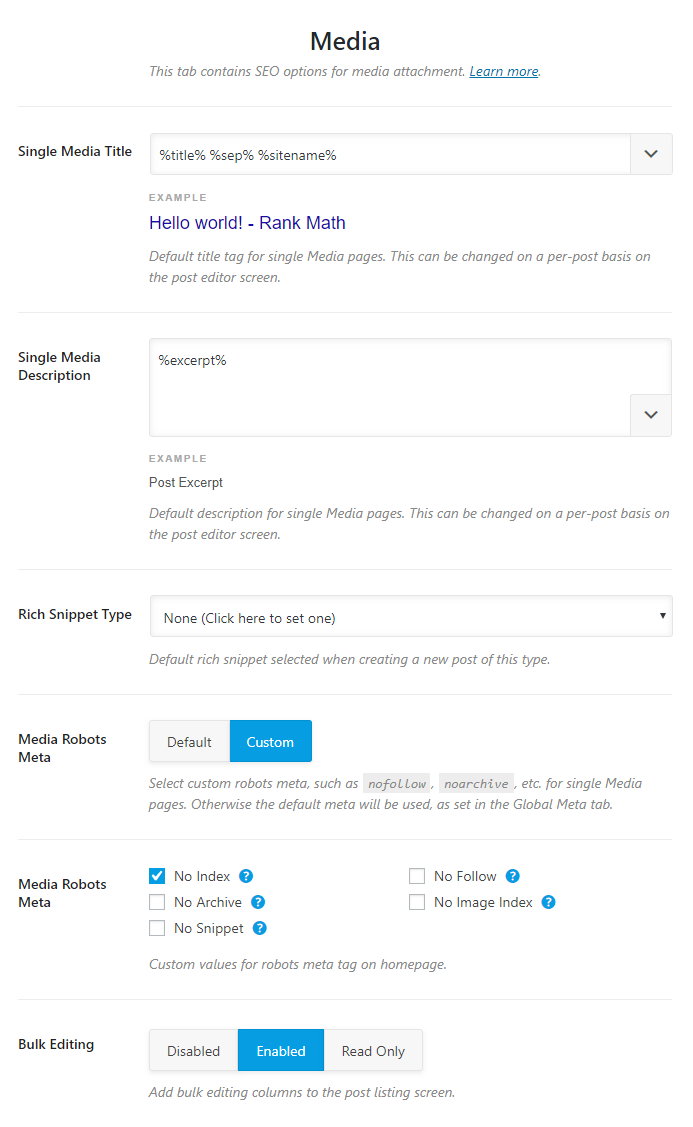
Single Media Title
This option lets you create a template that helps you give your media a title. You can enter a static text for the media titles, or use the supported variables to create a dynamic title. A sample title with a few variables is created by default.
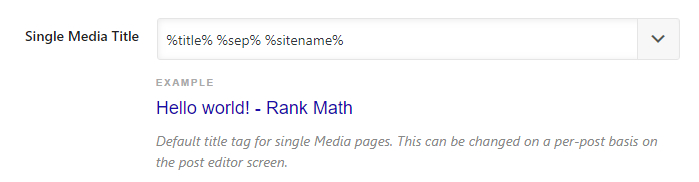
To see a list of all the supported variables, click the drop-down button on the top right of the text field. You can scroll through the list of variables, or filter them by typing any characters on your keyboard. The preview below the text field updates in real-time so you can see how your created template will affect the title.
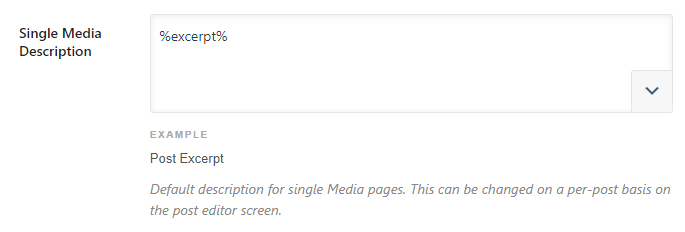
Single Media Description
This option lets you create a template that helps create a description for your media. You can enter a static text for the media description, or use the supported variables to create a dynamic one.
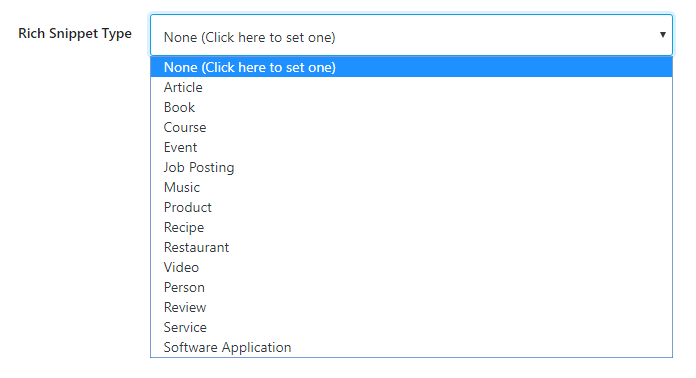
Rich Snippet Type
This option lets you select a default rich snippet to be associated with your media. Click the text field to see a list of all the supported rich snippets and select the one that describes your media the closest.
Headline
The Headline option will only appear if you select any Rich Snippet from the available options above. Here you will create a dynamic template for your media headlines using the variables we showed above, or a static one.

Description
Similar to creating a headline template, here you will create a description template for your media. You have access to the variables to create a dynamic description or create a static one.
Note that the Description field is not supported for the Book Type Rich Snippet. So, if you’re not seeing the Description field, then check if you have the Book Type Rich Snippet selected.
Article Type
As you might have guessed, this option lets you select the article type your media would classify as. For obvious reasons, this field is only visible when you select the Article Type Rich Snippet in the Rich Snippet Type Options.
There are 3 options to choose from. The Article and Blog Post type are similar and can be used interchangeably, while the News Article is limited to factual news reporting only.
Media Robots Meta
This option lets you configure a Meta Robots for your meta. You can either choose the default Robots Meta to be used which are configured in Rank Math’s settings, or choose the custom option.

If you choose the custom option, another set of settings will appear below it, which we’ve discussed below.
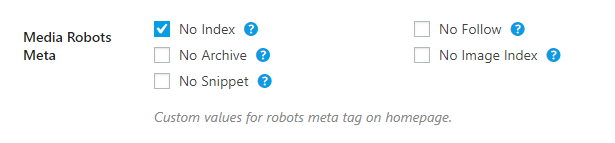
Media Robots Meta
These options appear when you select the Custom Media Robots Type option and give you access to the specific settings for the Robots Meta for your media. Using the checkboxes, select all the directives that you would want to apply to your media.
Bulk Editing
This option enables the bulk editing for Media Meta Data and is particularly useful when you have tons of posts on your website for which you need to optimize your meta for.

This covers all the settings in the Pages tab. Let us move onto the next section.
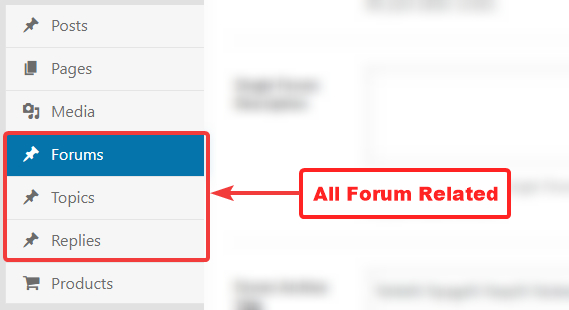
Forums
The Forums Section deals with all Meta and Titles setting related to forums. You will see this section only if you have a forum plugin installed that Rank Math supports. Currently, Rank Math supports bbPress and support for more forums are in the works.
If you’ve installed bbPress but still don’t see this section, make sure that the bbPress module is enabled. Head over to Rank Math > Dashboard.
If you just enabled the plugin, make sure to refresh the Rank Math’s settings page, and all the Forum related sections should pop right up.
There are 3 sections in the Title and Meta Settings that are related to Forums.
Forums, Topics, and Replies
Before getting into the settings, we would like to explain the difference between Forums, Topics, and Replies for better understanding.
Every forum will have some subtopics to discuss. Together with that, forums can also be about multiple things. For example, a gaming forum could have different topics for Sony, Nintendo, and Microsoft consoles.
In Rank Math’s context, these topics are called Forums. You can think of each forum being a separate topic or section.
The topic would be about a specific topic or thread inside a forum.
Replies are replies to specific topics.
We’ll discuss each of the sections, starting with the Forums section. Here are all the settings that you should see in the Forums section.
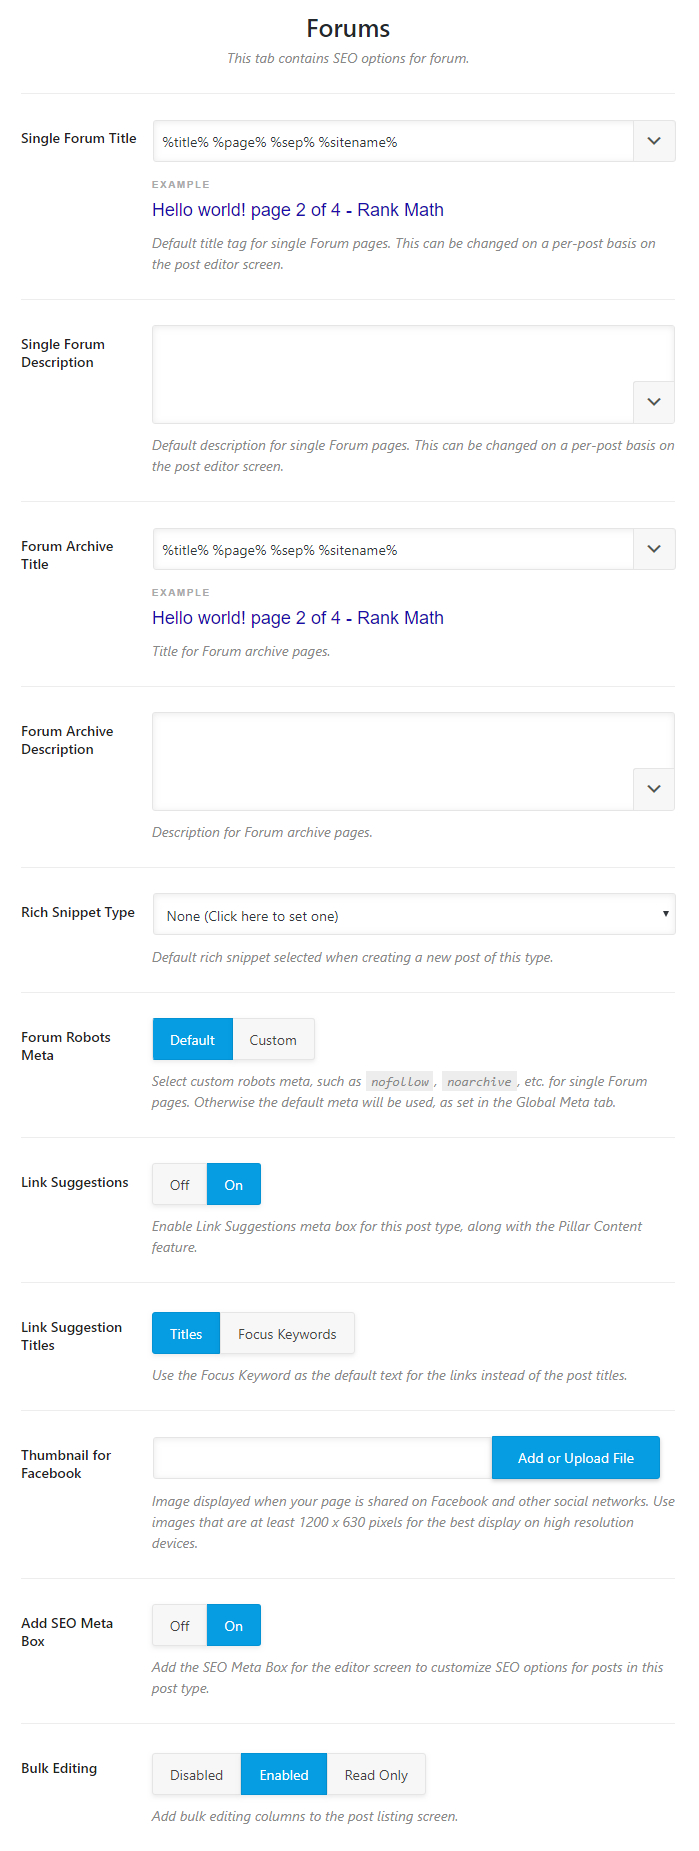
Let us discuss each of the settings.
Single Forum Title
Here you can create a template that will be used to create the titles to your forum. You have access to plenty of variables to create a useful template of your choice, and a default one is even created for you.
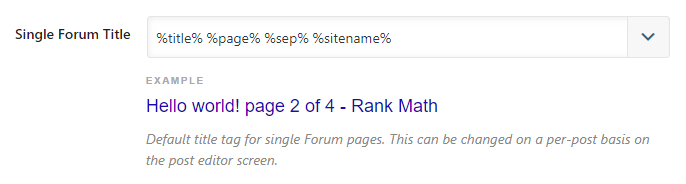
To see all the variables available, click the dropdown button at the end of the text area. You can scroll to see all the variables, or type in a few keywords to filter the variables. Once you add or remove a few variables, the real-time preview will let you see how the template will appear in the actual forum. Please note that not all variables are supported in all areas. For example, the search query variable will only be supported on search pages.
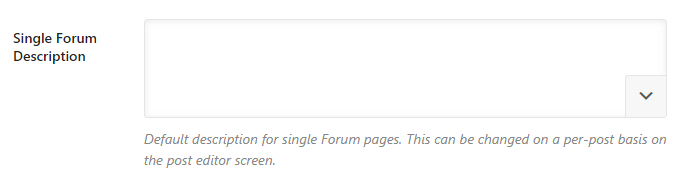
Single Forum Description
This field lets you create a template for the forum’s descriptions. The same variables that you saw in the Forum Title are also available to use here. You can use those variables to define a dynamic template or use a static one.
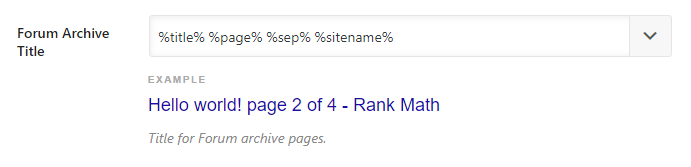
Forum Archive Title
Here you create the template that will be used to create the title of the forum archives. A sample template would already be created for you, and you can customize it using the variables we showed you above.
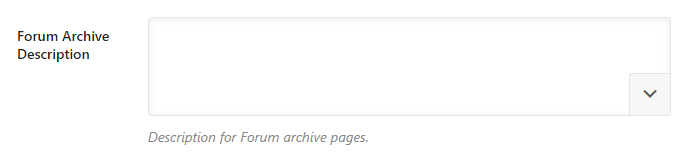
Forum Archive Description
In this field, you create the template that will be used to create the descriptions for your forum archives. It is the same deal as all the other fields, either use the variables to create a template or create a static one.
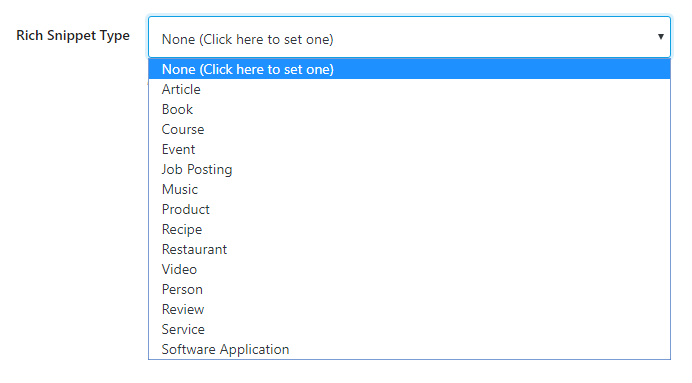
Rich Snippet Type
Here you select Rich Snippet that will be used for the forums. There are plenty of options available, so choose the one that suits the topic of your forum the closest.
- 8 Morning Rituals To Be More Productive At Work
- Bad Things To Avoid Doing At Work [9 Things You Should Never Do At The Office]
- How To Be Successful In Life: 11 Insightful Tips
Headline
The Headline field only appears if you have selected a default Rich Snippet Type. Here, you can create a template that will be used to create the Headings for your Rich Snippets. Similar to the other settings, you have access to a ton of variables to create the headline of your choice.

Description
The description field will also only appear if you select a Rich Snippet in the Rich Snippet Type field, except for the Books Rich Snippet, as Descriptions are not supported for books yet.
Here, you will create a template that will be used to create Rich Snippet Descriptions for your forums. A sample description should already be created, and you can customize it using variables.

Article Type
The Article Type Setting only appears when you select the Article Type Rich Snippet from the Rich Snippet Type selection above, and it helps define the type of article the forum post is. You have 3 options to choose from.
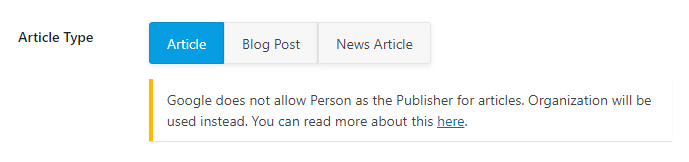
For forums, you can choose the Article or the Blog Post option. The News Article is specifically targeted for News Articles, and if you do have a news section on your forum, you can select the Article Type manually for those forums.
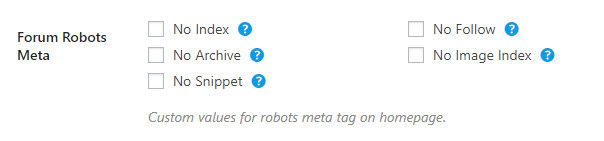
Forum Robots Meta
Here you can set the Robots meta for your forums. You can choose the default setting, which means that forums will inherit your global robots meta settings, or define custom settings for the forums. If you choose custom, then additional settings should appear below.

Forum Robots Meta Custom Settings
This setting shows up if you choose the Custom setting in the Forum Robots Meta option. As you can see, you can pick and choose the Robots Meta you want to apply to your forums. Unless it is a private forum, we would recommend that you keep all of these disabled.
Link Suggestions
When Link Suggestions is enabled, Rank Math intelligently scans the content of your website, and suggest links that you might want to link to from your current post, page, or forum. We absolutely recommend this feature to be enabled for posts and pages, but for forums, it depends. We recommend that you turn it on, and see if you use it often. If you do, keep it enabled, otherwise disable it.

Link Suggestion Titles
The Link Suggestion Title field is only visible when Link Suggestions is enabled. This option lets you choose how Rank Math will primarily search for related content. You can use forum titles or the focus keyword for the forum.

Thumbnail for Facebook
This option lets you choose a default thumbnail for Facebook sharing. If any of the forums are shared on Facebook, and they do not have a custom thumbnail selected for Facebook, this image will be used instead. Here is how you set one.
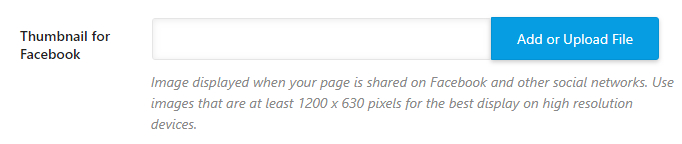
Click the Add or Upload Button to open the WordPress Media Manager. Once it is open, choose the thumbnail image that you’d like to use, or upload it. Once the image is uploaded and selected, click the “Choose this file” button.
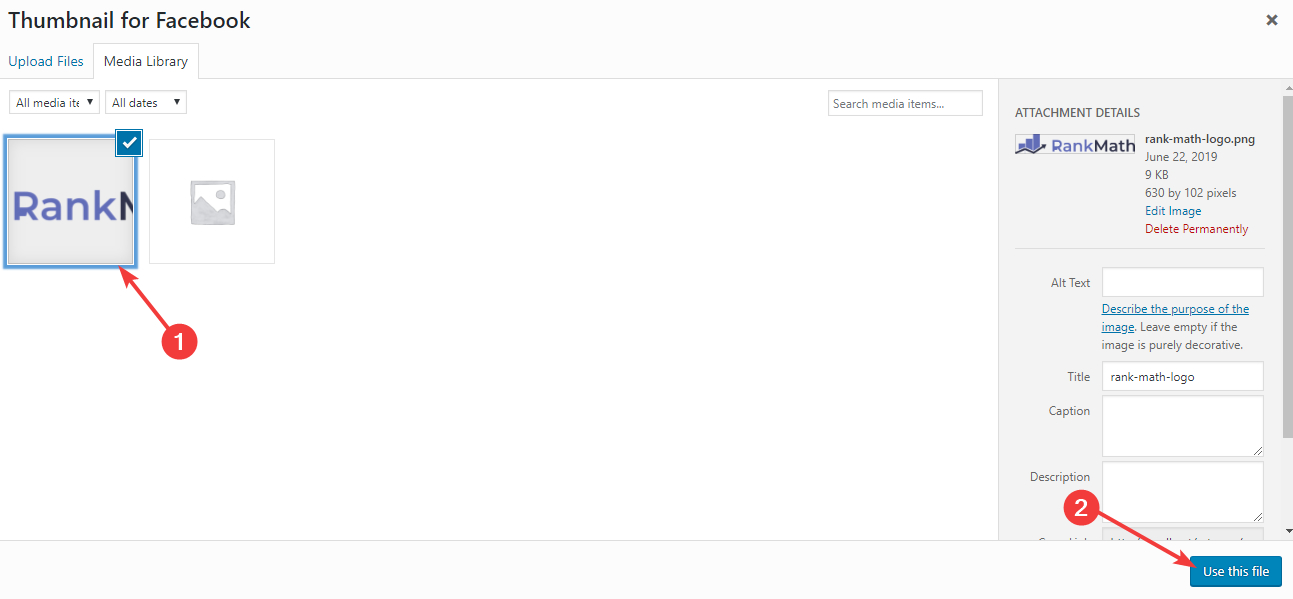
The image should now show up just below the setting. Here, we’ve selected the Rank Math logo, but you can upload any image that fits your website.
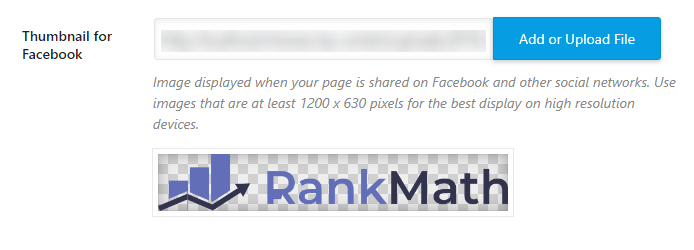
You can also change the image after it’s set by clicking the “Add or Upload File” button again and choosing a different file.
Add SEO Meta Box
Rank Math features a powerful Meta Box that helps you optimize your content for SEO, and you can learn more about it here. This option lets you enable or disable the Meta box for forums.

Bulk Editing
Using Rank Math, you can edit a lot of your posts in bulk, which can save you a lot of time. This feature might not be useful for a new website, but for websites that have a lot of old content, this feature can be invaluable.

This covers all the Forum related settings. Let us move to the next section.
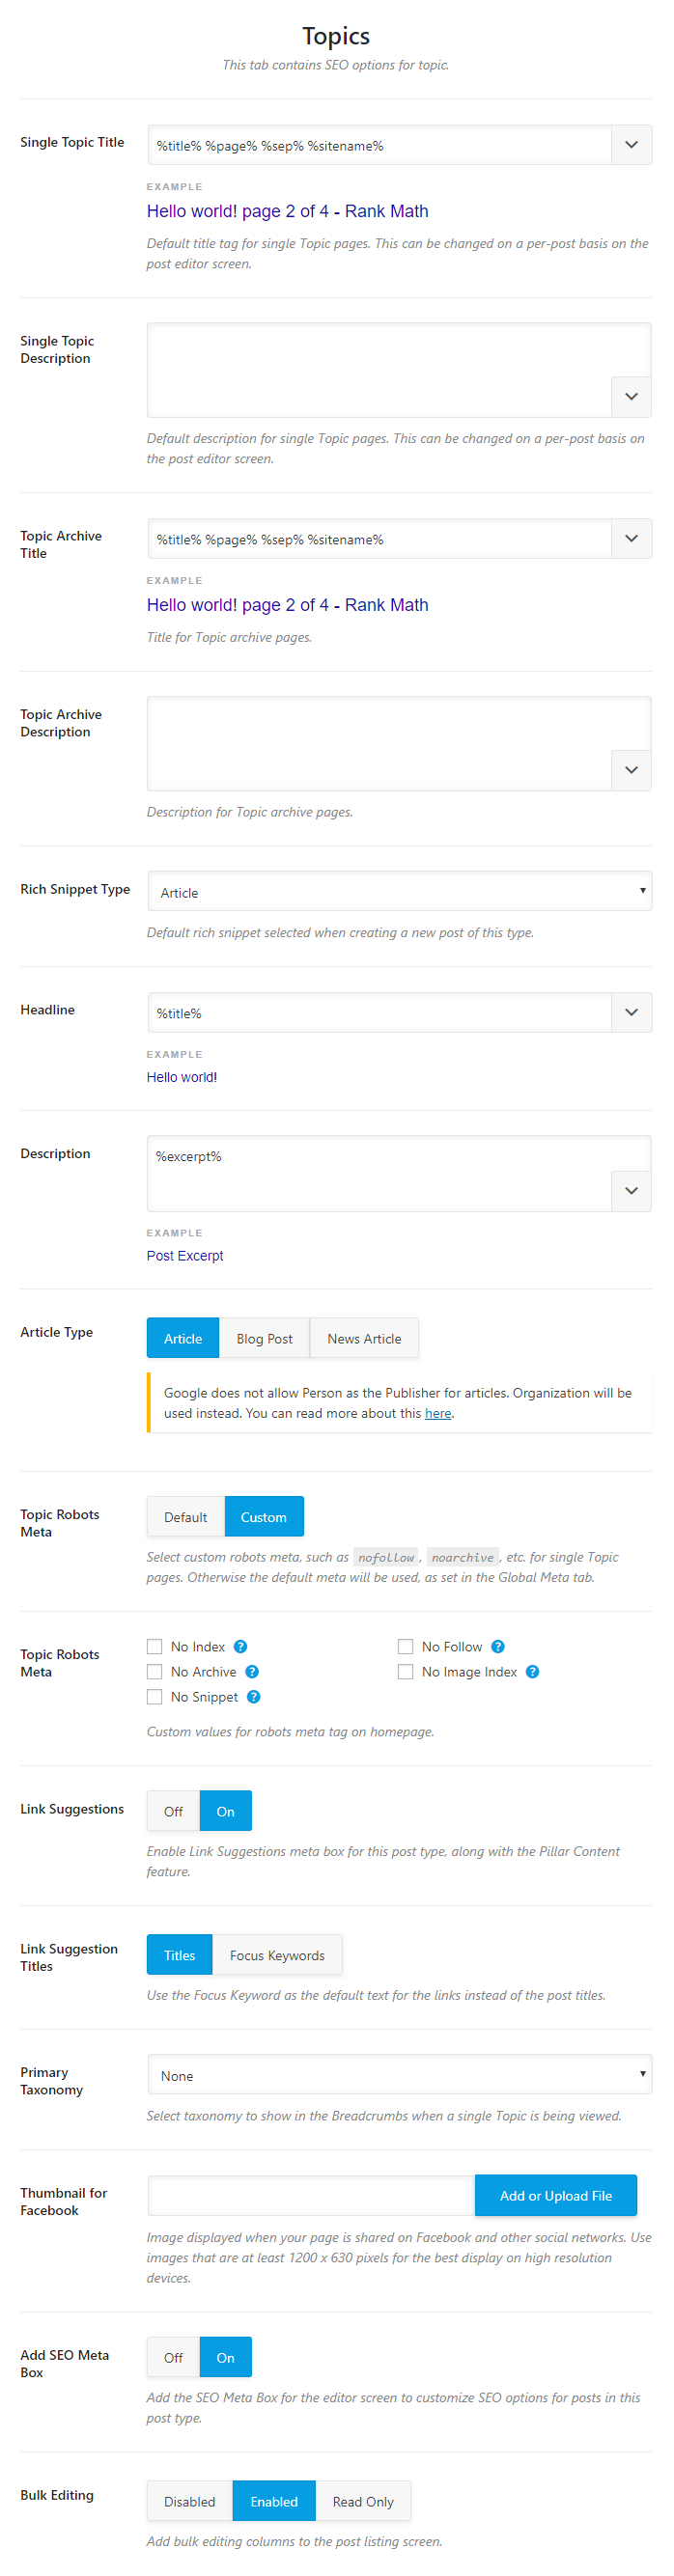
Topics
A Forum is a broad topic which can have multiple Topics under it, and the Topics section deals with the Meta and Titles of exactly those. Here are all the settings that are available in the topics section.
Let us understand each of the settings.
Single Topic Title
This setting is used to create a title format for the topics that will be created in the forum.
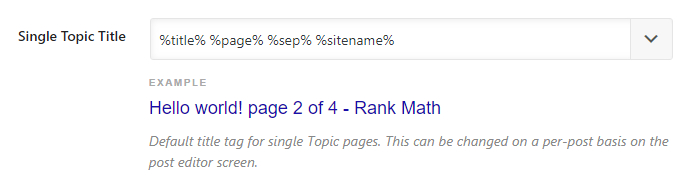
A sample title format should be visible to you along with a live preview just below the setting.
To customize the title tag, you can use one of the many variables available. To see all the variables, click the drop-down at the edge of the text area.
You can scroll and see all the variables available, and also type in keywords to filter the keywords. As you make any changes, the real-time preview will also update, in real-time.
You should know that while there are a lot of variables to choose from, some variables are supported only for specific pages. For example, the search query variable will only work for search pages. For any variable that has special requirements, a small notice has been added next to it.
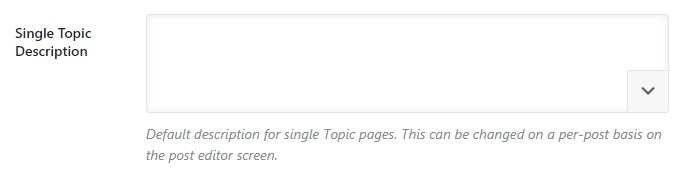
Single Topic Description
This field lets you create a template for setting the descriptions of topics. Similar to the Single Topic Title discussed above, you can use all sorts of variables to create a template.
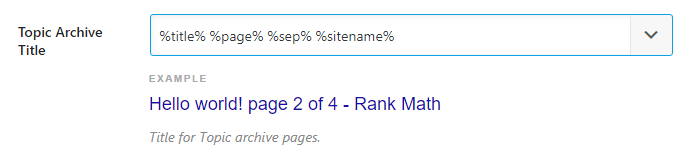
Topic Archive Title
This field lets you create a title template for your topic archives. You have access to all the variables here as well, and a sample format should be already created for you. As you make any changes to the template, the preview below the text area will update in real time.
Topic Archive Description
This option lets you create a template for Topic Archives. You can use the same variables we demonstrated above to create an optimized Topic Archive Description format.
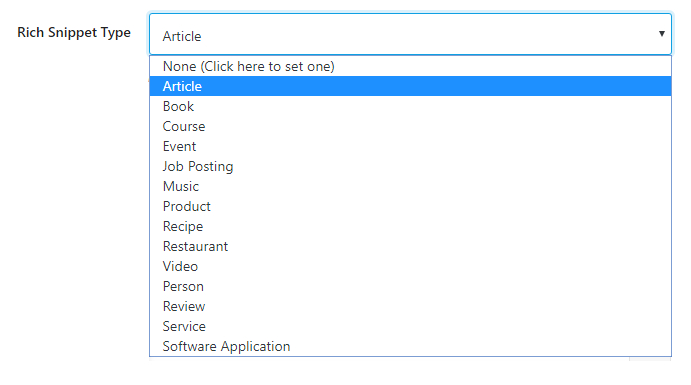
Rich Snippet Type
Here you can choose what type of Rich Snippets data should Rank Math add to your topics. There are many options to choose from, and you should select the option that suits your Forum Topics the closest.
Headline
The Headline option only appears once you Select a Rich Snippet type from the Rich Snippet Type option. Here you can create the headline format that will be used for the Rich Snippet for the topic. You have access to all kinds of variables, which you can see using the dropdown, and you can even create a static format if you prefer.
A sample Headline format should already be visible to you, and as you make any changes, the preview below the setting will give you an idea of how the headline will appear, in real time.

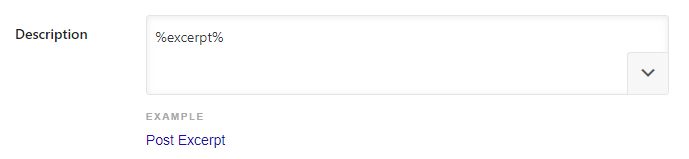
Description
This option is also only visible when you select a Rich Snippet from the Rich Snippet Type options, with one exception. If you select the Books Rich Snippet type, this field will not be visible, as it is not supported.
In this setting, you will create a template that will be used to create a description of the topics. You can choose from the many variables available to create a template, and combine them with static text as well. A live preview is available below the description, and it should update in real-time as you make any changes to the template.
Article Type
The Article Type Setting will only be visible if you select the Article Rich Snippet from the Rich Snippet Type setting. Here, you have 3 options to choose from—Article, Blog Post, and News Article.
Article and Blog Post are quite similar and should be used for any opinionated content while the News Article should only be used for factual news reporting.
For topics, the Article type or the Blog Post type option should serve better.
You might have noticed the small notice appearing below the options. That appears because Google does not support the Article Rich Snippet when your website is set up as a personal website. If you see this notice, then you might have configured your website as an Individual during Rank Math’s Setup Wizard.
To stay compliant with Google’s Rich Snippet Guidelines, Rank Math will automatically substitute the metadata for a personal site to an organization, and hence, you can safely ignore the notice.
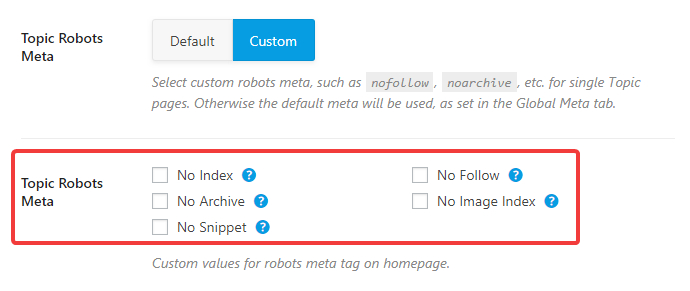
Topic Robots Meta
Here you can configure the Robots Meta that will be used for your Forum Topics. There are 2 options to choose from, Default and Custom. If you choose the default option, then the Global Robots Meta will be used for the Forum Topics, and if you choose the custom option, a new set of settings will open up below it, which will let you select configure the robots meta manually.

Topic Robots Meta Custom Settings
This setting will appear only if you select the Custom Settings in the Topic Robots Meta setting, and it lets you configure a custom meta robots configuration for your topics. As you can see from the image, all the meta robot settings become available to you as checkboxes, and you can select and enable the ones you like.
Link Suggestions
Link Suggestions is a feature unique to Rank Math, which helps you take advantage of internal linking opportunities. When enabled, Rank Math will intelligently scan your content and suggest internal links based on the current post.
This feature is quite useful for blogs, but for forums, it depends on how the forum is set up and run. There is no harm in keeping this enabled even if you don’t use it for forums, so we suggest that keep this enabled.

Link Suggestions Titles
This setting will only be visible if you enable this Link Suggestions feature.
This option configures who Rank Math looks for internal linking opportunities. There are 2 options to choose from; Titles and Focus Keywords.
If you select the Titles option, then Rank Math will look for internal linking opportunities based on the title of the topic. If the Focus Keywords option is selected, then Rank Math will make the search based on the focus keywords of the topic.
Since most of the content on a forum should be user-generated, and thus no focus keywords will be set, we recommend that you keep this setting configured on Titles.

Primary Taxonomy
Here you can select the Primary Taxonomy that will be applied to the topics that are created.

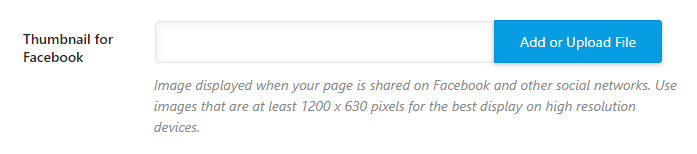
Thumbnail for Facebook
In this option, you will select the default thumbnail that will be used if a topic is shared on Facebook. Topics usually don’t have options to configure custom sharing images, and a user who is creating a topic won’t take time out to create a custom image. That is why it is important to create a default one. Click the “Add or Upload File” button to get started.
When you click the button, WordPress’s media manager will open up. If the default image is already uploaded to WordPress, select it, or else, upload it. After uploading and selecting the image, click the “Use this File” button.
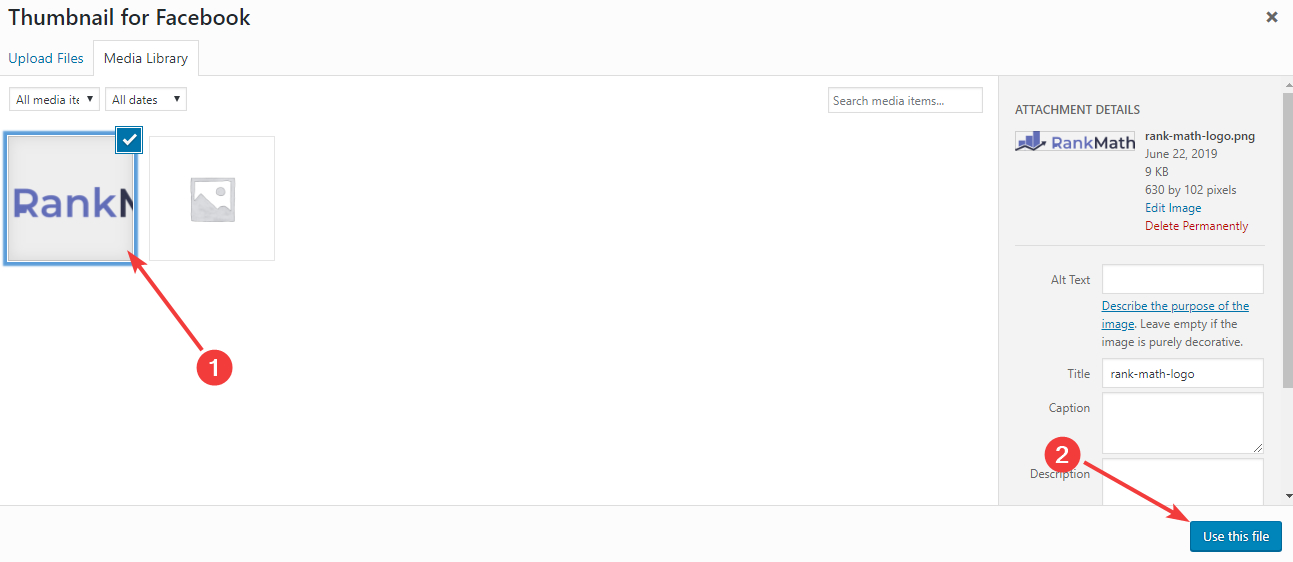
The image should now be visible just below the setting. If you want to change the image in the future, click the “Add or Upload File” button again follow the process we just described. You can also delete the image by hovering your mouse near the uploaded image and clicking the “X” that appears on the top right of the image.
Add SEO Meta Box
This option enables or disables the SEO Meta Box for topics. The SEO Meta Box hosts plenty of options to optimize your posts for SEO, and you can learn more about it here.

Bulk Editing
This option lets you configure or disable the bulk editing feature for topics. If you already have a lot of content on your website when you installed Rank Math, then you should use the bulk editing feature to optimize them together. For new websites, we would recommend that you test it out first and see if you find it useful.
Replies
Replies, in the context of forums, are the individual replies that any topic in the forum will receive.
Since each reply can technically qualify as an individual piece of content, optimizing replies can fetch you a fair amount of traffic.
And that is what the Replies section is for. Here, you will configure all the Title and Meta settings related to Replies in the forums. Here are all the settings that should be visible in the Replies section.
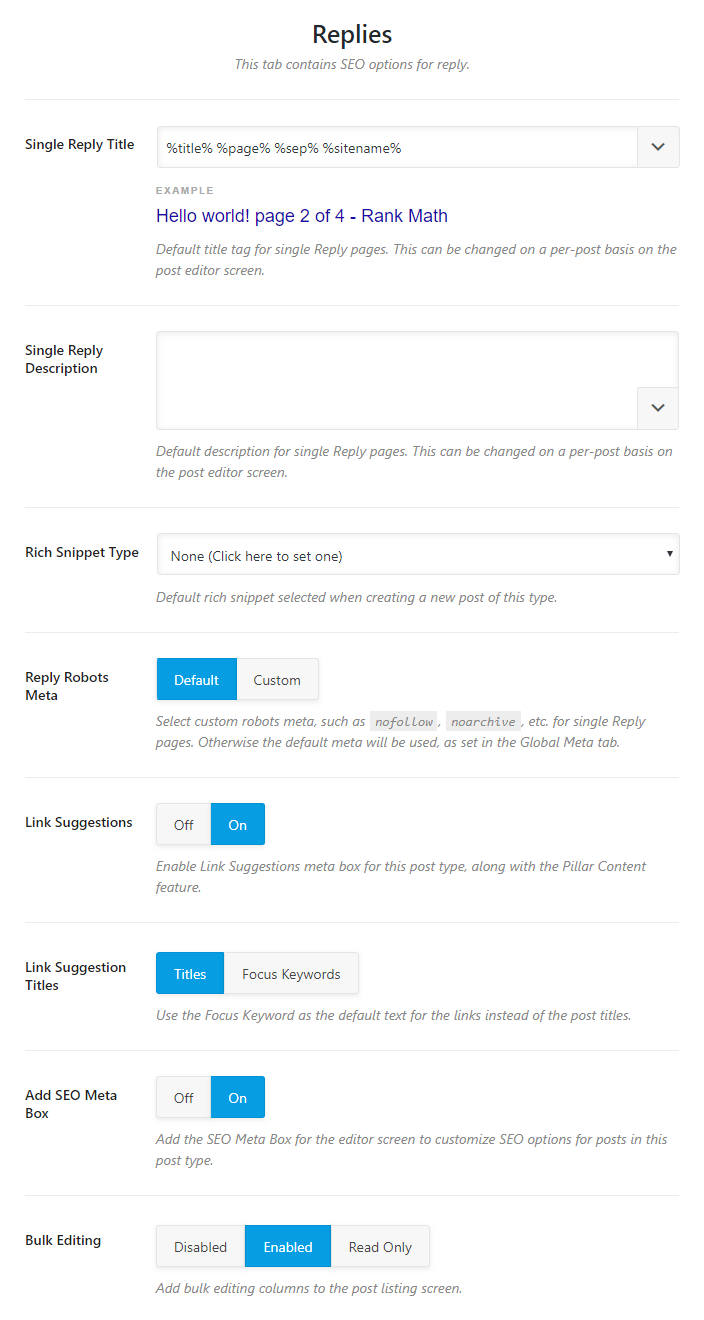
Single Reply Title
This setting is used to create the title format for the Replies that will be created in the forum.
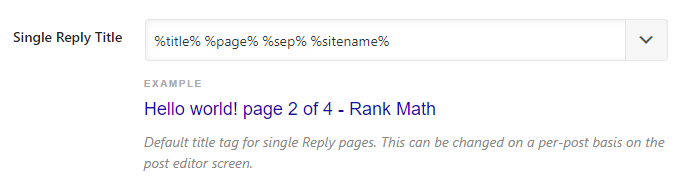
A sample title format should be visible to you along with a live preview just below the setting.
To customize the title tag, you can use one of the many variables available. To see all the variables, click the drop-down at the edge of the text area.
You can scroll and see all the variables available, and also type in keywords to filter the keywords. As you make any changes, the real-time preview will also update, in real-time.
You should know that while there are a lot of variables to choose from, some variables are supported only for specific pages. For example, the search query variable will only work for search pages. For any variable that has special requirements, a small notice has been added next to it.
Single Reply Description
This field lets you create a template for setting the descriptions of replies. Similar to the Single Reply Title discussed above, you can use all sorts of variables to create a template.

Rich Snippet Type
Here you can choose what type of Rich Snippets data should Rank Math add to your Replies. There are many options to choose from, and you should select the option that suits your Topic Replies the closest.
Headline
The Headline option only appears once you Select a Rich Snippet type from the Rich Snippet Type option. Here you can create the headline format that will be used for the Rich Snippet for the reply. You have access to all kinds of variables, which you can see using the dropdown, and you can even create a static format if you prefer.
A sample Headline format should already be visible to you, and as you make any changes, the preview below the setting will give you an idea of how the headline will appear, in real time.

Description
This option is also only visible when you select a Rich Snippet from the Rich Snippet Type options, with one exception. If you select the Books Rich Snippet type, this field will not be visible, as it is not supported.
In this setting, you will create a template that will be used to create a description for the Replies. You can choose from the many variables available to create a template, and combine them with static text as well. A live preview is available below the description, and it should update in real-time as you make any changes to the template.
Article Type
The Article Type Setting will only be visible if you select the Article Rich Snippet from the Rich Snippet Type setting. Here, you have 3 options to choose from—Article, Blog Post, and News Article.
Article and Blog Post are quite similar and should be used for any opinionated content while the News Article should only be used for factual news reporting.
For replies, the Article type or the Blog Post type option should serve better.

You might have noticed the small notice appearing below the options. That appears because Google does not support the Article Rich Snippet when your website is set up as a personal website. If you see this notice, then you might have configured your website as an Individual during Rank Math’s Setup Wizard.
To stay compliant with Google’s Rich Snippet Guidelines, Rank Math will automatically substitute the metadata for a personal site to an organization, and hence, you can safely ignore the notice.
Reply Robots Meta
Here you can configure the Robots Meta that will be used for your Topic Replies. There are 2 options to choose from, Default and Custom. If you choose the default option, then the Global Robots Meta will be used for the Topic Replies, and if you choose the custom option, a new set of settings will open up below it, which will let you select configure the robots meta manually.

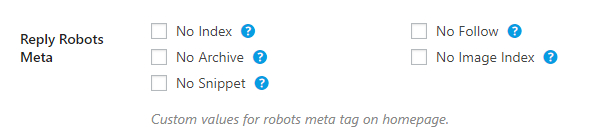
Reply Robots Meta Custom Settings
This setting will appear only if you select the Custom Settings in the Reply Robots Meta setting, and it lets you configure a custom meta robots configuration for your Replies. As you can see from the image, all the meta robot settings become available to you as checkboxes, and you can select and enable the ones you like.
Link Suggestions
Link Suggestions is a feature unique to Rank Math, which helps you take advantage of internal linking opportunities. When enabled, Rank Math will intelligently scan your content and suggest internal links based on the current post.
This feature is quite useful for blogs, but for forums, it depends on how the forum is set up and run. There is no harm in keeping this enabled even if you don’t use it for forums, so we suggest that keep this enabled.

Link Suggestions Titles
This setting will only be visible if you enable this Link Suggestions feature.
This option configures who Rank Math looks for internal linking opportunities. There are 2 options to choose from; Titles and Focus Keywords.
If you select the Titles option, then Rank Math will look for internal linking opportunities based on the title of the reply. If the Focus Keywords option is selected, then Rank Math will make the search based on the focus keywords of the reply.
Since most of the content on a forum should be user-generated, and thus no focus keywords will be set, we recommend that you keep this setting configured on Titles.

Thumbnail for Facebook
In this option, you will select the default thumbnail that will be used if a reply is shared on Facebook. Replies usually don’t have options to configure custom sharing images, and a user who is creating a reply won’t take time out to create a custom image. That is why it is important to create a default one. Click the “Add or Upload File” button to get started.
When you click the button, WordPress’s media manager will open up. If the default image is already uploaded to WordPress, select it, or else, upload it. After uploading and selecting the image, click the “Use this File” button.
The image should now be visible just below the setting. If you want to change the image in the future, click the “Add or Upload File” button again follow the process we just described. You can also delete the image by hovering your mouse near the uploaded image and clicking the “X” that appears on the top right of the image.
Add SEO Meta Box
This option enables or disables the SEO Meta Box for replies. The SEO Meta Box hosts plenty of options to optimize your posts for SEO, and you can learn more about it here.

Bulk Editing
This option lets you configure or disable the bulk editing feature for replies. If you already have a lot of content on your website when you installed Rank Math, then you should use the bulk editing feature to optimize them together. For new websites, we would recommend that you test it out first and see if you find it useful.

Products
The products tab deals with all the Meta and Title related settings related to Products. For obvious reasons, this tab will only be visible to you if you’re using a WordPress addon that is designed to help sell products. Rank Math currently supports WooCommerce, and support for other plugins will be added in the future.
Here are all the settings that you will see in the Products section.
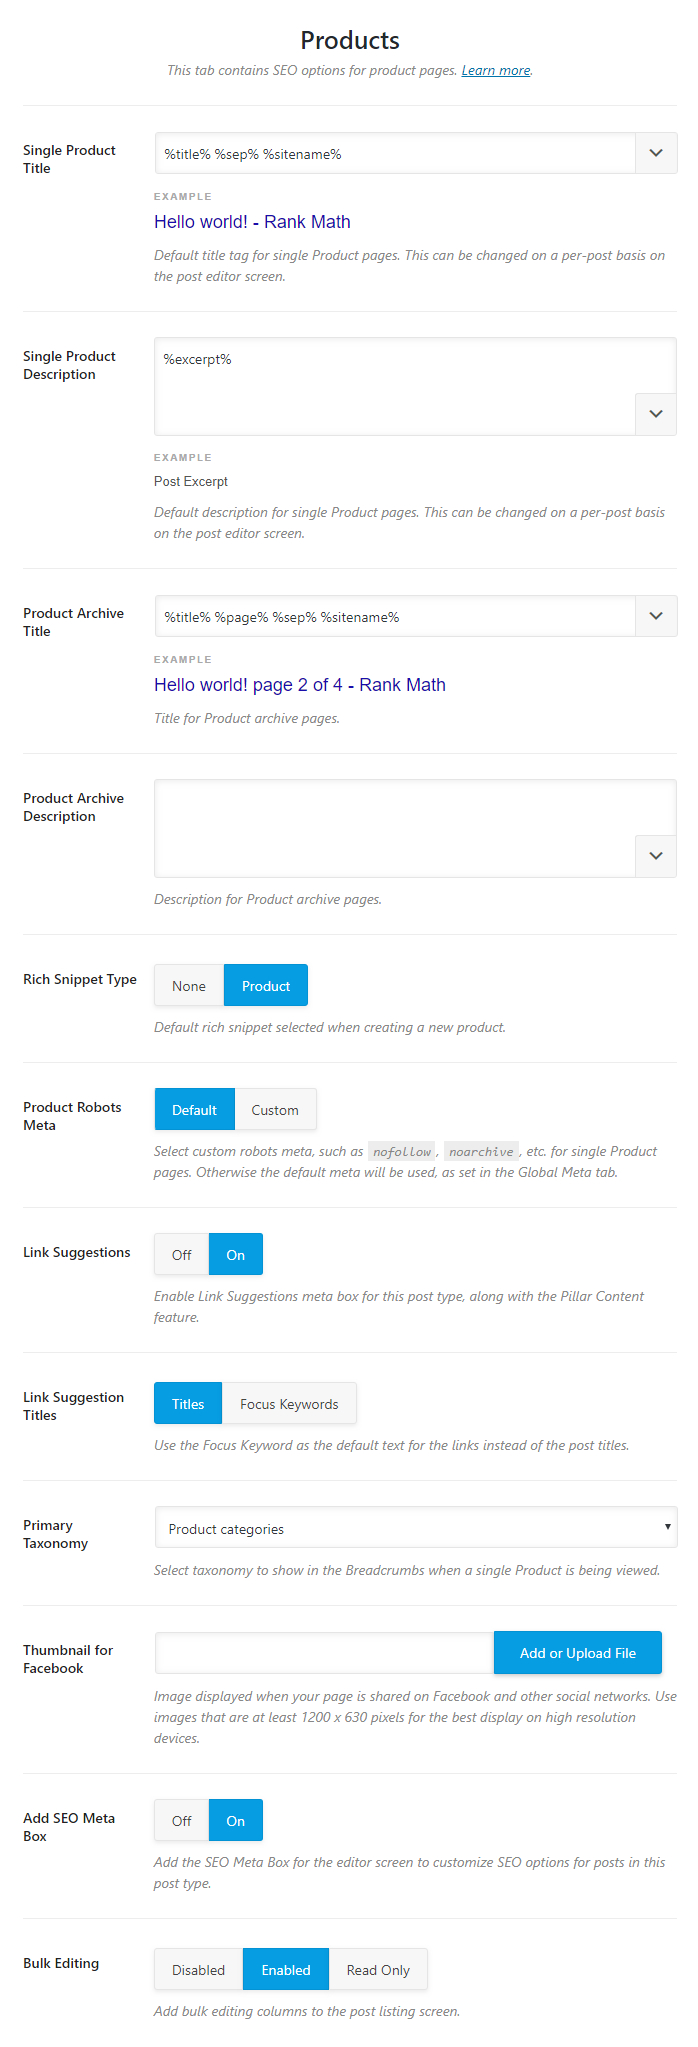
Single Product Title
This setting lets you create a template that will be used to create the title of your products. You can use template variables to create a dynamic title or create a static one, or a mix of both. The variables give you access to the post meta, which can help in creating optimized dynamic titles.
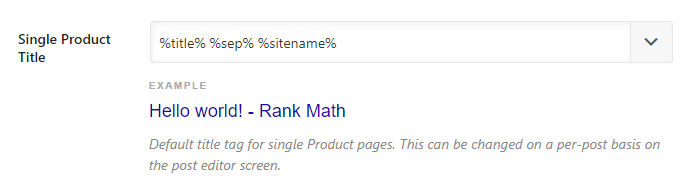
To see all the variables, click the drop-down at the edge of the text area.
You can scroll and see all the variables available, and also type in keywords to filter the keywords. As you make any changes, the real-time preview will also update, in real-time.
You should know that while there are a lot of variables to choose from, some variables are supported only for specific pages. For example, the search query variable will only work for search pages. For any variable that has special requirements, a small notice has been added next to it.
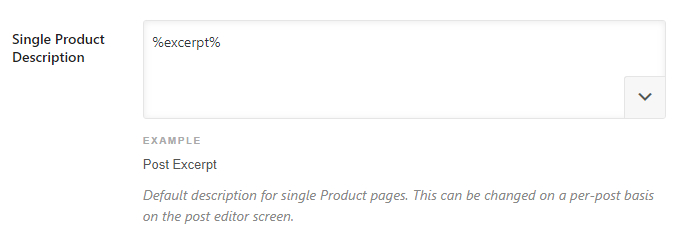
Single Product Description
This field lets you create a template for setting the descriptions of your products. Similar to the Single Reply Title discussed above, you can use all the available variables to create a template. A sample template should also be created for you, and you can use it as well.
As you make any changes the preview just below the setting should update in real-time.
Product Archive Title
This option lets you create a template for the Titles of your Product Archives. You can use the same variables we demonstrated above to create an optimized template. The real-time preview below the text area should help you visualize how the final template will turn out.

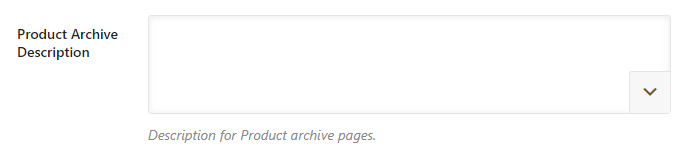
Product Archive Description
This option lets you create a template for the descriptions of your product archives. You can use the same variables we demonstrated above to create an optimized template.
Rich Snippet Type
This option lets you choose a Rich Snippet type. Since we’re dealing with products here, the only 2 options are None or Products. In essence, you can say that this option lets you enable or disable the Product Rich Snippets.

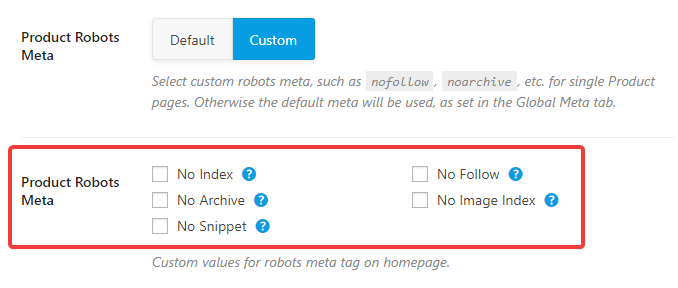
Product Robots Meta
Here you can set the Robots Meta for your products. You can either use the Global defaults by choosing the default option or choose the Custom option to define custom settings.

Products Robot Meta Custom Settings
If you select the Custom option in the Products Robots Meta setting, additional settings will appear below it, which will let you define the meta robots specifically for products. As you can see from the image, all the meta robot directives are available, and you can simply check the ones you want to enable for your products.
Link Suggestions
Link Suggestions is a feature unique to Rank Math, which helps you take advantage of internal linking opportunities. When enabled, Rank Math will intelligently scan your content and suggest internal links based on the current post.
This feature is quite useful for blogs, but for products and eCommerce stores, it depends on how the store is set up and run. As you can probably guess, internal linking is not the primary way users will discover your products, and search, site architecture, up-sells, cross-sells, and related products would be more important. However, there is no harm in keeping this enabled even if you don’t use it, so we suggest that keep this enabled and see if you can find any value in it.

Link Suggestion Titles
This setting will only be visible if you enable this Link Suggestions feature.
This option configures who Rank Math looks for internal linking opportunities. There are 2 options to choose from; Titles, and Focus Keywords.
If you select the Titles option, then Rank Math will look for internal linking opportunities based on the title of the product. If the Focus Keywords option is selected, then Rank Math will make the search based on the focus keywords of the product.
How you will configure this product will depend on what kind of products you’re selling and if you’re using the Link Suggestions feature in the first place. If you a variety of products in different categories, then the Focus Keyword option will be more useful—if you’ve set up focus keywords for the products. If you have multiple products in multiple categories, then the Titles option would suit better.

Primary Taxonomy
This option lets you select the Primary Taxonomy for the products. Click the drop-down and select the taxonomy most suitable for your products.

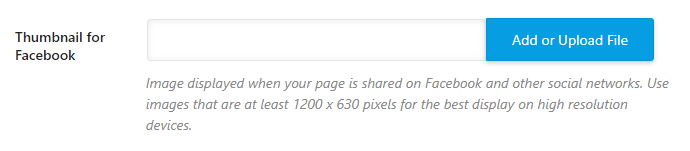
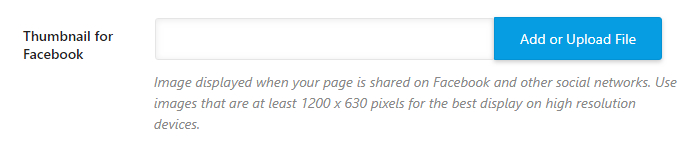
Thumbnail for Facebook
This option lets you select the default image for Facebook sharing. When any of your products are shared on Facebook, Facebook does not use the product image as the thumbnail. Instead, it looks for a specific image defined by the OpenGraph protocol.
Ideally, you should be configuring the sharing image for each of the products; Rank Math does have the functionality to do so. However, if you have a lot of products, it can take some time. In the meantime, you can set up a default sharing image.
Click the “Add or Upload File” button to get started.
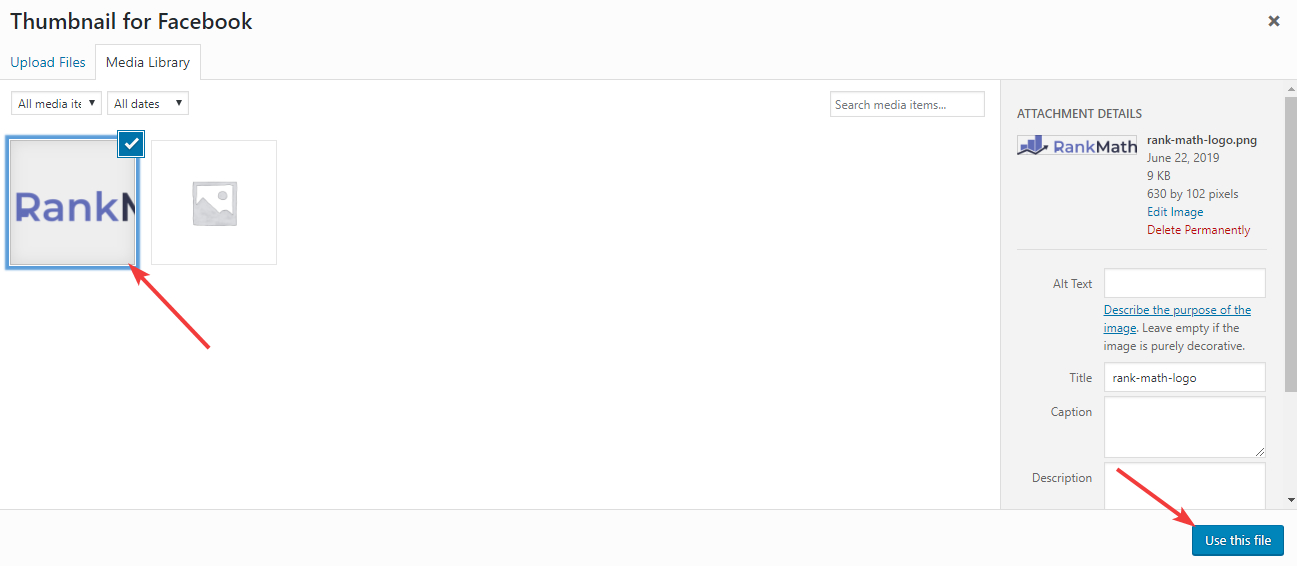
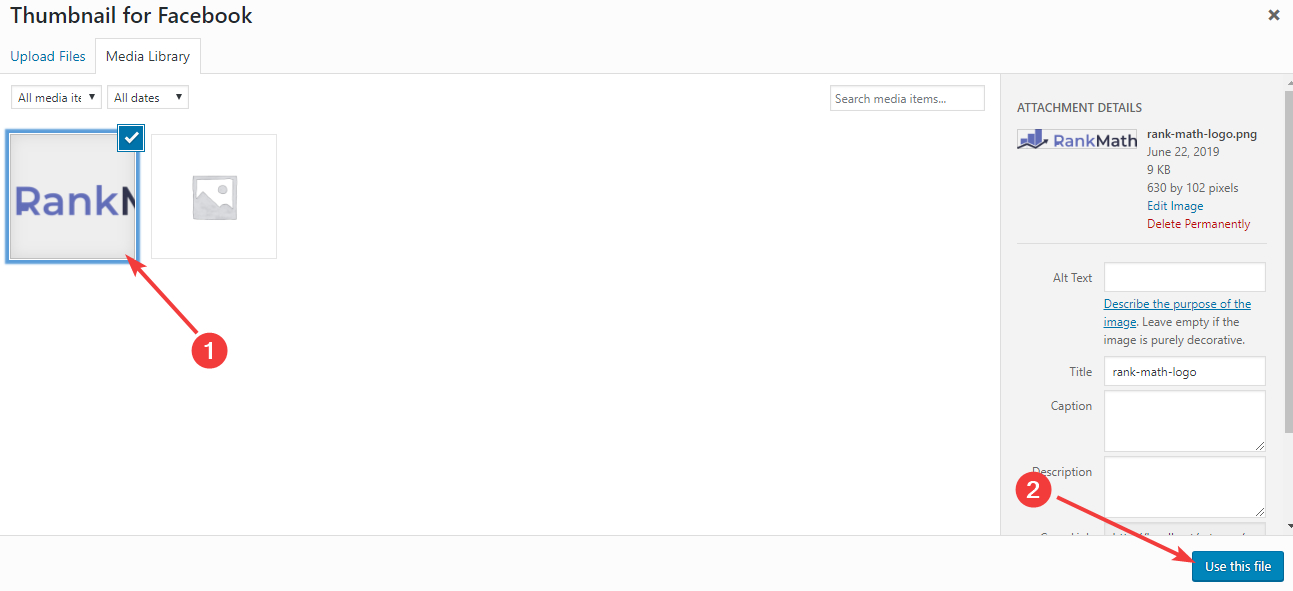
When you click the button, WordPress’s media manager will open up. If the default image is already uploaded to WordPress, select it, or else, upload it. Remember, the ideal dimensions for the sharing image are 1200 pixels by 630 pixels. After uploading and selecting the image, click the “Use this File” button.
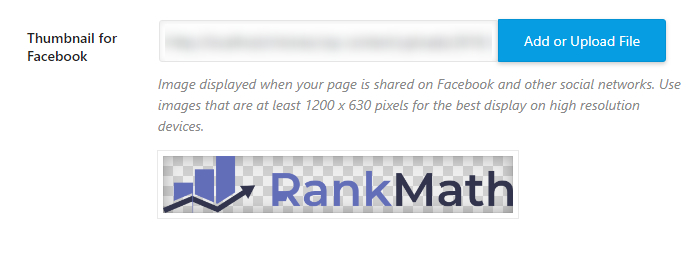
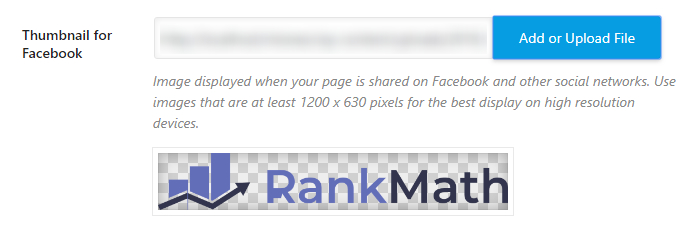
The image should now be visible just below the setting. If you want to change the image in the future, click the “Add or Upload File” button again follow the process we just described. You can also delete the image by hovering your mouse near the uploaded image and clicking the “X” that appears on the top right of the image.
Add SEO Meta Box
This option enables or disables the SEO Meta Box for products. The meta box hosts many important features that will prove crucial when optimizing your products. Therefore, we recommend that you enable the Meta Box. To learn more about the Meta Box, you can refer the dedicated guide we’ve written for it

Bulk Editing
This option lets you configure or disable the bulk editing feature for Products. If you already have a lot of products on your website when you installed Rank Math, then you should use the bulk editing feature to optimize them together. For new websites, we would recommend that you test it out first and see if you find it useful.

This covers all the settings in the Products section. Let us move on to the next section.
Categories
The Categories Tab affects the meta titles and descriptions of your categories. Here is an image showing all the options in the Categories tab.
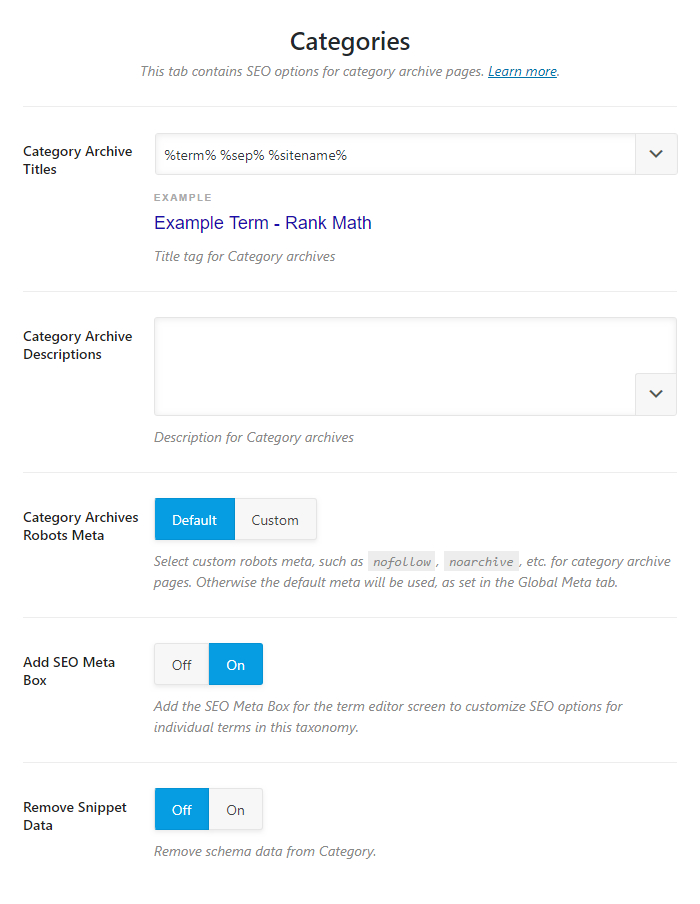
Let us understand the impact of each of the settings in detail.
Category Archive Titles
This option lets you create a template for creating meta descriptions for category archive pages. You can create a static template or create a dynamic one using variables.
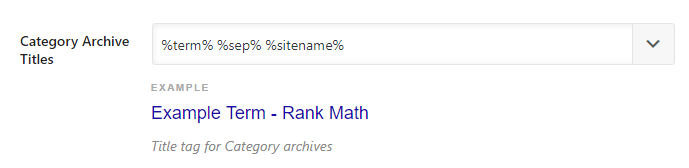
To see all the variables you have access to, click the drop-down button on the top right of the text field. A drop-down menu will appear, which will contain all the variables. You can scroll to see all the variables, or filter them by typing any characters on your keyboard.
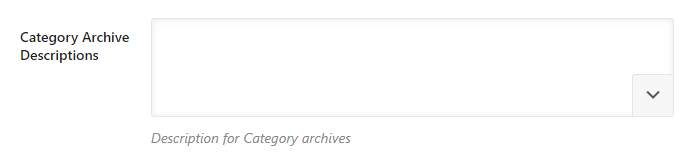
Category Archive Descriptions
This option lets you create a template for creating meta descriptions for category archive pages. You can create a static template or create a dynamic one using variables.
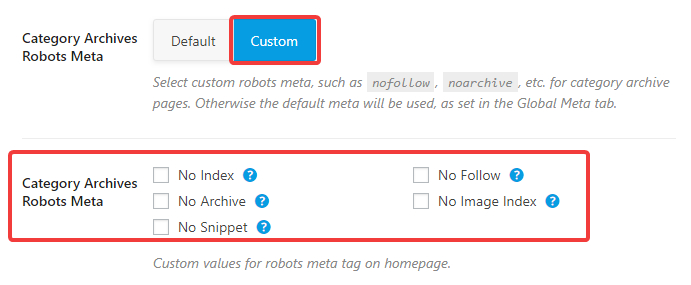
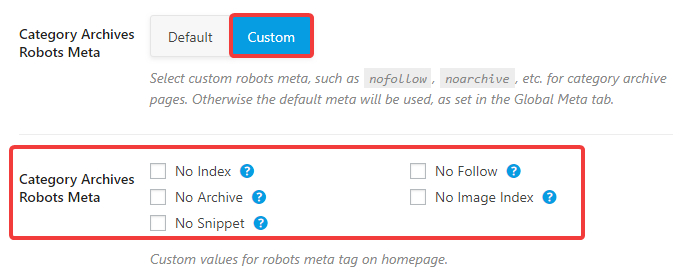
Category Archives Robots Meta
This option lets you customize the robots meta for category archive pages. You can either leave them at the default settings that were set during Rank Math’s setup or set them to custom settings.

If you choose the custom option, another set of options will appear below it which will allow you to pick the meta robots tags specifically.
Add SEO Meta Box
This option adds an SEO Meta box on the category archive page editor screen. Using the Meta box, you can customize the SEO settings for the different categories.

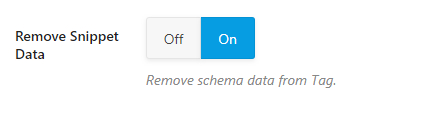
Remove Snippet Data
This option lets you keep or remove Schema related data from your category pages. Since Product based Schema is meant to be used for individual products, enabling this option can keep your categories clean.

This covers all the settings in the Categories tab, let’s check out the next tab, the Tags tab.
Tags
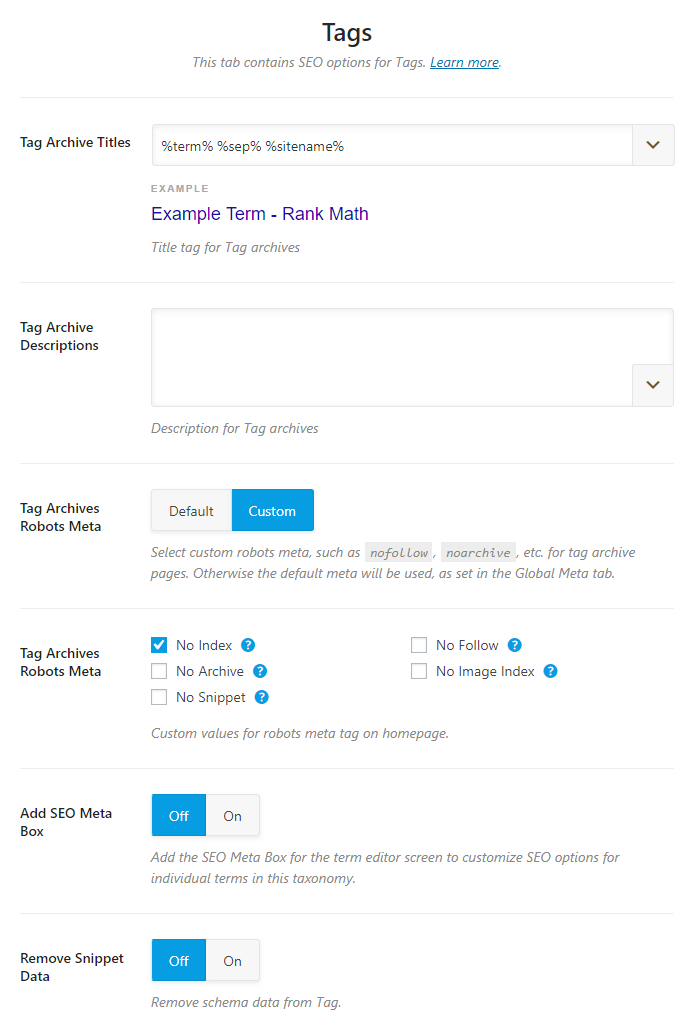
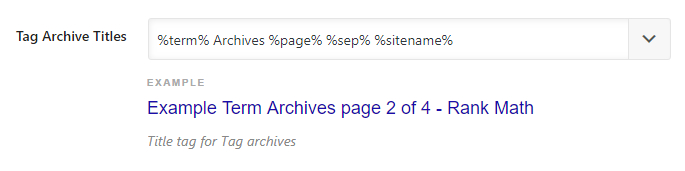
Tag Archive Titles
This option lets you create a template for creating titles for tag archive pages. You can create a static template or create a dynamic one using variables. A sample template has been created for reference.
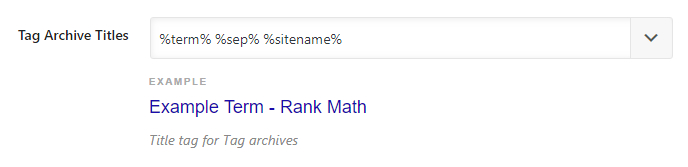
To see all the variables you have access to, click the drop-down button on the top right of the text field. A drop-down menu will appear, which will contain all the variables. You can scroll to see all the variables, or filter them by typing any characters on your keyboard. As you make any changes to the template, the preview below the text area will update in real time, showing you how the title will look like.
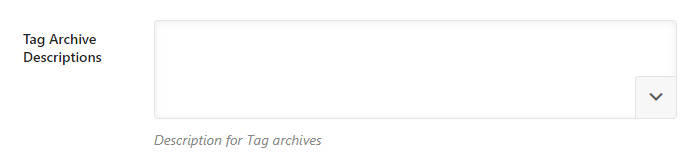
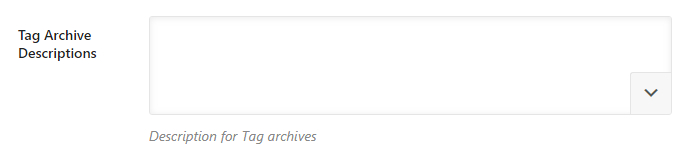
Tag Archives Descriptions
This option lets you create a template for creating meta descriptions for tag archive pages. You can create a static template or create a dynamic one using variables.
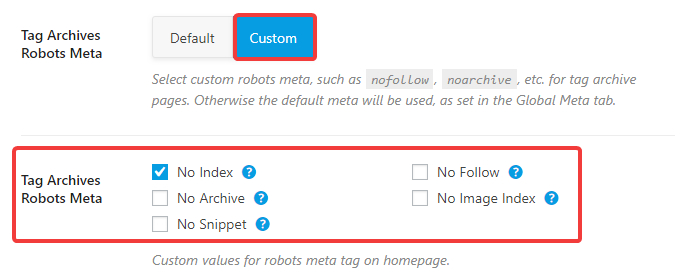
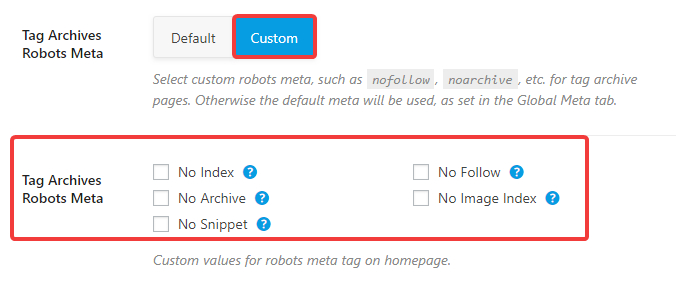
Tag Archives Robots Meta
This option lets you customize the robots meta for tag archive pages. You can either leave them at the default settings that were set during Rank Math’s setup or set them to custom settings.

If you choose the custom option, another set of options will appear below it which will allow you to pick the meta robots tags specifically.
Add SEO Meta Box
This option adds an SEO Meta box on the tags archive page editor screen. Using the Meta box, you can customize the SEO settings for the different categories.

Remove Snippet Data
This option lets you keep or delete Rich Snippet data from your Tag Archive pages. Since most websites will no-index will no-index tag archives, this option becomes less important.

This covers all the settings in the Tags section. Let us move on to the Topic Tags section.
Topic Tags
The Topic Tag section lets you define the Titles and the Meta settings of Topic Tag Archives. As you probably guessed, this section is part of the Forum related settings that we mentioned when we discussed the Forum, Topics, and other settings. Similar to those settings, this section will also be visible only if you’re using a Forum plugin on your website.
Here are all the settings that you would see in the Topic Tags section.
Let us discuss each of the settings.
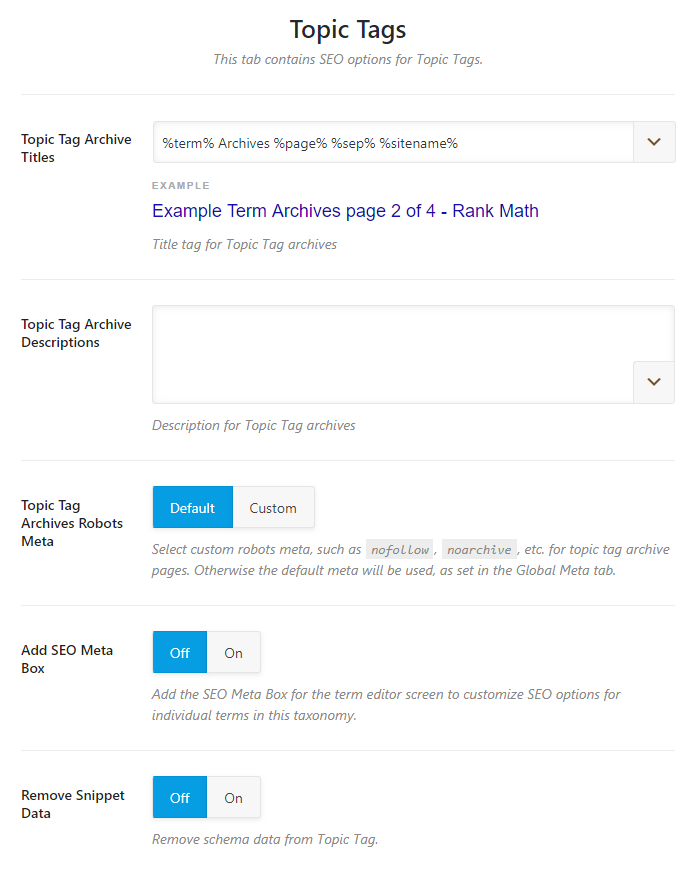
Topic Tag Archive Titles
This setting lets you create a template for the titles of your Topic Tag Archives.

A sample title format should be visible to you along with a live preview just below the setting.
To customize the title template, you can use one of the many variables available. To see all the variables, click the drop-down at the edge of the text area.
You can scroll and see all the variables available, and also type in keywords to filter the keywords. As you make any changes, the real-time preview will also update, in real-time.
You should know that while there are a lot of variables to choose from, some variables are supported only for specific pages. For example, the search query variable will only work for search pages. For any variable that has special requirements, a small notice has been added next to it.
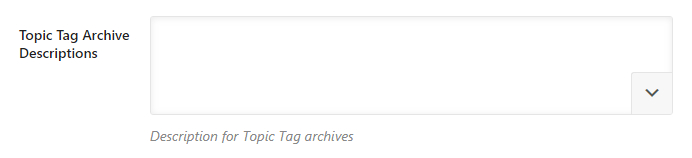
Topic Tag Archive Descriptions
This field lets you create a template for setting the descriptions of Topic Tag Archives. Similar to the Topic Tag Archive section discussed above, you can use all sorts of variables to create a template.
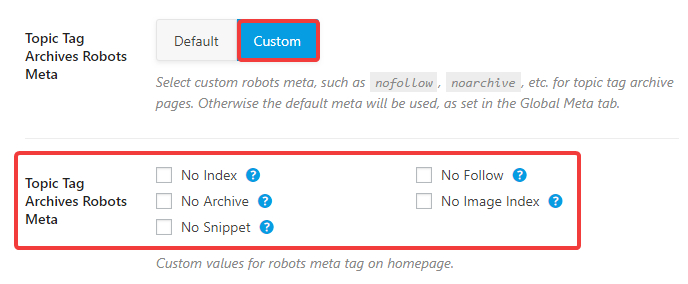
Topic Tag Archives Robots Meta
Here you can configure the Robots Meta that will be used for your Topic Tag Archives. There are 2 options to choose from, Default and Custom. If you choose the default option, then the Global Robots Meta will be used for the Forum Topics, and if you choose the custom option, a new set of settings will open up below it, which will let you select configure the robots meta manually.

As you can see from the image, all the meta robot settings become available to you as checkboxes, and you can select and enable the ones you like.
Add SEO Meta Box
This option enables or disables the SEO Meta Box for Topic Tag Archives. The SEO Meta Box hosts plenty of options to optimize your posts for SEO, and you can learn more about it here.

Remove Snippet Data
This option lets you keep or remove Rich Snippet data from the Topic Tag Archives.

Product Categories
You might wonder that we already covered the Categories Tab,so why are we covering it again. There is a difference. The section that we covered earlier is meant for WordPress categories, namely posts and pages, and the Product Categories section is specifically for Product Categories.
Similar to the Products section, this section will only be visible and relevant if you’re using WooCommerce on your store. Here are all the settings inside the Product Categories section.
Let us look at all the options in detail.
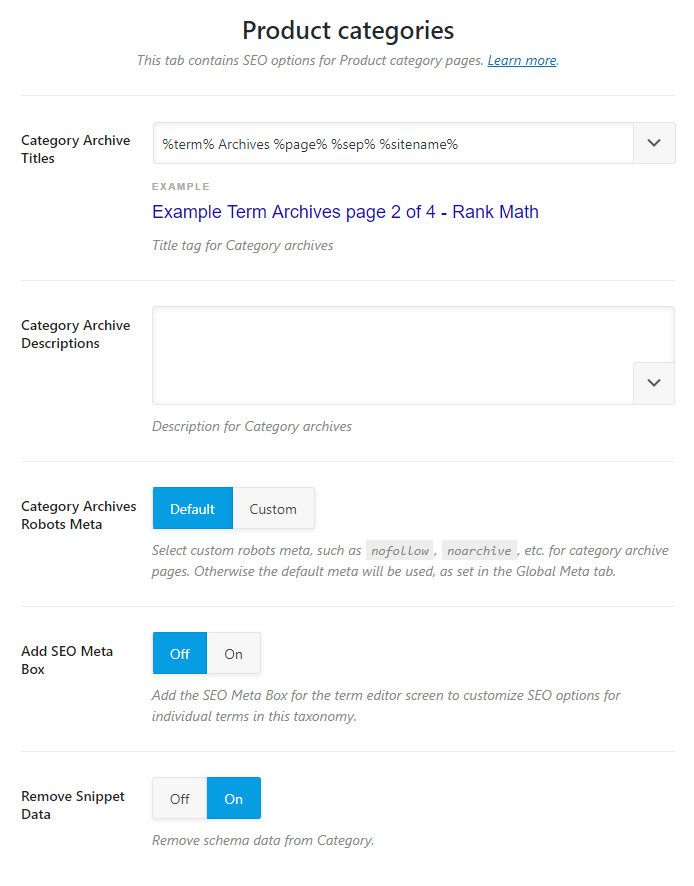
Category Archive Titles
This option lets you create a template for the titles of your Product Category Archive Pages. You can create a static template or create a dynamic one using variables. A sample template should be also be created for reference.

To see all the variables you have access to, click the drop-down button on the top right of the text field. A drop-down menu will appear, which will contain all the variables. You can scroll to see all the variables, or filter them by typing any characters on your keyboard. As you make any changes, the preview below the setting should update in real-time.
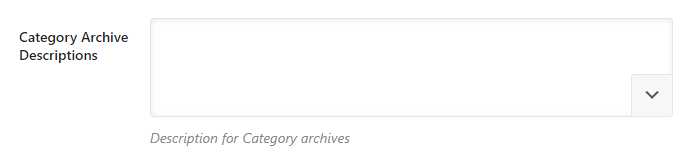
Category Archive Descriptions
This option lets you create a template for creating meta descriptions for product category archive pages. You can create a static template or create a dynamic one using variables similar to the Category Archive Titles.
Category Archives Robots Meta
This option lets you customize the robots meta for product category archive pages. You can either leave them at the default settings that were set during Rank Math’s setup or set them to custom settings.

If you choose the custom option, another set of options will appear below it which will allow you to pick the meta robots tags specifically. The different Robots Meta options will appear as checkboxes, and the selected ones will be applied to the Product Category Archives.
Add SEO Meta Box
This option lets you enable or disable the SEO Meta box for Product Categories. How you should configure this option will depend on how your store is set up and what pages you are wanting to rank in the search engines.

Remove Snippet Data
This option lets you enable or disable Rich Snippet data from Product Category Pages.

This covers all the settings in the Product Categories tab, let’s check out the next tab, the Product Tags tab.
Product Tags
The section above dealt with Product Category Pages, and this section deals with Product Tag pages. As expected, this section will also be visible only if you’re using WooCommerce. Here are all the settings in this section.

Let us understand each of the settings.
Tag Archive Titles
This option lets you create a template for the titles of your product tag archive pages. You can create a static template or create a dynamic one using variables. A sample template has been created for reference, which you can use as well.
To see all the variables you have access to, click the drop-down button on the top right of the text field. A drop-down menu will appear, which will contain all the variables. You can scroll to see all the variables, or filter them by typing any characters on your keyboard. As you make any changes to the template, the preview below the text area should update in real time.
Tag Archive Descriptions
This option lets you create a template for creating meta descriptions for product tag archive pages. Similar to the Tag Archive Titles, you can create a static template or create a dynamic one using variables.
Tag Archives Robots Meta
This option lets you customize the robots meta for product tag archive pages. You can either leave them at the default settings that were set during Rank Math’s setup or set them to custom settings.

If you choose the custom option, another set of options will appear below it which will allow you to pick the meta robots tags specifically.
Add SEO Meta Box
This option adds an SEO Meta box on the product tags editor window. Whether you should use this option or not will depend on how you’ve structured your website.

Remove Snippet Data
This option lets you keep or remove Rich Snippet data from your Product Tag Pages.
Saving Your Settings
Once you’ve made any changes to the settings that you’d like to keep, you need to save your settings. The settings inside Rank Math don’t get saved automatically, and you have to manually save them for it to take effect.
If you navigate away from the settings area without saving your settings, Rank Math will also warn you of the same.
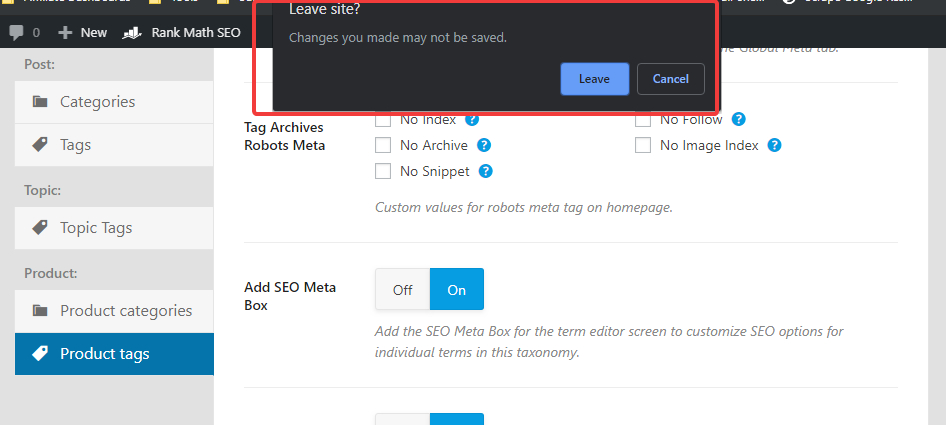
If you click Leave, then you will reach your destination, but all the changes since your last save will be lost, and there will be no way to bring them back.
This feature is quite useful in the case where you are just checking out the settings and do not want to save the settings. In those situations, just leave the settings area, and your changes will not be saved.
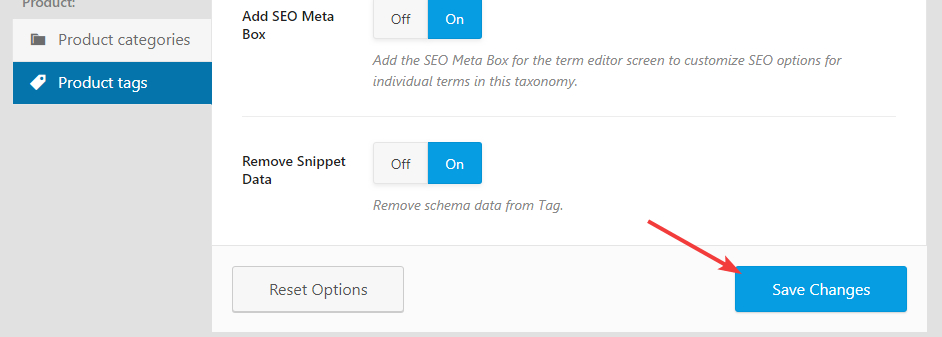
To actually save your settings, click the “Save Changes” button present at the bottom of each of the settings in the Titles and Meta Settings.
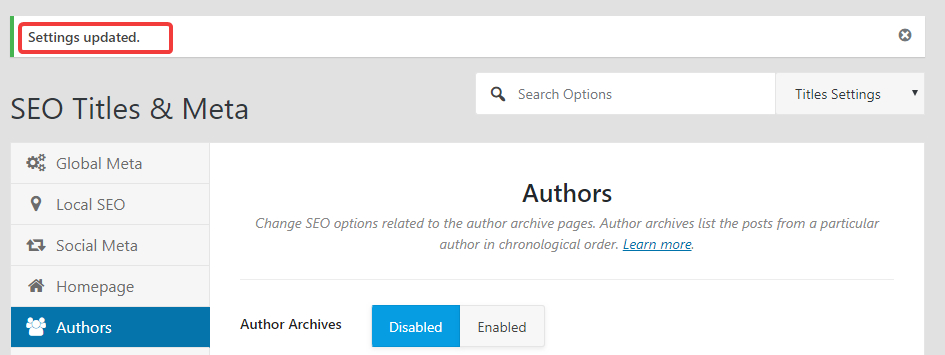
In a few seconds, the page will refresh, and your settings will be saved. Look for the confirmation message on the top of the screen to confirm.
Important Note: Once you save your changes, all your existing settings are overwritten permanently, and there is no way to revert to the earlier version of settings without a backup. Rank Math does offer a backup and import-export settings option that you should use before making changes to your settings to preserve your existing settings.
Resetting Your Settings
There can be many cases where you want to revert to the default settings in Rank Math. Maybe you were just experimenting, or maybe you want to configure Rank Math from scratch.
To cater to these scenarios, Rank Math has a built-in reset function which configures Rank Math back to its default settings. The button to reset your settings is present at the bottom of each setting page. Click it to reset your settings.
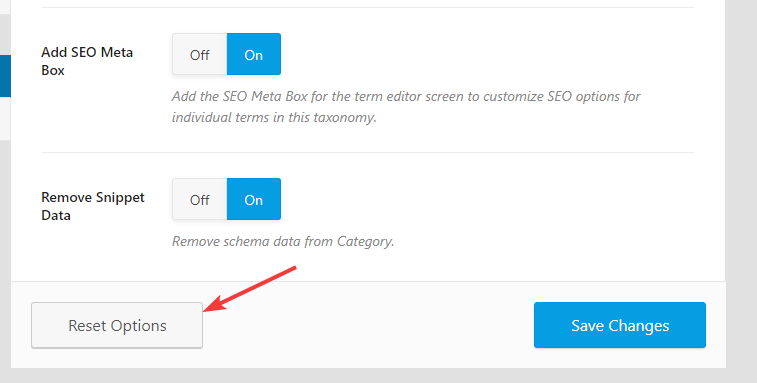
Rank Math will warn you before the actual reset takes place. If you’re unsure about this step, we recommend that you first take a backup of your settings.
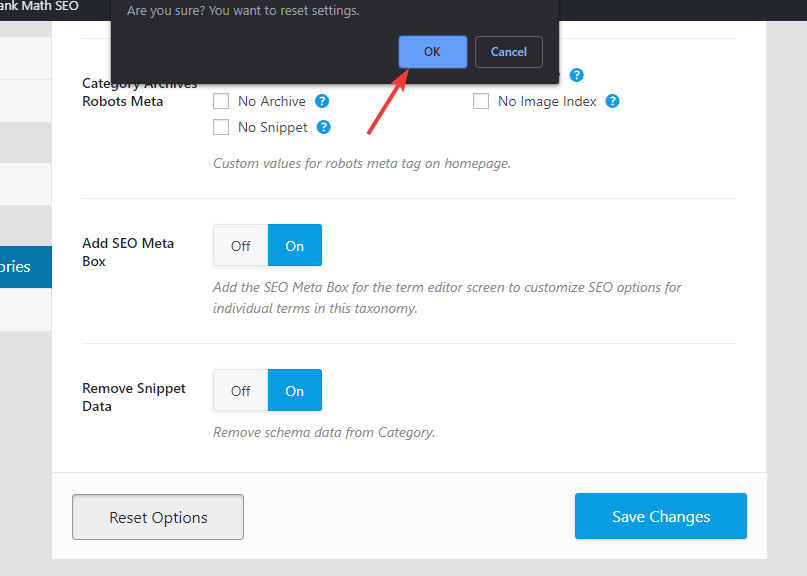
If you click “OK”, the page will refresh, and in a few seconds, all the settings will be reset to their defaults. You should also see a confirmation message on the top of the page confirming the reset.
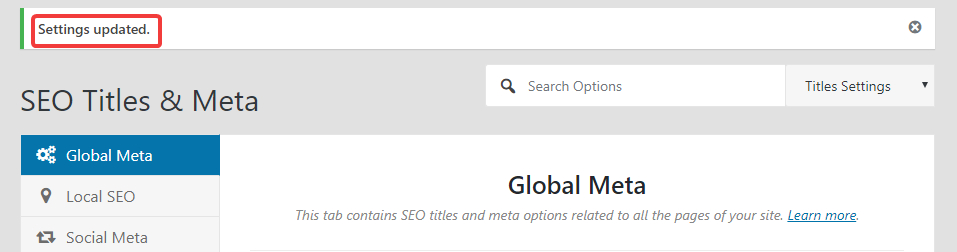
Important Note: The reset process does not reset the settings of just one of the sections, but all the sections in the SEO Titles and Meta Section. That means every change you’ve made to any of the sections will be lost and will be replaced with the default settings. Proceed with caution, and only if you know what you’re doing. Taking a backup of your existing settings never hurts.
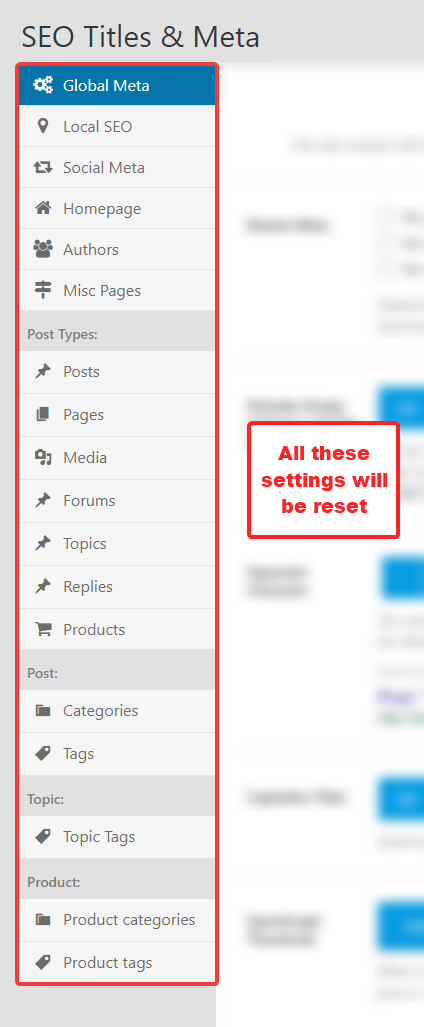
Conclusion
That it! We’ve covered all the settings in the Titles and Meta section of Rank Math. There were a lot of settings to understand and go through, and we hope that we were able to make the simple for you to understand. If you have any questions or have trouble configuring these settings, please get in touch with the support team by opening up a support ticket. The support staff is available 24x7x365 and will help you out to the best of their abilities.


5 Comments
Spot on with this write-up, I truly believe this site needs a great deal more attention. I'll probably be returning to see
ReplyDeletemore, thanks for the info!
There is definately a lot to find out about this subject.
ReplyDeleteI really like all the points you've made.
Good web site you've got here.. It's hard to find excellent writing like yours these days.
ReplyDeleteI really appreciate individuals like you! Take care!!
Wow that was unusual. I just wrote an extremely long comment but after I clicked
ReplyDeletesubmit my comment didn't appear. Grrrr... well I'm not writing all that over again. Anyways,
just wanted to say wonderful blog!
Great blog article. Awesome.
ReplyDelete